Free Shipping on Domestic Orders $75+
Introduction
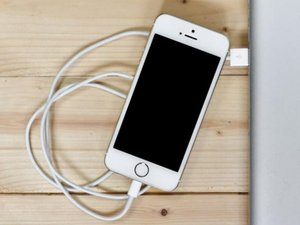
There is a certain anxiety in knowing your phone is nearly dead. This can only be made worse by adding the complication that your iPhone takes an eternity to charge up. Battery life and charging might seem simple, but the chain has many links, and any could be at fault. Luckily, most reasons for slow charging don't require a toolkit, just a little investigating.
The Basics
Before undertaking any of the more time-consuming solutions below, these are a few fundamentals to get you started.
- Try a different charger. This may be as simple as a bad cable or power brick.
- Restart your iPhone. This can clear up any minor software hiccups.
- Is your phone also getting hot? Even if it’s not charging? This might be a software issue.
- If your phone struggles to charge past 80%, check Settings > Battery > Battery Health and Charging to see if Optimized Battery Charging is toggled on. This setting prevents the phone from charging to full capacity. This could prolong the longevity of your battery.
Causes
Ever notice all the text printed on nearly any power adapter in your house? The information here is not just model number and manufacturer-specific data; it also includes the adapter's specifications. The amount of power the charger can output is strongly related to the rate a device can charge.
- Look for text on the part of your charger that goes into the wall. It should contain several important bits of information.
- Output Voltage and Amperage: These will be listed together. The adapter may be capable of outputting multiple voltages, including 5V, the typical voltage for USB charging. Higher voltages may be utilized on larger devices or to support fast charge standards.
- Wattage: Some manufacturers, like Apple, list this on the adapter. If not, you can calculate it yourself! Wattage is Volts multiplied by Amps. In the case of a basic Apple iPhone charger, the USB brick is rated for 5V and 1A. Therefore, it would be a 5 Watt charger (5x1=5).
- Save some brain cells and use a wattage calculator if your numbers aren’t as easy.

The higher the wattage is on the charger, the faster your iPhone has the potential to charge. If you’re using the old Apple 5W charger, swapping to the 20W charger could make a difference.
Not all third party chargers are equal. Look for the "Made for iPhone" logo to point you toward more reliable brands. Long-term use of substandard chargers can damage your phone's charging mechanism.

$7.99
4.6
8 reviews
Solution: Clean the charge port
Think about how often you put your phone in a pocket or bag daily. What else is in that pocket, or that bag? If the speaker and microphone grilles at the bottom of your phone are clogged with dust, your charge port is too.

- Inspect the port using a flashlight. It is common for bits of lint or rubbish to get caught. They compress into the back of the port with repeat charges.
- Check the fit of your cable. Does the lightning plug sit flush with the bottom of the phone? It should. If it sits askew, or there’s a gap where you can still see the metal of the charger, a good cleaning is in order.
- If your charge port has signs of burn or corrosion, skip to the Faulty Lightning Port section.
- If there is debris in the port, give it a good clean. The "custom cotton swab" method is sure to get anything tucked into corners.
- Avoid inserting any metal tools into the port. The pins are easily damaged. In addition, inadvertently bridging pins together can cause electrical damage.

- 10 - 15 minutesEasy

- 5 - 10 minutesEasy
Poorly optimized or buggy software can be a battery killer. If the onset of your battery issue is sudden, it may be that an app has been updated or your phone installed a patch. The newer version could contain more resource-intensive features or a bug that unintentionally runs your battery dry. If your phone consumes a lot of energy, it will appear to be charging slowly because the power consumption rate is close to the charge rate. You may also notice that your phone is hot in this case.
- Have any apps been updated recently? In the App Store, select your profile by tapping your profile avatar in the upper right corner (it will be your initials if you never set an image). Apps needing update will be shown here under the "Personalized Recommendations" settings. Recently updated apps will be listed beneath those.
- Check battery usage in the battery menu within Settings. Beneath Battery Health and any usage graphs is a breakdown of all energy-consuming apps or functions.
- Quit any app that seems likely to be an offender and see if it affects battery life. Uninstall any apps in the overlap (recently updated and consuming large amounts of battery) that are negatively impacted. If battery life improves, try reinstalling the app.
- A fresh OS install is a drastic measure to address battery life, but it could still be significantly helpful if some corruption is contributing to the issue.
- Be sure to have a backup of your device and connect to iTunes to perform the reset for the most reliable results.
If you’ve cleaned all the gunk out of the port or everything looked spotless from the start, the port might be faulty.
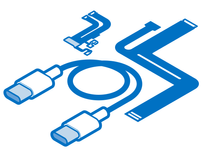
- If your cable seems loose when you connect it or have to hold it in a certain position, the port itself may have some loose connections. Your best bet here is to replace the charge port assembly.
- Perform a visual inspection of the device’s internals. Look for any sign of damage.
- Faults in the lightning port assembly can often be attributed to liquid entry. Despite water resistance, many potential entry points are along the bottom of the phone.
- Be sure to source replacement charge port assemblies from reputable vendors or splurge for higher-quality parts. Substandard third-party replacements are rampant.
Find compatible replacement parts for your Apple iPhone. All parts and fix kits are backed by the iFixit Quality Guarantee.
Unlike the Alkaline batteries you put in your TV remote, the battery in your iPhone is a little more complex. In addition to the battery cells, where all the energy-generating chemistry occurs, the battery also contains a management board. Certain types of failures within this board could cause slow charging.
- Check your battery health. In Settings, navigate to the Battery menu. iPhones will have an option here called “Battery Health.” Does it say Service? If so, battery replacement is a good start.
- Just because this says your battery is performing as expected, it does not guarantee battery reliability. As with most electronic diagnostics, trust is a failure, not a pass.
- If you are not convinced your battery is in good health, get a second opinion. For years, Coconut Battery has been used by iFixit forum regulars to get more battery info. You will need a Mac to run it, but it gives far more detail.

- 2 - 4 minutesVery easy
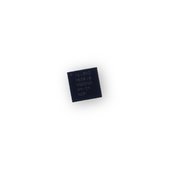
The Tristar chip (or Hydra in the iPhone 8 and newer) on an iPhone logic board is responsible primarily for USB-related functions. But it is also integral in the charging process. It detects items connected via the Lightning port and has electrical lines of communication to the charging chip. It is also the chip most commonly damaged on the board.
- Tristar issues manifest in many ways, rapid battery drain is only one of them. You can use a digital-multimeter to easily test some functions of Tristar.
- This repair requires soldering small surface mount components onto a circuit board. Unless this is a skill you are practicing, it's best to leave this one to the professionals. Any good shop that does board-level repairs should be able to. Ask around to find a board-level specialist in your area. Even shops that don’t work on boards may be able to point you to someone who does!
- This issue is so common that there are tools designed solely to test the functionality of this chip. They are a bit pricey for one-time use but handy if you are a serial fixer.

$59.95
4.8
119 reviews
The logic board is the hub for most of an iPhone's functionality. Any number of the small components on the board may have failed or become damaged, and it is a safe assumption of cause if nothing else on this page has worked.
- Check for signs of a board issue - burned or cracked components, liquid residue, corrosion, or bend. If there are signs of liquid, the iPhone Liquid Damage Guide might help.
- Replacing the logic board is often the most practical solution for a DIYer whose board has failed.
- Contrary to popular belief, the board itself can be repaired. However, it requires specialized tools and micro-soldering know-how. If you’re feeling curious and want to know more about getting into micro soldering, here’s some good reading and some good watching to get you started.

- 1 hourModerate
You're seeing solutions for Apple iPhone. Select your model to find parts for your device.
Related Problems


27 common problems
View all