Introduction
Use this guide to clean your iPhone's (generation 14 and below) charging port, a.k.a. the "Lightning port."
If your iPhone charges intermittently—or not at all—your charging port may be dirty, which prevents your charger from sitting correctly. Cleaning your charging port may fix this.
This guide uses tools that you might have around the house, but we also sell a Precision Cleaning Kit that includes some small brushes and picks to make your cleaning life easier.
What you need
-
-
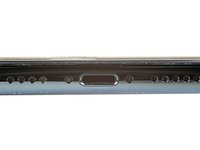
Shine a flashlight into your charging port and inspect it for any large blockages.
-
Follow the guide normally to work your way through each procedure to thoroughly clean your port. Alternatively, click the links below to jump to a specific cleaning method:
-
Between cleanings, reinspect the charging port for any remaining blockages or missed spots.
-
-
Tool used on this step:Dust Blower$5.99
-
Point the tip of a dust blower at one corner of the charging port.
-
Blow a few puffs of air into the charging port.
-
Plug in your iPhone to check if it charges and if the charger is fully seated.
-
If your iPhone isn't charging or seats properly, unplug it and repeat the blowing process.
-
If your iPhone still doesn't charge or sits properly after multiple repetitions, move to the next step.
-
-
-
-
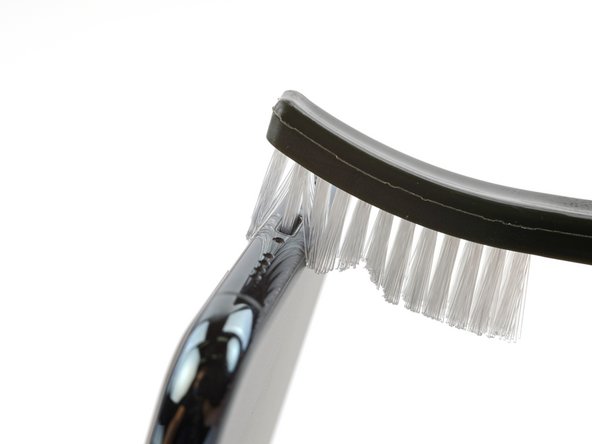
Insert the head of a brush, like a dry toothbrush, into the charging port.
-
Gently turn the brush in small circles to break up any clumped debris.
-
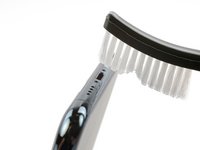
Remove the brush and use a dust blower to blow out any debris.
-
If any debris is stuck, reinsert the brush and rotate it to let the hairs "scoop" out any debris.
-
Plug in your iPhone and check if it's charging. If it's still not charging, move on to the next step.
-
-
-
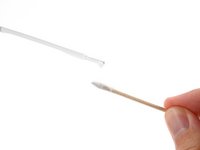
Follow this guide to make a custom cotton swab.
-
Apply a few drops of highly-concentrated isopropyl alcohol (>90%) to the cotton.
-
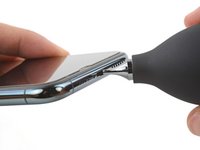
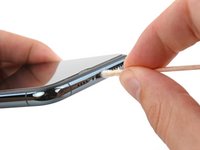
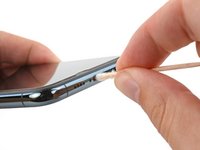
Insert your tool into the charging port.
-
Slide the tool back and forth along the charging port to clean it.
-
Wait a few minutes for the isopropyl alcohol to evaporate before plugging in your iPhone and testing it.
-
-
-
Plug in your iPhone and check if it's charging:
-
If your iPhone is charging, congratulations!
-
If your iPhone isn't charging, repeat the isopropyl alcohol cleaning process.
-
If your iPhone still isn't charging after multiple cleaning attempts, and you confirmed with a flashlight that there's no debris, you may need to replace the charging port.
-
To replace your charging port, go to this page, find your iPhone's model, and follow the respective charging port guide for detailed instructions.
-


For other general electronics skills guides, click here.
Cancel: I did not complete this guide.
24 other people completed this guide.


5 Guide Comments
The article on the Apple Support site says that compressed air should not be used: Cleaning your iPhone - Apple Support
Fair enough! I have changed the text accordingly.
Any understanding as to why compressed air would be harmful? The link simply says to not do it.