Introduction
This repair guide was authored by the iFixit staff and hasn’t been endorsed by Google. Learn more about our repair guides here.
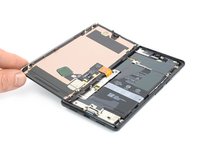
Use this guide to remove or replace the rear camera assembly in your Google Pixel 6 Pro.
For your safety, discharge the battery below 25% before disassembling your phone. This reduces the risk of a dangerous thermal event if the battery is accidentally damaged during the repair. If your battery is swollen, take appropriate precautions.
Caution: The Pixel 6 Pro contains class 1 lasers. Disassembly could result in exposure to invisible infrared laser emissions.
Retaining water resistance after the repair will depend on how well you reapply the adhesive, but your device will lose its IP (Ingress Protection) rating.
You’ll need replacement adhesive to reattach components when reassembling the device.
What you need
-
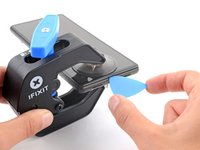
Tool used on this step:Clampy - Anti-Clamp$24.95
-
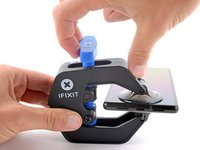
Pull the blue handle backwards to unlock the Anti-Clamp's arms.
-
Slide the arms over either the left or right edge of your phone.
-
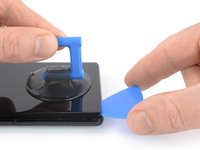
Position the suction cups near the bottom edge of the phone—one on the front, and one on the back.
-
Squeeze the cups together to apply suction.
-
-
-
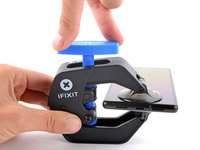
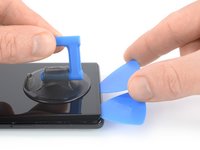
Pull the blue handle forward to lock the arms.
-
Turn the handle clockwise 360 degrees or until the cups start to stretch.
-
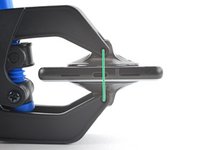
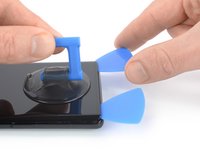
Make sure the suction cups remain aligned with each other. If they begin to slip out of alignment, loosen the suction cups slightly and realign the arms.
-
-
-
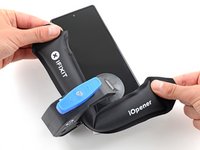
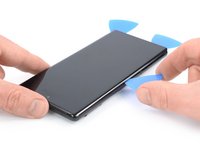
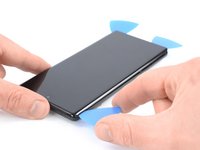
Heat an iOpener and thread it through the arms of the Anti-Clamp.
-
Fold the iOpener so it lays on the bottom edge of the phone.
-
Wait one minute to give the adhesive a chance to release and present an opening gap.
-
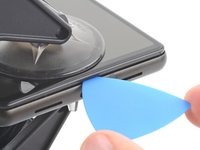
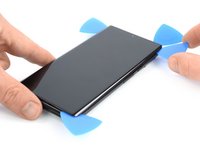
Insert an opening pick under the screen frame when the Anti-Clamp creates a large enough gap.
-
Skip the next two steps.
-
-
-
Apply a heated iOpener to the screen to loosen the adhesive underneath. Apply the iOpener for at least 3 minutes.
-
-
-
Once the screen is warm to the touch, apply a suction handle to the bottom edge of the screen.
-
Lift the screen including its safety frame with the suction handle to create a small gap between the screen and the phone assembly.
-
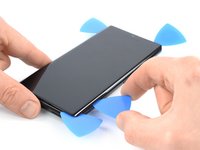
Insert an opening pick into the gap between the screen frame and the phone assembly.
-
Slide the opening pick to the bottom left corner of the screen to slice its adhesive.
-
Leave the opening pick in place to prevent the adhesive from resealing.
-
-
-
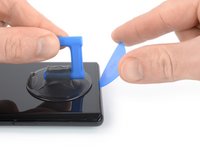
Insert a second opening pick at the bottom edge and slide it to the bottom right corner of the screen to slice the adhesive.
-
Leave the opening pick in place to prevent the adhesive from resealing.
-
-
-
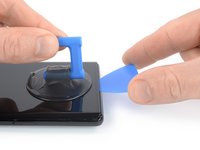
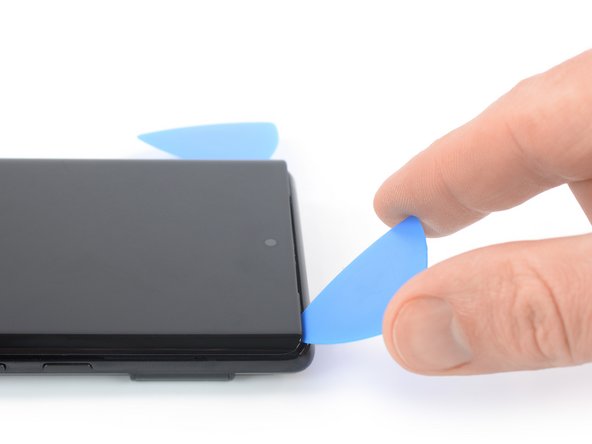
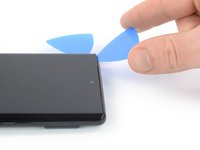
Insert a third opening pick underneath the bottom left corner of the screen.
-
Slide the opening pick along the left edge of the screen to slice the adhesive.
-
Leave the opening pick in the top left corner to prevent the adhesive from resealing.
-
-
-
Insert a fourth opening pick at the top left corner of the screen.
-
Slide the opening pick along the top edge of the phone to slice the adhesive.
-
Leave the opening pick in the top right corner to prevent the adhesive from resealing.
-
-
-
Insert a fifth opening pick and slide it along the right edge of the phone to slice the remaining adhesive.
-
-
-
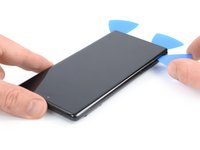
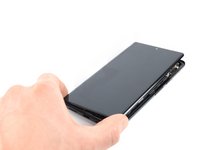
Carefully fold the screen to the left side of the phone assembly like you would open the front cover of a book.
-
-
-
Tool used on this step:Magnetic Project Mat$19.95
-
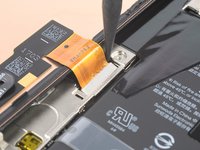
Use a Torx T3 screwdriver to remove the 2.0 mm-long 3IP Torx Plus screw securing the display cable metal bracket.
-
-
Tool used on this step:Tweezers$4.99
-
Use a pair of tweezers to remove the metal bracket sitting on top of the display cable connector.
-
-
-
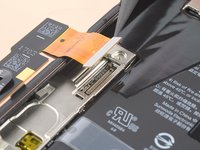
Use a spudger to disconnect the display flex cable by prying the connector straight up from its socket.
-
-
-
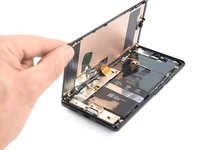
When handling your screen, grip it by its edges.
-
When placing the screen on your work area, make sure nothing is touching the bottom of the screen. Consider placing it on a soft, lint-free cloth.
-
-
-
Remove the screen.
-
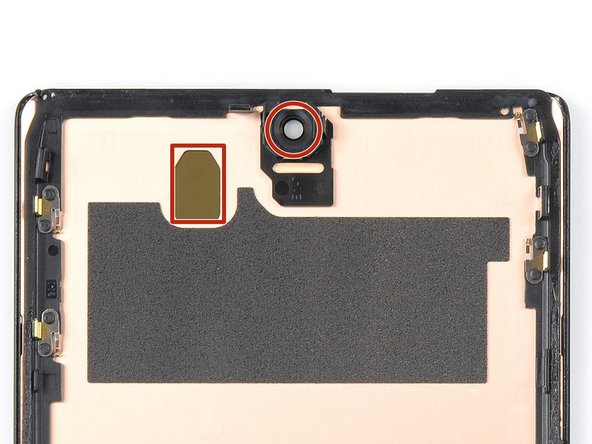
If you replaced the screen, check the screen's front-facing camera hole and sensor cutout for any protective liners. Remove these liners before you close the phone up.
-
This is a good point to test your phone before sealing it up. Temporarily connect your screen, power on your phone, and make sure it works as expected. Before continuing with reassembly, power off your phone and disconnect the screen.
-
Follow this guide if you're using custom-cut adhesives for your device.
-
Follow this guide in case you're using a pre-cut adhesive card.
-
If you're installing a new screen, follow this guide to calibrate the fingerprint sensor.
-
-
-
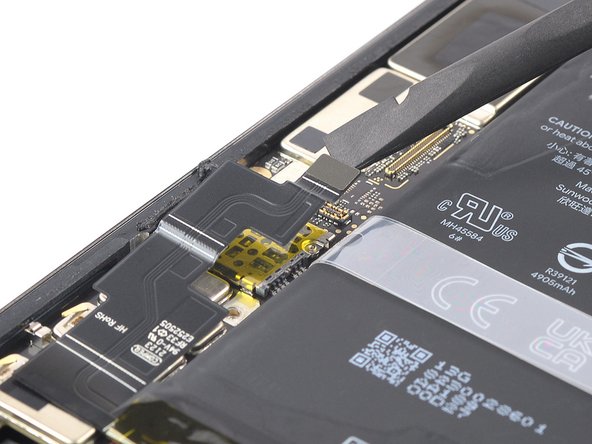
Apply a heated iOpener or a heat gun to the rear glass to loosen the adhesive underneath the graphite films on top of the battery. Apply the iOpener for at least two minutes.
-
-
Tool used on this step:Tweezers$4.99
-
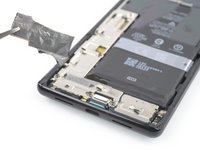
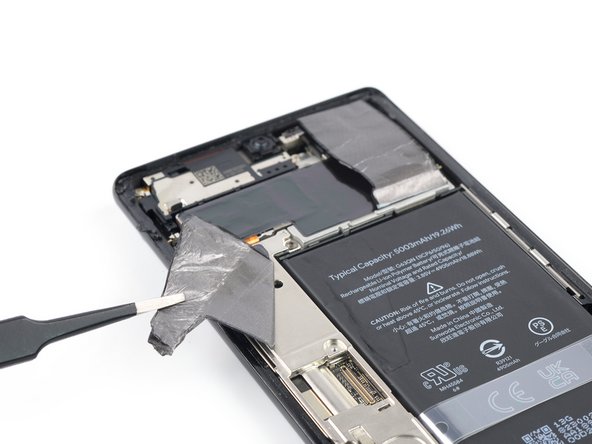
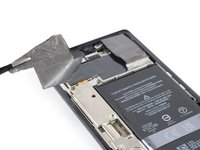
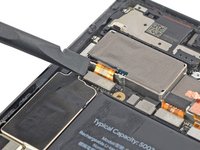
Use a pair of blunt nose tweezers or a clean fingernail to carefully peel the black graphite film off the bottom edge of the battery and the motherboard shield.
-
Remove the graphite film.
-
-
-
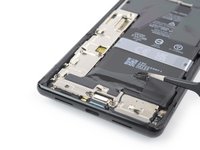
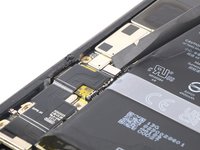
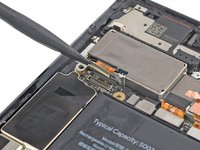
Use a pair of blunt nose tweezers or a clean fingernail to carefully peel the black graphite film off the top right corner of the battery.
-
Fold the graphite film in direction of the selfie camera to get free access to the battery.
-
-
-
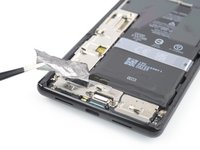
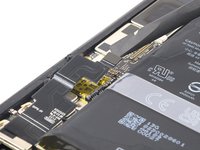
Use a pair of blunt nose tweezers or a clean fingernail to carefully peel the black graphite film off the left edge of the battery and the motherboard shield.
-
-
-
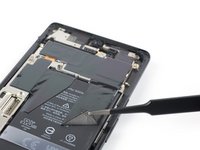
Use a Torx T3 screwdriver to remove the two 5.1 mm-long 3IP Torx Plus screws securing the charging port metal bracket.
-
-
-
Use a pair of tweezers to remove the charging port bracket.
-
-
-
Use a Torx T3 screwdriver to remove the five 5.1 mm-long 3IP Torx Plus screws securing the motherboard cover.
-
-
-
Use a pair of tweezers or your fingers to carefully remove the motherboard cover.
-
-
-
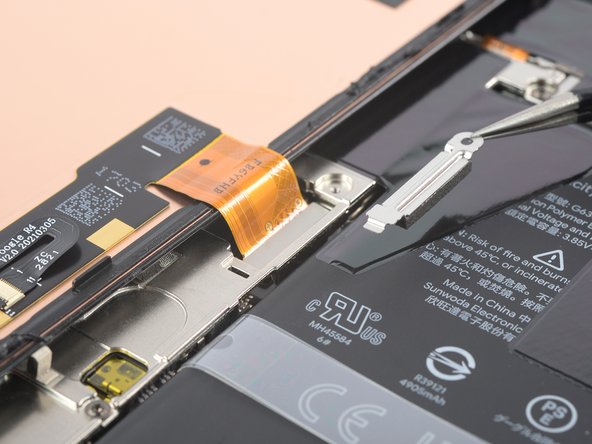
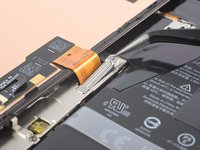
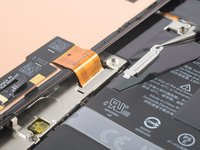
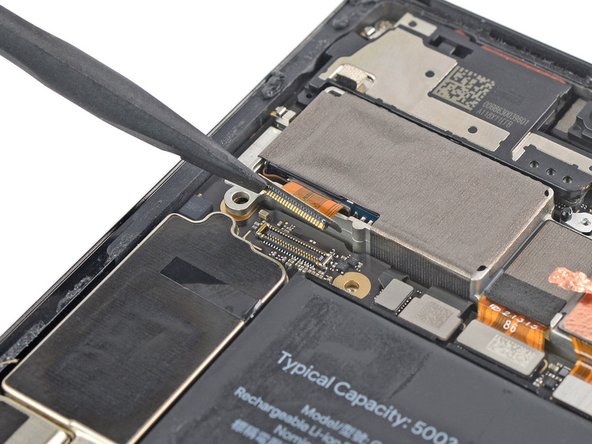
Use a spudger to disconnect the battery cable by prying the connector straight up from its socket.
-
-
-
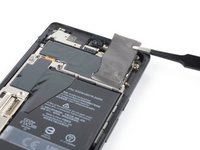
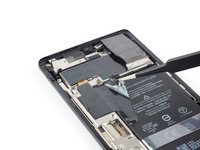
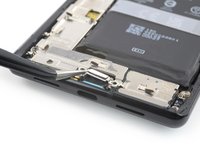
Use a Torx T3 screwdriver to remove the two 5.1 mm-long 3IP Torx Plus screws securing the camera connector cover.
-
-
Tool used on this step:Tweezers$4.99
-
Use a pair of tweezers to remove the camera connector cover.
-
-
-
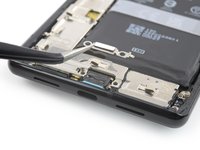
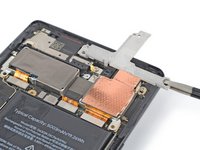
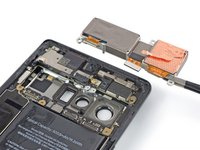
Use a Torx T3 screwdriver to remove the single 3.3 mm-long 3IP Torx Plus screw securing the camera assembly.
-
-
-
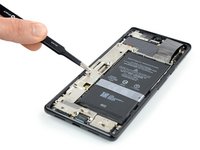
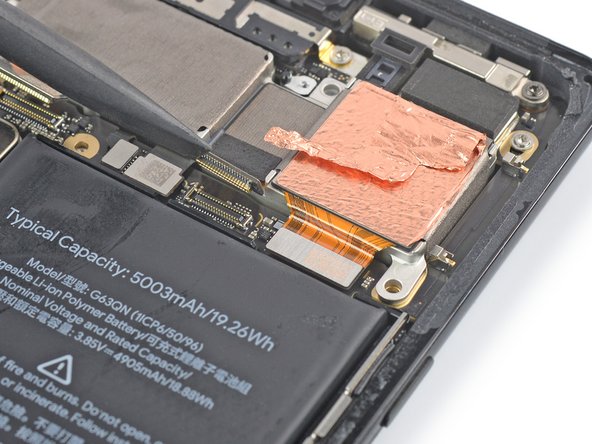
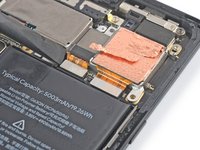
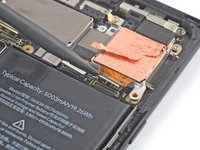
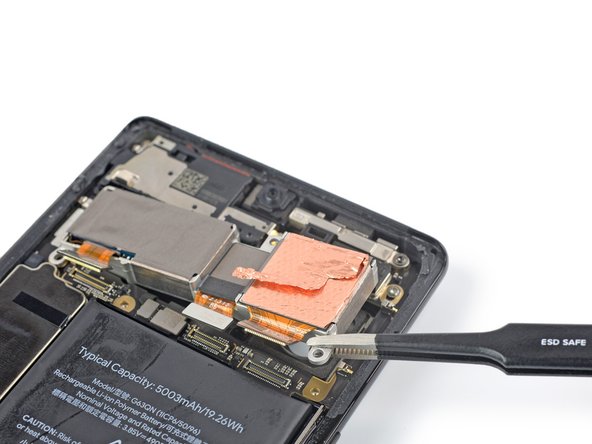
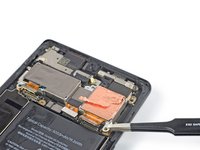
Use a pair of tweezer to carefully peel the top half of the copper foil off the metal spacer and fold it back.
-
-
-
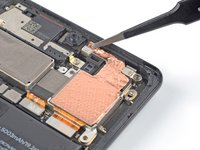
Use a spudger to disconnect the telephoto cable by prying the connector straight up from its socket.
-
-
-
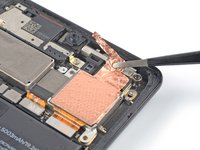
Use a spudger to disconnect the cables of the wide and ultrawide cameras by prying their connectors straight up from their sockets.
-
-
-
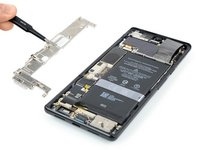
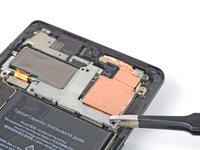
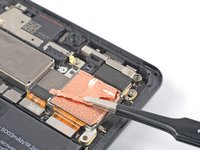
Use a pair of tweezers or your fingers to carefully lift the camera assembly out of its recess and remove it.
-


If possible, turn on your device and test your repair before installing new adhesive and resealing.
To reassemble your device, follow these instructions in reverse order. During reassembly apply new adhesive where necessary after cleaning the relevant areas with isopropyl alcohol (>90%).
To run a diagnostics test with the built-in Pixel Diagnostic tool, click here.
Take your e-waste to an R2 or e-Stewards certified recycler.
Repair didn’t go as planned? Try some basic troubleshooting, or ask our Answers community for help.
Cancel: I did not complete this guide.
5 other people completed this guide.


8 Guide Comments
I just read that the camera has to be "paired" with the motherboard using software. It may work after a replacement and not calibrating, but will not render as-good of pictures. This came from a leaked repair manual from google. What do you say of this? Also, do you need to re-use the graphite and copper tape? https://repair.wiki/w/Google_Pixel_6_Pro...
it's actually says that swapping a camera between production models can cause issues because they are somehow paired to the mainboard but the GEO replacement ones exist specifically to get around this problem but it would seem what they have done is made it so you can't get a broken pixel 6pro take its good working camera and fix another pixel 6 pro with it because of the pairing issue from factory it's a massive d!ck move forces you to buy new camera if you want to replace a logic bord or camera instead of say using a broken phone for parts
UPDATE:
I just replaced the camera and it will not work. I get an error message, and asks to force close or continue anyway. If you continue, it just crashes. As to the gold foil, I was able to peel it off another broken camera and re-use it. Why is Ifixit selling these parts if you CANNOT use them unless you are Assurion or UbreakIfix(the only authorized centers) who have their own supply of official parts straight from Google????? This is very deceptive and disingenuous from Ifixit.
thanks for the warning @michaelcarton
good guide fairly simple hardest part really is getting the screen off/on its in my phone and works like new
the box it came in look like it got elbow dropped from the top rope was so flat I thought it was a brown envelope at fist no joke but be f*%ked it somehow survived the classic Aus post treatment and is working fine