Free Shipping on Domestic Orders $75+

iPhone SE 2022 Screen Replacement

Views: 84K

View statistics:

Past 24 Hours:
55
Past 7 Days:
455
Past 30 Days:
2,122
All Time:
84,370
Comments: 52

42 comments on steps, 10 guide comments.

Go to guide comments
Completed: 42

42 people have marked this guide "completed." Will you be next?

Favorites: 0

No one has favorited (and subscribed to) this guide. Will you be the first?

Time Required: 1 - 2 hours
Difficulty: Moderate
Featured Guide

This guide has been found to be exceptionally cool by the iFixit staff.

iPhone SE 2022 Screen Replacement

Introduction

Go to step 1 ↓

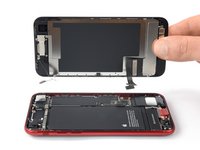
Use this guide to replace a cracked or broken screen on your iPhone SE 2022.

This guide was performed on the A2783 (international) model.

This part comes with the front facing camera, earpiece speaker, and EMI shield already installed, making for an easier repair.

In order to maintain Touch ID functionallity it's important to carefully transfer the original home/Touch ID sensor onto the new display. The solid-state home button is paired to its original logic board by Apple, so replacing it will render it unusable.

Note: True Tone functionality is disabled after a screen replacement, even when using an original Apple screen.

If you do not replace the adhesive seals when reassembling, your device will function normally, but will most likely lose its water protection.

You’ll need replacement adhesive to reattach components when reassembling the device.

What you need

Fix Kit

This kit contains all the parts and tools needed to complete this guide.

Parts

Tools

    1. iPhone SE 2022 Screen Replacement, Remove the pentalobe screws: step 1, image 1 of 2 iPhone SE 2022 Screen Replacement, Remove the pentalobe screws: step 1, image 2 of 2
      • Power off your phone before beginning disassembly.

      • Remove the two 3.4 mm P2 pentalobe screws on the bottom edge of the iPhone.

      Ask FixBot

      Add Comment

    1. iPhone SE 2022 Screen Replacement, Mark your opening picks: step 2, image 1 of 3 iPhone SE 2022 Screen Replacement, Mark your opening picks: step 2, image 2 of 3 iPhone SE 2022 Screen Replacement, Mark your opening picks: step 2, image 3 of 3
      • If inserted too far, an opening pick can damage your device. Follow this step to mark your pick and prevent damage.

      • Measure 3 mm from the tip and mark the opening pick with a permanent marker.

      • You can also mark the other corners of the pick with different measurements.

      • Alternatively, tape a coin to a pick 3 mm from the tip.

      Ask FixBot

      Add Comment

    1. iPhone SE 2022 Screen Replacement, Tape over any cracks: step 3, image 1 of 3 iPhone SE 2022 Screen Replacement, Tape over any cracks: step 3, image 2 of 3 iPhone SE 2022 Screen Replacement, Tape over any cracks: step 3, image 3 of 3
      • If your iPhone has a cracked screen, keep further breakage contained and prevent bodily harm during your repair by taping over the glass.

      • Lay overlapping strips of clear packing tape over the iPhone's screen until the whole face is covered.

      • Wear safety glasses to protect your eyes from any glass shaken free during the repair.

      • If you can't get the suction cup to stick in the next few steps, fold a strong piece of tape (such as duct tape) into a handle and lift the screen with that instead.

      • If all else fails, you can superglue the suction cup to the screen.

      Ask FixBot

      Add Comment

    2. iPhone SE 2022 Screen Replacement, Anti-Clamp instructions: step 4, image 1 of 3 iPhone SE 2022 Screen Replacement, Anti-Clamp instructions: step 4, image 2 of 3 iPhone SE 2022 Screen Replacement, Anti-Clamp instructions: step 4, image 3 of 3
      Tool used on this step:
      Clampy - Anti-Clamp
      $24.95
      Buy
      • The next three steps demonstrate the Anti-Clamp, a tool we designed to make the opening procedure easier. If you aren't using the Anti-Clamp, skip down three steps for an alternate method.

      • For complete instructions on how to use the Anti-Clamp, check out this guide.

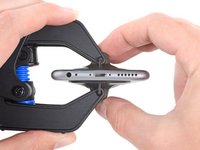
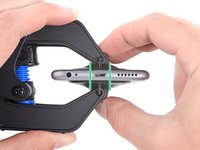
      • Pull the blue handle backwards to unlock the Anti-Clamp's arms.

      • Slide the arms over either the left or right edge of your iPhone.

      • Position the suction cups near the bottom edge of the iPhone just above the home button—one on the front, and one on the back.

      • Squeeze the cups together to apply suction to the desired area.

      • If you find that the surface of your iPhone is too slippery for the Anti-Clamp to hold onto, you can use tape to create a grippier surface.

      Ask FixBot

      Add Comment

    3. iPhone SE 2022 Screen Replacement: step 5, image 1 of 3 iPhone SE 2022 Screen Replacement: step 5, image 2 of 3 iPhone SE 2022 Screen Replacement: step 5, image 3 of 3
      • Pull the blue handle forwards to lock the arms.

      • Turn the handle clockwise 360 degrees or until the cups start to stretch.

      • Make sure the suction cups remain aligned with each other. If they begin to slip out of alignment, loosen the suction cups slightly and realign the arms.

      Ask FixBot

      Add Comment

    4. iPhone SE 2022 Screen Replacement: step 6, image 1 of 3 iPhone SE 2022 Screen Replacement: step 6, image 2 of 3 iPhone SE 2022 Screen Replacement: step 6, image 3 of 3
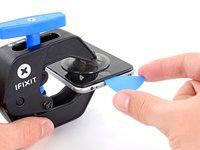
      • Heat an iOpener and thread it through the arms of the Anti-Clamp.

      • You can also use a hair dryer, heat gun, or hot plate—but extreme heat can damage the display and/or internal battery, so proceed with care.

      • Fold the iOpener so it lays on the bottom edge of the iPhone.

      • Wait one minute to give the adhesive a chance to release and present an opening gap.

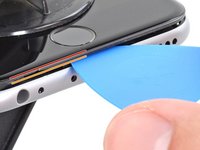
      • Insert an opening pick under the screen's plastic bezel, not the screen itself.

      • If the Anti-Clamp doesn't create a sufficient gap, apply more heat to the area and rotate the handle a quarter turn.

      • Don't crank more than a quarter turn at a time, and wait one minute between turns. Let the Anti-Clamp and time do the work for you.

      • Skip the next two steps.

      Ask FixBot

      Add Comment

    5. iPhone SE 2022 Screen Replacement, Heat the front panel adhesive: step 7, image 1 of 1
      • If you're using a suction handle, follow the next two steps to loosen the rear glass.

      • Prepare an iOpener and apply it to the screen for at least two minutes to loosen the adhesive underneath.

      • A hair dryer, heat gun, or hot plate may also be used, but be careful not to overheat the phone—the display and internal battery are both susceptible to heat damage.

      Ask FixBot

      Add Comment

    6. iPhone SE 2022 Screen Replacement, Screen information: step 8, image 1 of 3 iPhone SE 2022 Screen Replacement, Screen information: step 8, image 2 of 3 iPhone SE 2022 Screen Replacement, Screen information: step 8, image 3 of 3
      • To avoid damaging your screen in the next step, note the following:

      • There's a plastic bezel on the underside of the screen. Your opening pick will go underneath this bezel.

      • There's a seam between the plastic bezel and the display panel. Don't insert your pick here or you'll damage the screen.

      • Sometimes the display panel separates from the bezel before you even get a chance to insert a pick. This may be unavoidable depending on the condition of the adhesive. In this case, you’ll most likely need to replace your entire screen.

      Ask FixBot

      Add Comment

    7. iPhone SE 2022 Screen Replacement, Insert an opening pick: step 9, image 1 of 3 iPhone SE 2022 Screen Replacement, Insert an opening pick: step 9, image 2 of 3 iPhone SE 2022 Screen Replacement, Insert an opening pick: step 9, image 3 of 3
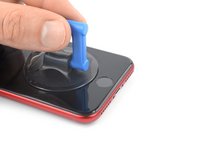
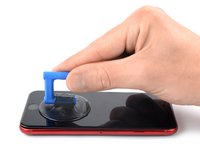
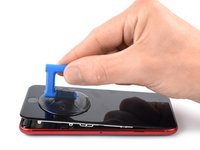
      • Secure a suction handle to the lower half of the front panel, as close to the home button as possible.

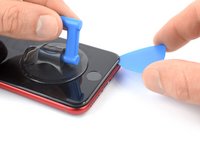
      • Lift the front panel with the suction handle to create a small gap between the front panel and the frame.

      • If you have trouble creating a gap, apply more heat to the bottom half of the screen to further soften the adhesive. Follow the iOpener instructions to avoid overheating.

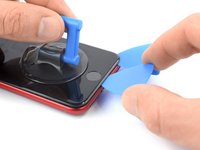
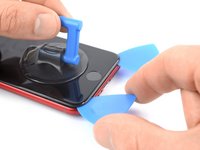
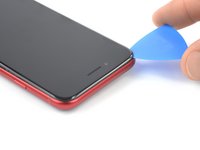
      • Insert an opening pick into the gap under the screen's plastic bezel.

      Ask FixBot

      Add Comment

    8. iPhone SE 2022 Screen Replacement, Slice the adhesive: step 10, image 1 of 3 iPhone SE 2022 Screen Replacement, Slice the adhesive: step 10, image 2 of 3 iPhone SE 2022 Screen Replacement, Slice the adhesive: step 10, image 3 of 3
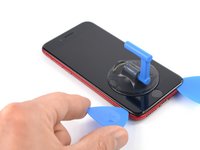
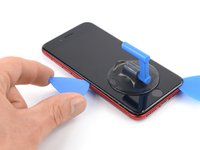
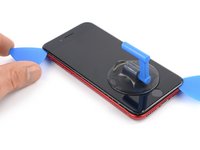
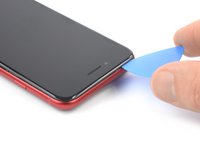
      • Slide the opening pick to the bottom right corner to slice the front panel adhesive.

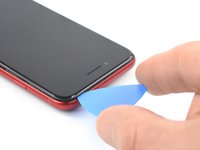
      • Insert a second opening pick at the bottom edge of your phone.

      • Slide the opening pick to the bottom left corner to slice the adhesive.

      • Leave the opening picks in place to prevent the adhesive from resealing.

      Ask FixBot

      Add Comment

    9. iPhone SE 2022 Screen Replacement, Slice the adhesive: step 11, image 1 of 3 iPhone SE 2022 Screen Replacement, Slice the adhesive: step 11, image 2 of 3 iPhone SE 2022 Screen Replacement, Slice the adhesive: step 11, image 3 of 3
      • If the adhesive becomes hard to cut, it has most likely cooled down. Use your iOpener for two to three minutes to reheat it.

      • Slide the bottom left opening pick along the left edge of your phone to slice the adhesive.

      • Stop near the top left corner of the display.

      • Do not try to pry the top edge of the display away from the rear case, as it is held in place by plastic clips that may break.

      Ask FixBot

      Add Comment

    10. iPhone SE 2022 Screen Replacement: step 12, image 1 of 3 iPhone SE 2022 Screen Replacement: step 12, image 2 of 3 iPhone SE 2022 Screen Replacement: step 12, image 3 of 3
      • Slide the bottom right opening pick along the right edge of your phone to slice the adhesive.

      • Don't insert your pick more than 3 mm, as you may damage internal components.

      • Stop near the top right corner of the display.

      Ask FixBot

      Add Comment

    11. iPhone SE 2022 Screen Replacement, Lift the screen: step 13, image 1 of 2 iPhone SE 2022 Screen Replacement, Lift the screen: step 13, image 2 of 2
      • Remove the opening picks.

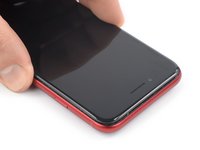
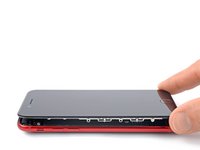
      • Gently pull up on the suction handle to lift up the bottom edge of the display.

      • Do not raise the display more than 15º or you'll risk straining or tearing the ribbon cables connecting the display.

      • Remove the suction handle.

      Ask FixBot

      Add Comment

    12. iPhone SE 2022 Screen Replacement, Slice the remaining adhesive: step 14, image 1 of 3 iPhone SE 2022 Screen Replacement, Slice the remaining adhesive: step 14, image 2 of 3 iPhone SE 2022 Screen Replacement, Slice the remaining adhesive: step 14, image 3 of 3
      • Slide an opening pick underneath the top left corner of the display.

      • Slide the opening pick around the top left corner and along the top edge of the phone to slice the remaining adhesive.

      Ask FixBot

      Add Comment

    13. iPhone SE 2022 Screen Replacement, Disengage the front panel clips: step 15, image 1 of 2 iPhone SE 2022 Screen Replacement, Disengage the front panel clips: step 15, image 2 of 2
      • Slide the display assembly slightly down in direction of the charging port to disengage the clips holding it to the rear case.

      Ask FixBot

      Add Comment

    14. iPhone SE 2022 Screen Replacement, Lift up the display: step 16, image 1 of 3 iPhone SE 2022 Screen Replacement, Lift up the display: step 16, image 2 of 3 iPhone SE 2022 Screen Replacement, Lift up the display: step 16, image 3 of 3
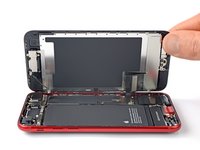
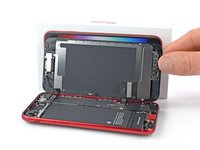
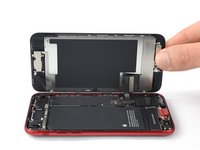
      • Open the phone by swinging the display up from the left side, like the back cover of a book.

      • Don't try to fully separate the display from the phone assembly yet, as several fragile ribbon cables still connect it to the logic board.

      • Lean the display against something to keep it propped up while you're working on the phone.

      Ask FixBot

      Add Comment

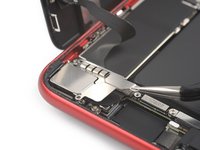
    1. iPhone SE 2022 Screen Replacement, Unfasten the lower display cable bracket screws: step 17, image 1 of 1
      Tool used on this step:
      Magnetic Project Mat
      $19.95
      Buy
      • Remove the four Phillips screws securing the lower display cable bracket:

      • Two 1.2 mm-long screws

      • Two 2.8 mm-long screws

      • Throughout this guide, keep careful track of your screws so that each one goes back where it came from during reassembly. Installing a screw in the wrong place can cause permanent damage.

      Ask FixBot

      Add Comment

    2. iPhone SE 2022 Screen Replacement, Remove the lower display cable bracket: step 18, image 1 of 2 iPhone SE 2022 Screen Replacement, Remove the lower display cable bracket: step 18, image 2 of 2
      Tool used on this step:
      Tweezers
      $4.99
      Buy
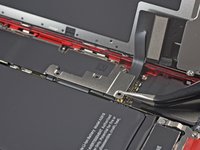
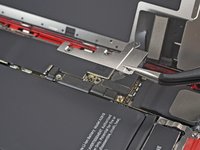
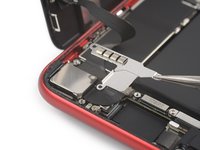
      • Use a pair of tweezers to carefully remove the lower display cable bracket.

      Ask FixBot

      Add Comment

    3. iPhone SE 2022 Screen Replacement, Disconnect the battery: step 19, image 1 of 2 iPhone SE 2022 Screen Replacement, Disconnect the battery: step 19, image 2 of 2
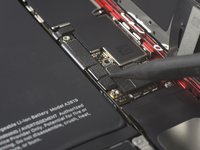
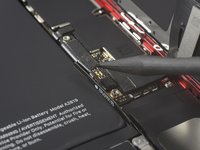
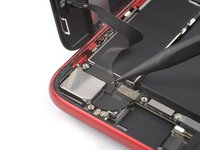
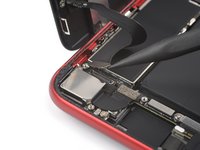
      • Use the pointed end of a spudger to disconnect the battery by prying the connector straight up from its socket.

      Ask FixBot

      Add Comment

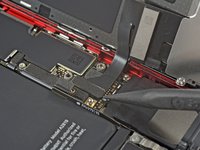
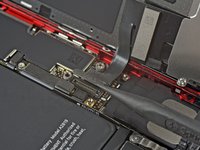
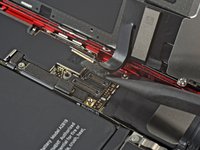
    1. iPhone SE 2022 Screen Replacement, Disconnect the display and digitizer cables: step 20, image 1 of 3 iPhone SE 2022 Screen Replacement, Disconnect the display and digitizer cables: step 20, image 2 of 3 iPhone SE 2022 Screen Replacement, Disconnect the display and digitizer cables: step 20, image 3 of 3
      • The display and digitizer cables run on top of each other. To avoid cable damage always start by disconnecting the upper cable first and never try to disconnect both at the same time.

      • Use the pointed end of a spudger to disconnect the bottom two display cables by prying the connectors straight up from their sockets.

      • To re-attach press connectors like this, press down on one side until it clicks into place, then repeat on the other side. Do not press down on the middle. If the connector is even slightly misaligned, the connector can bend, causing permanent damage.

      Ask FixBot

      Add Comment

    2. iPhone SE 2022 Screen Replacement, Unfasten the front sensor assembly bracket screws: step 21, image 1 of 1
      • Use a Phillips screwdriver to remove the three 1.2 mm-long screws securing the front sensor assembly bracket.

      Ask FixBot

      Add Comment

    3. iPhone SE 2022 Screen Replacement, Remove the front sensor assembly bracket: step 22, image 1 of 2 iPhone SE 2022 Screen Replacement, Remove the front sensor assembly bracket: step 22, image 2 of 2
      Tool used on this step:
      Tweezers
      $4.99
      Buy
      • Use a pair of tweezers to carefully remove the front sensor assembly bracket.

      Ask FixBot

      Add Comment

    4. iPhone SE 2022 Screen Replacement, Disconnect the front sensor assembly cable: step 23, image 1 of 2 iPhone SE 2022 Screen Replacement, Disconnect the front sensor assembly cable: step 23, image 2 of 2
      • Use the pointed end of a spudger to disconnect the front sensor assembly by prying the connector straight up from its socket.

      Ask FixBot

      Add Comment

    5. iPhone SE 2022 Screen Replacement, Remove the display assembly: step 24, image 1 of 2 iPhone SE 2022 Screen Replacement, Remove the display assembly: step 24, image 2 of 2
      • Remove the display assembly.

      • During reassembly, follow this guide to apply adhesive and install your display assembly.

      Ask FixBot

      Add Comment

    1. iPhone SE 2022 Screen Replacement, Unfasten the home/Touch ID sensor bracket screws: step 25, image 1 of 1
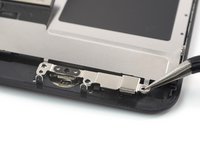
      • Remove the four screws securing the home/Touch ID sensor bracket:

      • Three 1.2 mm-long Y000 screws

      • One 1.1 mm-long Y000 screw

      Ask FixBot

      Add Comment

    2. iPhone SE 2022 Screen Replacement, Remove the home/Touch ID sensor bracket: step 26, image 1 of 2 iPhone SE 2022 Screen Replacement, Remove the home/Touch ID sensor bracket: step 26, image 2 of 2
      Tool used on this step:
      Tweezers
      $4.99
      Buy
      • Use a pair of tweezers to carefully remove the home/Touch ID sensor bracket.

      Ask FixBot

      Add Comment

    3. iPhone SE 2022 Screen Replacement, Disconnect the home/Touch ID sensor: step 27, image 1 of 3 iPhone SE 2022 Screen Replacement, Disconnect the home/Touch ID sensor: step 27, image 2 of 3 iPhone SE 2022 Screen Replacement, Disconnect the home/Touch ID sensor: step 27, image 3 of 3
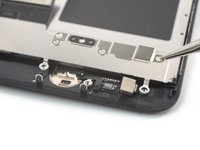
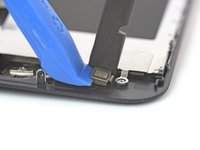
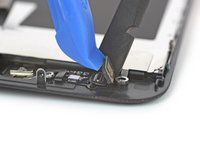
      • Use an opening tool to pry under the left edge of the home/Touch ID sensor cable connector to disconnect it from its socket.

      • If the entire connector begins to flip up without separating, press down on the cable at the top edge of the connector with the flat end of a spudger, while simultaneously prying up the left edge of the connector. Be very careful not to damage the cable or connector, or you will permanently disable the sensor.

      Ask FixBot

      Add Comment

    4. iPhone SE 2022 Screen Replacement, Heat the home/Touch ID sensor cable adhesive: step 28, image 1 of 1
      • Prepare an iOpener and apply it to the screen where the home/Touch ID button is located for at least two minutes to loosen the adhesive underneath its cable.

      • A hair dryer, heat gun, or hot plate may also be used, but be careful not to overheat the phone—the display and internal battery are both susceptible to heat damage.

      Ask FixBot

      Add Comment

    5. iPhone SE 2022 Screen Replacement, Free the home/Touch ID sensor cable: step 29, image 1 of 3 iPhone SE 2022 Screen Replacement, Free the home/Touch ID sensor cable: step 29, image 2 of 3 iPhone SE 2022 Screen Replacement, Free the home/Touch ID sensor cable: step 29, image 3 of 3
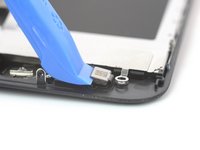
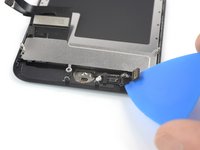
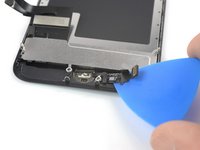
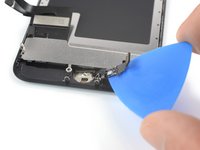
      • Carefully slide an opening pick underneath the home/Touch ID sensor cable and separate it from the back side of the display panel.

      • Avoid damaging the cable connector during this procedure. The home/Touch ID sensor cable is wrapped around it and abrupt movements might tear the connector cable. Try to fold the connector up in direction of the selfie camera and out of the cables way instead.

      Ask FixBot

      Add Comment

    6. iPhone SE 2022 Screen Replacement, Remove the home/Touch ID sensor assembly: step 30, image 1 of 3 iPhone SE 2022 Screen Replacement, Remove the home/Touch ID sensor assembly: step 30, image 2 of 3 iPhone SE 2022 Screen Replacement, Remove the home/Touch ID sensor assembly: step 30, image 3 of 3
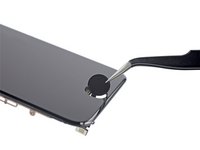
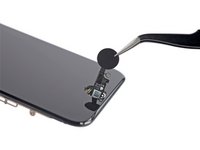
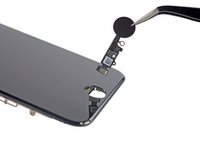
      • Use a pair of tweezers to remove the home/Touch ID sensor assembly by lifting it through the front side of the display.

      • To reinstall, first feed the cable through the hole in the front of the display as shown.

      • Your replacement part may come with extra Y000 screws already installed near the Home Button. Remove the unnecessary screws so that you can reinstall the home button bracket.

      Ask FixBot

      Add Comment

Conclusion

If possible, turn on your device and test your repair before installing new adhesive and resealing.

To reassemble your device, follow these instructions in reverse order.

The best way to secure the new screen is to apply a sheet of custom-cut double-sided tape to the frame and place the screen back in its original position.

Take your e-waste to an R2 or e-Stewards certified recycler.

Repair didn’t go as planned? Try some basic troubleshooting, or ask our Answers community for help.

Cancel: I did not complete this guide.

42 other people completed this guide.

Dominik Schnabelrauch

Member since: 11/23/16

266,207 Reputation

682 Guides authored

Team

iFixit Member of iFixit

Staff

121 Members

72,885 Guides authored

10 Guide Comments

HOLA

Cambié la pantalla del iphone se 2022 , pero no me funciona la nueva pantalla. al volver a poner la original que solo estaba quebrada pero funcionaba, ahora ya no funciona.

Claudio Salinas - Reply Share

no funciona. al parecer es otra pantalla. no da imagen

Ipoint Tech - Reply Share

la pantalla 2020 no me funciono tampoco en un se 2022.

Ipoint Tech - Reply Share

i real need my phone fix for school im only 12

Tyveiair Hardy - Reply Share

Sorry if this is a dumb question, but is there a guide to actually installing the part once these steps are all completed? I get the idea of going backwards, but it seems like there are places that adhesive must be applied, and perhaps some tips on how to do that correctly (or incorrectly! :D ) that might warrant spelling it our for us old folks.

Jim - Reply Share

Add Comment

View Statistics:

Past 24 Hours: 55

Past 7 Days: 455

Past 30 Days: 2,122

All Time: 84,370