The Basics
Before undertaking any of the more time-consuming solutions below, here are a few fundamentals to get you started.
- Check your system for updates: An up to date console ensures that your console receives essential bug fixes and system improvements that can prevent your system from overheating.
- Ensure your Switch's Exhaust vents are unobstructed: Dirty or blocked air vents can prevent air from flowing correctly through your console. Ensure that your console's exterior is clean and the air vents are not blocked by dirt or the material of a carrying case.
- When using the docking station, avoid placing the console in enclosed spaces or on surfaces obstructing airflow, such as inside cabinets or soft materials like carpets. Keep 4-6 inches of open space between your console's vents and any objects.
- Keep your Switch clear of heat sources: For your Nintendo Switch to cool, it must be in a space where the ambient air temperature won't change drastically. The ideal room temperature for your Switch should be around +5ºC (+40ºF) to +35ºC (+95ºF).
Causes
Low-quality or third-party accessories may not deliver the proper power or cooling required for optimal performance. For example, some third-party external cooling fans can sometimes cause the Switch to overheat because they divert the airflow to the wrong location.
- Remove any connected accessories, including external fans, hard drives, and charging accessories. Then, check your Switch and see if the issue persists.
- Test your accessories to see if the issue has been resolved. If your console is no longer overheating, try plugging in your accessories one at a time to see if the issue happens with one particular accessory.
One of the few other steps before opening your Switch is resolving potential software issues. Thankfully, there are several different ways to do this.
Perform a Software Update
In most instances, a software update can resolve issues affecting how your Switch's hardware functions.
- Power off your Switch.
- Press and Hold the Volume Up, Volume Down, and the Powerbuttons simultaneously. This will boot your system into Maintenance Mode.
- Select the Update System option.
- Once your Switch has finished updating, Restart your Switch
Initialize your Switch
If a software update cannot resolve your issue, you can initialize your Switch through Maintenance Mode.
This method will not delete your game save data, Screenshots, or User Information. However, all software saved on the microSD card will be unusable.
- Power off your Switch.
- Press and Hold the Volume Up, Volume Down, and the Powerbuttons simultaneously. This will boot your system into maintenance mode.
- Once your system has booted into Maintenance Mode, choose Initialize Console Without Deleting Save Data.
- Select Next, and Initialize Console Without Deleting Save Data.
While your vents may be clean and free of dust, you could have an issue with dust and debris having built up in your Switch's internal components.
- Please turn off the console and unplug it from the power source.
- To access the internal cooling fan, use iFixit's Nintendo Switch Fan Replacement guide.
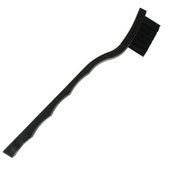
- Use compressed air, or other product, and a soft brush to gently clean the vents, fan, and heat sink.
- Be sure that the fan is clean and is spinning freely.

- 30 minutes - 1 hourModerate

$109.99
4.8
11 reviews

$2.99
4.9
373 reviews
If you frequently run intense graphics games, the issue may be caused by an overused system. Cooling periods should be taken to allow the console to cool down before further use.
- If you've been gaming for an extended period, around 5 to 6 hours without breaks, consider taking breaks to allow the console to cool down.
- Please turn off the console during breaks to let it cool more efficiently. Ideally, you should wait an hour for it to cool down.
If you are still experiencing issues with your console, consider opening your Switch to see if there is any potential damage internally.
- Check the console's fan for damage or warping. Ensure your Nintendo Switch's cooling fan is spinning correctly in its housing and is connected to and receiving power from the Switch's Motherboard. Replace the malfunctioning fan with a new one if needed.
- Look at your Switch's heatsink for dust build-up. Locate your Switch's Heat Sink, and ensure the heatsink is clean and debris-free. If you notice any damage, try replacing it with a new one.
- Replace the thermal compound underneath the heatsink. Most thermal compounds become less effective over time, especially when used in a system with heavy use. Consider changing out your thermal compound if you have had your system for an extended period.
- Perform a thorough visual inspection of the console's motherboard for any signs of burns or damaged components. If you observe any visible damage, such as burns or components that appear to be physically damaged, the board must be replaced with a new one.
- You can use our motherboard guides if you choose to replace the board with a new one:

- 30 minutes - 1 hourModerate

- 20 - 45 minutesModerate

- 1 - 2 hoursModerate

- 1 - 2 hoursModerate

$29.99
4.8
155 reviews

$6.99
5
1 reviews

$24.95
4.9
52 reviews

Find compatible replacement parts for your Nintendo Switch. All parts and fix kits are backed by the iFixit Quality Guarantee.
You're seeing solutions for Nintendo Switch. Select your model to find parts for your device.


