
The Basics
Before undertaking significant repairs on your device, you must go through basic troubleshooting steps. These steps can often resolve issues without the need for extensive repairs. Please ensure you check the following.
- Powered on and charged. If your Chromebook's built-in display is not displaying any content:
- Try charging your device. This should wake it up from sleep mode and power it on.
- Check the charging indicator light on the side. If your computer shows a sign of life, you're dealing with a screen issue.
- Screen brightness settings.
- Adjust the display brightness using the physical keys available on most models. Sometimes, this functionality requires combining the function key (Fn) with the brightness key.
- Select the internal display.
- Press the Ctrl + Maximize (F4 or F5) keys to switch between internal and external displays. This key combination ensures that the internal display is selected for content output.
- Disconnect all external USB devices connected to your Chromebook.
- Disconnect any external devices; by doing so, you can eliminate them as potential sources of the issue.
- Perform a power cycle on your device to resolve potential software-related issues.
- Restarting your device can terminate any problematic programs causing the issue.
- You can perform a power cycle by pressing and holding the power + refresh keys simultaneously.
- Restarting your device can terminate any problematic programs causing the issue.
If the issue remains, then proceed to the more in-depth tips below.
Causes
If the battery is dead and your device is not receiving power, it will not display any content on the screen. This could indicate a problem with your device's charging adapter. Check the following to ensure your device receives power from the charger.
- The outlet you're plugging into is outputting power. Fuses can go out, and outlets can suddenly stop providing power. Check that another appliance can pull sufficient power from the outlet or move your charger to an outlet you know works.
- Check to see if your device's cooling system is spinning. If your Chromebook has an active cooling system, you should be able to hear the fans powering on when you start up the device.
- Check if your device's Status LED illuminates. For passive cooling systems, the status LED can determine whether the unit receives sufficient power.
If you cannot hear the device's cooling system and the Status LED does not illuminate, try plugging in your device using a known undamaged charging adapter. If you observe that the screen only turns on when the device is connected to power, there is likely an issue with the battery.
When using an external display with your Chromebook, the ChromeOS operating system typically keeps trying to communicate with it even after it has been disconnected. This can result in display-related issues or errors.
- Connect your Chromebook to an external monitor or TV using the available outputs. This will allow you to test ChromeOS's functionality on the external display and can help us determine whether the issue is with the operating system or with the device's screen.
- Switch your display from the main display to the external display. To switch the display from an external display back to the main screen, press the Ctrl + Maximize (F4 or F5) keys.
If you have verified that ChromeOS is working correctly with the external display but fails to switch back to the main screen, the main display is likely defective or broken. If you find that ChromeOS is the issue, then continue to the next section.
To address any potential software issues causing your device to have trouble detecting the internal display, you can attempt to restore ChromeOS using a recovery disk. The instructions for creating a ChromeOS recovery disk are below, and an in-depth guide can be found here. An empty USB drive with at least 8 GB of storage is required.
- Install the Chromebook Recovery Utility Extension: Open Google Chrome and install the Chromebook Recovery Utility Extension from the Chrome Web Store. Click on the extension and follow the on-screen instructions.
- Prepare Chromebook for Recovery: Turn off your Chromebook and ensure it's connected to a power source. Press the Esc + Refresh (F3) keys simultaneously, then press the Power button. Release the Power button when the Chromebook starts, but continue holding Esc + Refresh until you see a screen prompting you to insert the recovery disk.
- Recover ChromeOS: Insert the previously created recovery disk into your Chromebook and follow the on-screen instructions to initiate the ChromeOS recovery process. This will reinstall the operating system and can resolve software-related problems that may be causing the black screen issue.
- Follow System Setup: After completing ChromeOS recovery, follow the on-screen instructions to set up your Chromebook as you would during the initial setup. Check if the black screen issue is resolved.
If the issue persists after restoring ChromeOS, proceed to the more in-depth troubleshooting steps below.

- 5 minutesVery easy
If your Chromebook does not power on or show signs of life, the issue may be related to the battery. Follow these steps to troubleshoot battery-related problems.
- Check Battery Level: Connect your Chromebook to the charger and allow it to charge for at least 15 minutes. After that, check if the charging indicator light confirms that the device is charging.
- Reset the Battery: On certain Chromebooks, you may find a small pinhole reset button on the bottom or side of the device. To reset the battery, insert a paperclip or similar tool into the pinhole and press gently. Afterward, attempt to power on the Chromebook and check if the issue is resolved.
- Replace the Battery: If resetting the Chromebook hasn't worked, and you aren't seeing any signs of life from your device, it's probably not turning on due to a faulty battery. Consider replacing the battery.
If the Chromebook still does not power on, proceed to the next section.

Find compatible replacement parts for your Chromebook. All parts and fix kits are backed by the iFixit Quality Guarantee.
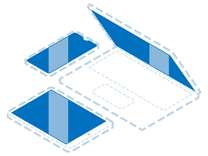
If your Chromebook works with an external display but with the main display, it suggests possible damage to the display. To check if the display might be faulty, follow these steps.
- Power off your Chromebook. Be sure to remove any peripherals or power sources.
- Carefully inspect the internal display for physical damage. This includes any significant or small cracks or any liquid damage. Checking from different angles can help spot hairline cracks as they catch in the light.
If there is physical damage, consider replacing the screen.
Find compatible replacement parts for your Chromebook. All parts and fix kits are backed by the iFixit Quality Guarantee.
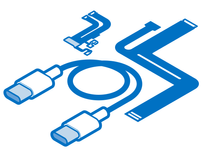
In most Chromebooks, the internal display is screwed to the back of the display and has a cable running to the display hidden beneath the display bezel, which is needed to send signals to the LCD panel from the logic board. If this cable is disconnected or damaged, the display may not work.
- Verify that the display is correctly connected to the display cable. This will involve some dismantling. Ensure the display cable is securely plugged into the LCD panel and motherboard. If the cable appears loose, reconnect it carefully. After reconnection, test the display to see if the content displays correctly on the LCD panel.
- Perform a visual inspection of the display cable. If no visible damage is apparent, thoroughly examine the display cable connections. Check both the end of the display and the point where the display cable connects to the motherboard. Look for any signs of damage, such as burns or indications of liquid damage. If any damage is found, try to replace the cable.
If you don't find any issues during the display and display cable inspection, proceed to the final section for further troubleshooting.
Find compatible replacement parts for your Chromebook. All parts and fix kits are backed by the iFixit Quality Guarantee.
If your Chromebook displays a black screen even after following the troubleshooting steps mentioned earlier, there is a high likelihood of a problem with the motherboard or the surrounding components.
- Ensure that your device's CPU is adequately cooled. If you have recently reinstalled your heatsink, double-check that it is correctly attached to your CPU and that the CPU has the appropriate amount of thermal paste applied. Proper cooling is essential to prevent overheating and ensure optimal performance.
- Remove any accumulated dust or debris from your device's internal components. Maintaining proper airflow within your device is crucial. Dust or debris can hinder the cooling process, potentially causing issues with the operating system. Regularly cleaning your device's internals helps prevent excessive heat generation and ensures optimal performance.
- Reset your device's BIOS Settings. To reset your motherboard's BIOS settings, you can try uninstalling and then reinstalling the CMOS battery. By doing so, any stored settings or configurations that may have become corrupted will be cleared, and the system will start with default settings. This helps eliminate potential conflicts or misconfigurations that could be causing the issue you're experiencing.
- Verify that the RAM module is installed correctly and functioning properly. If it is not properly seated, it can cause display issues. Try re-inserting it, ensuring it is securely in place. Alternatively, you can consider replacing it with the same type to eliminate any potential RAM-related problems.
- Perform a thorough visual inspection of the circuit boards for any signs of burns or damaged components. Suppose you observe visible damage, such as burns or physically damaged parts. In that case, the board likely needs to be replaced, especially if it's the board carrying the display cable connector.

- 5 - 20 minutesModerate

Find compatible replacement parts for your Chromebook. All parts and fix kits are backed by the iFixit Quality Guarantee.
You're seeing solutions for Chromebook. Select your model to find parts for your device.
Related Problems


11 common problems
View all