Introduction
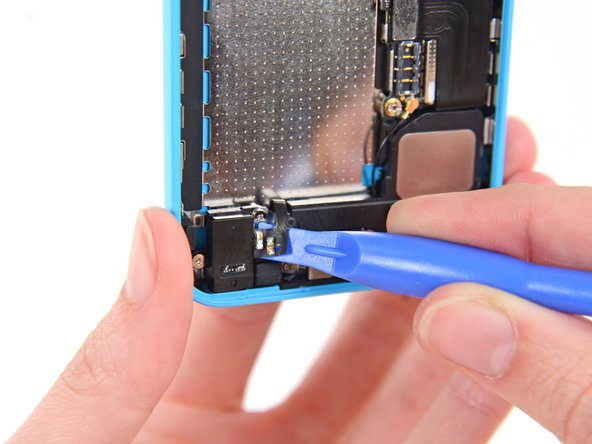
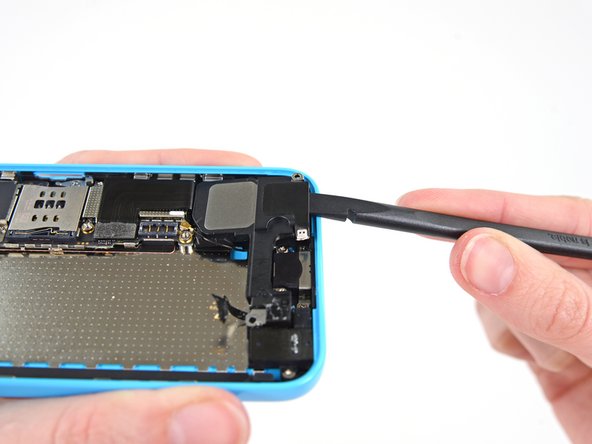
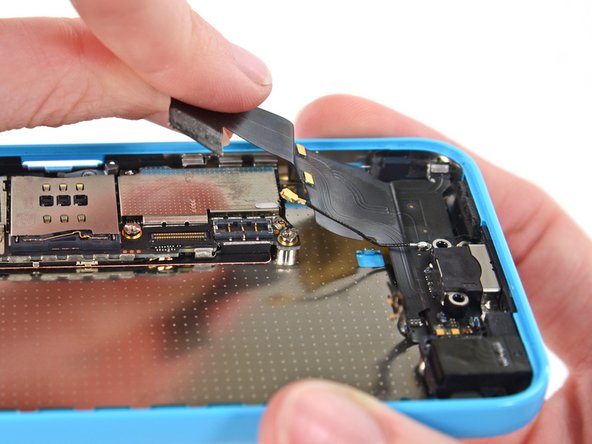
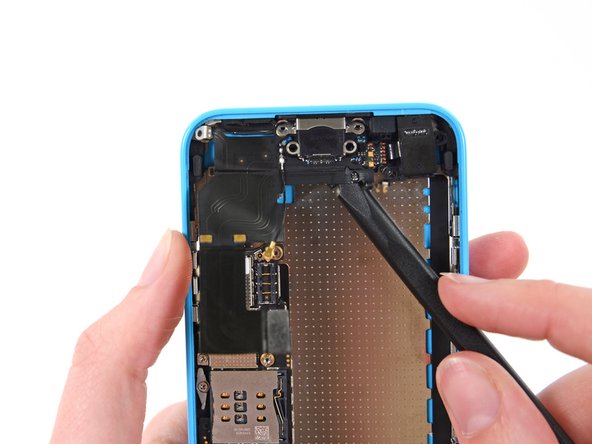
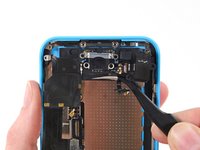
Use this guide to replace the Lightning connector and audio port cable in your iPhone 5c.
You can also use this guide for reference when replacing the microphone gasket.
Tools
Parts
Video Overview
-
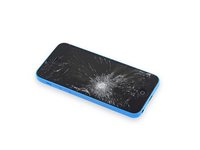
If your display glass is cracked, keep further breakage contained and prevent bodily harm during your repair by taping the glass.
-
Lay overlapping strips of clear packing tape over the iPhone's display until the whole face is covered.
-
Power off your iPhone before beginning disassembly.
-
Remove the two 3.8 mm P2 Pentalobe screws on either side of the Lightning connector.
to keep screws in order, buy some double sided tape and then affix the tape in small pieces to a sheet of paper. As you take the screws out, you can affix them to the tape (which is on the paper) and then write a description of what they are and where they go. quick, cheap and easy.
-
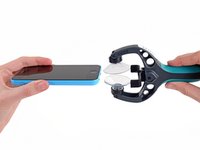
Close the handle on the iSclack, opening the suction-cup jaws.
-
Place the bottom of your iPhone in between the suction cups, against the plastic depth gauge.
-
The top suction cup should rest just above the home button.
-
-
Open the handles to close the jaws of the iSclack. Center the suction cups and press them firmly onto the top and bottom of the iPhone.
I just replaced my iPhone 5C battery today and only used the I fix it repair kit that came with the suction cup. Getting the glass screen out was not too difficult as I used a little bit of upward motion on the suction cup while at the same time prying gently with the flat end of the opening tool at the same time. If you have two people it makes it a little easier as someone can hold the phone. After getting the end open, I was able to go around the perimeter and gently pry up the edges with very little trouble.
-
Hold onto your iPhone securely and close the handle of the iSclack to separate the suction cups, pulling the front panel up from the rear case.
-
The iSclack is designed to safely open your iPhone just enough to separate the pieces, but not enough to damage any cables.
-
Skip the next three steps and continue on to Step 8.
-
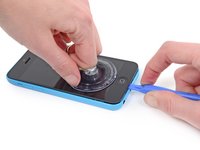
Press a suction cup onto the screen, just above the home button.
cool i diden't now
very, very difficult to get a tight seal on tape. I removed the tape and still can't get a tight seal.
-
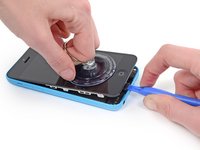
While holding the iPhone down with one hand, pull up on the suction cup to slightly separate the front panel assembly from the rear case.
-
With a plastic opening tool, begin to gently pry the rear case down, away from the display assembly, while you pull up with the suction cup.
-
Pull the plastic nub to release the vacuum seal on the suction cup.
-
Remove the suction cup from the display assembly.
-
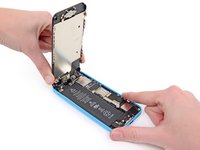
Lift the home button end of the front panel up to gain access to the connectors near the top of the phone.
-
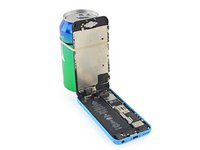
Open the display to about a 90º angle, and lean it against something to keep it propped up while you're working on the phone.
-
In a pinch, you can use an unopened canned beverage to hold the display.
-
-
Add a rubber band to keep the display securely in place while you work. This prevents undue strain on the display cables.
-
Remove the two 1.6 mm Phillips #000 screws securing the metal battery connector bracket to the logic board.
These screws are very tiny and hard to manipulate. The screwdriver is magnetic; which is great to take them out, but makes it hard to put the screws back in, as the screwdriver pulls them from the hole. I solved this problem by using the pointed end of the spudger to put a tiny drop of Elmer's glue in the hole and then insert the screw. You can do this before putting the bracket in place if you want. Then the screw wont pull out by the magnetic driver and make lining up and fastening the screws much easier; at least for me!
I found that you don't need to disconnect the battery... why bother doing more fiddling with annoyingly tiny screws and obstinate cable connectors when you don't actually have to? Especially when you could only end up causing more damage. As a matter of fact, the original iFixit video didn't bother to disconnect the battery either, but they've since updated the video to include battery disconnection, I guess as a "belt and braces" approach in case the repair-hero forgets to power down the phone first?
Disconnecting the battery is a safety precaution, and yes it's worth doing. Even with the phone powered off, there is some danger of blowing the backlight filter fuse if you disconnect the display while the battery is connected. At that point you're no longer looking at a simple DIY repair. Even though it's possible to skip this step and still come out okay, my advice is not to risk it.
-
Remove the metal battery connector bracket from the iPhone.
-
Use a spudger or a clean fingernail to gently pry the battery connector up from its socket on the logic board.
Why do we need to disconnect the battery?
Sorry, I missed the comments on step 9 that detail the procedure.
Instead of using a spudger, you can use your fingernails too. This is quicker and enables you to feel if you're not accidentally putting on too much pressure or lifting the connector instead of the cable.
Accidentally pulling out the logic board socket is no idle warning - exactly what I did without much effort. I think this shouldn’t be described as ‘prying’ up because it implies needing to use force - but these things actually pop off quite easily with a nudge, which you discover at later steps.
-
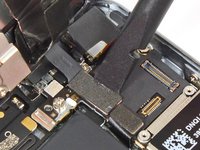
Remove the following Phillips #000 screws securing the front panel assembly cable bracket to the logic board:
-
Two 1.3 mm screws
-
One 1.7 mm screw
-
One 3.25 mm screw
-
In step 9: I think you are talking about the 3,25 and 1,7mm one not the 1,3 and the 1,7mm?
DO NOT Remove the battery, there is no need to and can cause unnecessary damage! There's a tutorial on YouTube that does it without!
I didn't need to remove the front panel to replace the lightning connector. Just prop it up like in Step 8, then skip steps 12-16.
I always put my screws in a magnet tray and place the screws in the exact position they were taken out. The magnet tray holds the screws tight in the position I put them in. No chasing on the floor looking for small screws that you brushed off the table.
I always take a picture of the phone, print it out, then use scotch tape to tape the screws onto the picture in the location where they go. You don't lose the screws and you always know where they go for re-assembly
good tip! but instead of taking & printing a picture of your own phone, you probably could just print the color coded pic from this step (assuming everything on your phone is exactly the same).
When reassembling, the screw holder that the screws screw into came off the board. Is there a way to superglue that back in?
-
Remove the front panel assembly cable bracket from the logic board.
-
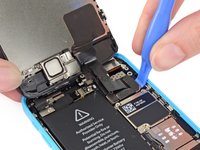
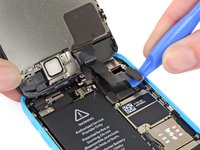
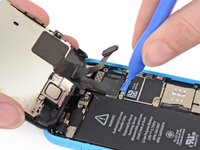
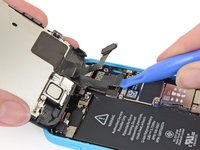
Use a plastic opening tool or a fingernail to disconnect the front-facing camera and sensor cable connector.
-
Use a plastic opening tool or a fingernail to disconnect the LCD cable connector.
I replaced the broken front panel of the iPhone 5c and got the "famous white stripes" on the new screen. Reading about all kind of problems that the lcd/digitizer cable contacts may cause, I compared the cable connectors of the original Apple and the replacement part I bought online with a 35x magnifying glass. The quality difference was visible: The white description on the original part on the cable next to the connector is: 821-1784-A, while the inferior replacement part is: 821-1784-02. Check out the two numbers online and insist getting the "A" to avoid future troubles !!!
This person above is not knowledgeable. That number is a camera proxy part number, not the lcd or digitizer number. It changes with production date, both for original and aftermarket ones. A, B, D, 02, 04, 08 etc. Can all be either or.
vince -
Apple uses numerical revisions (-02) for pre-production parts, and alpha revisions (-A) for production revisions. It looks like you got a preproduction assembly, or a knock-off.
There are, in fact, three connectors in this step, not two. The front-facing camera and digitizer connector (Step 11) is really difficult to align when you put it back. Took me about 15 minutes before I succeeded.
Now I have a different problem. Everything works just dandy, EXCEPT:
Towards the bottom of the screen (in portrait) there is a horizontal line that is dead to the touch. For example, on the keyboard, I can use the spacebar, but not C V B N M, etcetera.
Three possibilities in my mind: One, when I dropped it, something else besides the glass and digitizer, etc, was damaged.
Two: I did not replace the cables correctly. This seems unlikely. They all "clicked" into place and stayed there.
Three: The digitizer supplied is faulty.
Comments? Which cable/connector could be causing this -- if it is that?
Take apart, Clean Connections, Put back together.... If same problem sounds like a fault part...
duston -
When reassembling the iPhone 5c, I used the flat end of the spudger to press on the connectors and maintain them while replacing the front panel on the body of the iPhone.
The third and "deepest" connector no longer slips out of its socket, which it did before holding the whole lot with the spudger.
If the ESD plate covering the connectors is properly re-attached to the phone, you should not have to do this. The cover holds all the connectors in place just fine.
iBroke -
-
Remove the front panel assembly from the rear case.
-
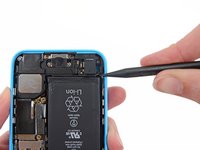
Run the tip of a spudger between the battery and the headphone jack to unfold the battery adhesive tab.
I didn't need to remove the battery to replace the lightning connector assembly. Skip past steps 17 through 25.
I agree, waste of time and you risk damaging the battery if the adhesive is too strong.
GotMac -
I also didn't need to remove the battery to replace the lightening cable. I'd say skip it unless you have big fingers, because it is a tight space.
No reason to remove the battery.
-
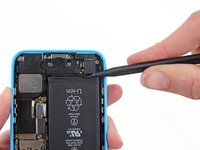
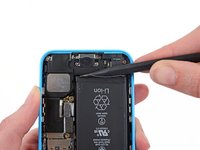
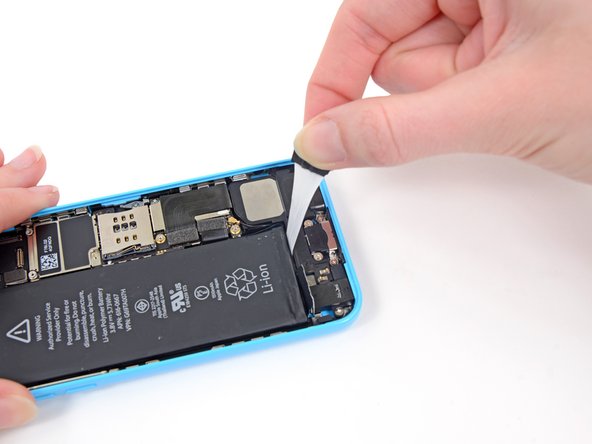
Pull the battery adhesive tab away from the phone.
It is a must to use a little heat. In my instance I used some hand warmers. My first attempt was with some older ones that didn’t get too hot. I then pulled out some others and using a little bit of time and several hand warmers it seemed to soften the grip of the tape underneath the battery. Using a hair dryer might have been my next step had my hand warmer trick not worked. USE HEAT!!!! It is your friend.
-
Cut the black battery adhesive tab between the two white adhesive strips, separating them.
Use heat beforehand to soften the grip of the sticky double sided tape that is used to keep the battery in place. USING HEAT IS A PREREQUISITE if you want this to go smoother. I also ended up using a little dental floss the come from underneath and then used it to saw back and forth to loosen the grip of the tape. Just take your time and use the magic of heat to loosen the grip.
-
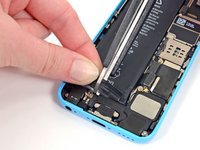
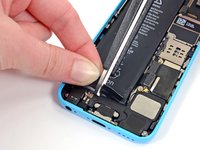
Slowly pull one of the battery adhesive strips away from the battery, toward the bottom of the iPhone.
-
Pull steadily, maintaining constant tension on the strip as it slips out from between the battery and the rear case. For best results, pull the strip at a 60º angle or less.
-
Guide the strip carefully around the corner and up the side of the battery. Be careful not to snag it on any of the other internal iPhone components.
I pulled the first tab straight up and it snapped. I tried to see if I could pry the battery out but couldn't without bending the battery. So I left the battery in and was able to complete this without removing it. However, I'm pretty sure I damaged the battery. Waiting on the replacement battery now to confirm. Long story short, leave the battery in for this fix!
When I tried to remove the adhesive, it snapped on both sides. Even though I was careful not to bend or twist. But now the battery is still stuck in place. What do I do now?
Keep reading; there are some additional steps you can take toward the end of the guide. The battery is much easier to remove if you keep the pull tabs intact, but they can be tricky.
My tabs broke as well, quite close to the battery's lower corners. Then I discovered a reasonably hot surface to place the phone - my quite old Apple Airport Extreme. I warmed the phone for a couple of 3 minute sessions, that didn't loosen the glue but made it more malleable. Then proceeded to carefully pull the tab on the logic board's side with tweezers, which was a success. After that I could get an old ID card under the battery and push the other tab into itself. That done, the glue basically gave out and the battery was free.
So my advice would be to use some sort of heat before pulling on the tabs, which will make them a bit easier to work with. It does take some time but result counts, right?
This is the most awful thing: removing the battery. The adhesive holds sooo strong. I ripped it off very soon. So i heated the back of the iPhone with a hair dryer up and opened the battery with scissors. Then i could draw the battery off.
5c is much better to repair then my last repaired iPhone. A 3gs :-)
Tanx ifixit. You are the best.
I don't thnk we need Steps 9 to 12 to remove the battery
Leave the display attached is you only need to replace the battery !!!
@lmusolino of course you can skip those steps (9-12) but it's risky for those digitizer to be damaged if you are careless while removing the battery.
This was more tricky than I thought. I bent the original battery quite hard to get it of, while blowing the phone with a hair dryer. I fixed two 5c's for my kids and I ordered one kit and a extra battery. I didn't understand when ordering that just one pair of adhesive strips came along, with the kit. I partial them using one strip each on the phones. Hope that it will work. Everything seems to work with the phones.
Don't pull too hard or it will break just gently apply presaure
If u do break the tabs the lift the top end of th battery and get them from that end
the adhesive is very strong and does NOT pull free. you MUST use heat (iopener) or similar to apply heat to it. go slow and when (not if) the adhesive snaps you will have to find a way to shove a spudger or an old credit card under the battery. after that, just rub your finger over the adhesive firmly and “roll” it out. this stuff is really nasty.
-
Repeat to remove the second strip.
I was able to remove the first strip as the guide discusses in Step#20. When I attempted to peel the second strip, as in Step #21 above, it broke. This left the adhesive strip on half of the battery and I was unable to grip anything. I got some dental floss and threaded it underneath the already free side. I then used a slight back and forth motion to loosen the grip of the other half of the strip enough that I could "GENTLY" pry the free side of the battery up. Taking extreme care not to pry against any components of the phone. I then gently pried the battery up a little at a time along with using a sawing motion on the dental floss to eventually free the battery from the underlying adhesive strip. Takes patience and persistence. GENTLY being the operative word.
At this step, be VERY careful with the two gold-colored prongs (pins) right next to the lightening cable port. If you crush/bend/collapse these pins, they won’t make contact with the screen side when re-assemble the phone, making your Home button non-functional.
If accidentally collapsed the pin because you pushed on it, be VERY careful bending it back. You have one shot at getting this right. Over-bending leads to the pins breaking off, and then you’re really f’ed. That’s what happened to me, and I had to solder some tin onto the base to build-up to the right height; very tedious.
https://s.real.com/jnjcW3 This shows photo of what I’m talking about.
-
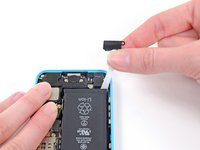
Remove the battery from your iPhone.
Use heat before attempting to remove adhesive strips. They will break. Heat helps tp loosen the grip and is your friend. Dental floss can also be a good helper to saw back and forth once you get it under one corner of the battery. Go slow and take your time. USE HEAT BEFOREHAND. I FOUNF THAT IT TOOK A GOOD 3-5 minutes to get everything hot enough to loosen the grip of the tape.
-
Follow our iOpener heating instructions or use a hair dryer to heat the adhesive securing your battery to the rear case.
-
Lay the iOpener flat on the backside of the iPhone to the right of the camera. Smooth it out so that there is good contact between the back of the iPhone and the iOpener.
-
Let the bag sit on the iPhone for approximately 90 seconds before attempting to remove the battery.
-
If using a hair dryer or heat gun, heat the back of the iPhone until it's slightly too hot to touch.
-
you can substitute a 'bed buddy' or similar microwave activated heating pack here for the iOpener. i eventually wound up working on-top-of the heading pad as at softened the adhesive. take your time and let the heat work
A hairdryer works too. Aim it at the same spot on the back of the phone, don't let it get too hot though.
Instead of using the iOpener, I opted for my “patented” “Rice in a sock” and heated the sock for 1 minute, which worked perfectly. I laid the heated sock flat and used it as a mini work bench while removing the adhesive strip! My wife uses this for when she has head aches, which caused “me to not have a headache”, when peeling back the adhesive strips!
-
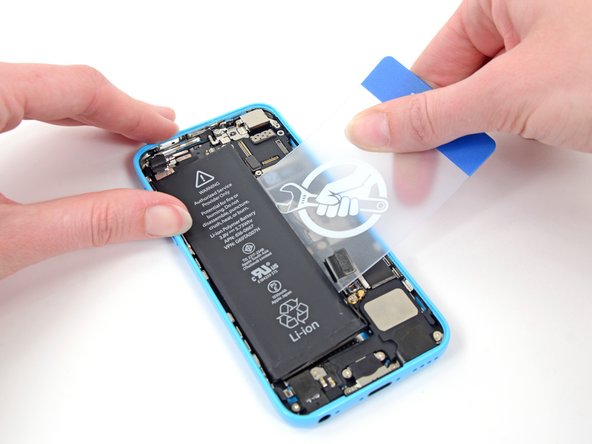
Carefully wedge a plastic card under the battery on the side nearest the logic board.
-
Slide the card from the top of the battery to the bottom, pushing toward the edge of the case.
A picture of the position of the upper ribbon cable would be useful here. I have falsely thought that you only have to be careful around the top edge of the battery that is near the logic board, and have managed to cut the upper component cable with the plastic card.. :(
The third bullet of this step has a link to two photos of the cable.
I destroyed the ribbon cable that runs down the side of the case toward the headphone jack (not mentioned in the instructions!) while trying to wedge the battery out with a credit card. Am I SOL or is there a fix?
Sounds like you hit the upper component cable mentioned in red in the instructions. “Avoid prying near the top edge of the battery, or you may damage the upper component ribbon cable.” You’ll likely need to replace the cable, or use on-screen accessibility button replacements. If you’d like to post photos to our Answers Forum, you may get more specific help for your situation. Best of luck!
-
Lift and remove the battery from the iPhone.
-
Use a plastic opening tool to peel the home button spring contact cable up from the speaker enclosure.
-
Remove the following screws securing the speaker enclosure to the rear case:
-
Two 2.7 mm Phillips #000 screws
-
One 2.2 mm Phillips #000 screw
-
These screws didn't fit our brand new Phillips #000 at all, but they did fit a J #000 just fine.
The light is not Working if I can get new iPhone 5c if okay with you
-
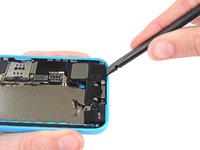
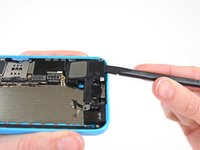
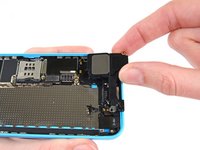
Use the flat end of a spudger to gently pry the speaker enclosure up from the rear case.
-
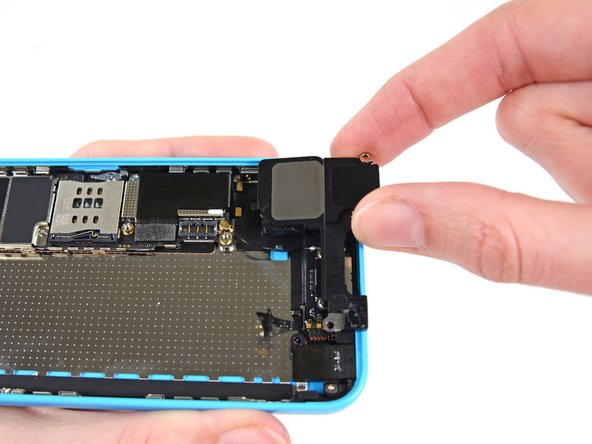
Remove the speaker enclosure. Be careful not to snag it on the antenna cable.
Why remove this microscopic bracket? That was the hardest part of the whole job. Just keep it on, but alert people to its presence to ensure they don't let it slip off. But putting it back on was a pain.
-
Use a plastic opening tool to disconnect the Lightning connector ribbon cable from its socket on the logic board.
-
The Lightning connector cable is lightly adhered to a shield on the logic board. Use the flat end of a spudger to gently peel the cable up.
When reversing this and reseating the new component, you really need to give it a push to lock in. Just touching the connectors will make most of the phone work, but you need to have the connector locked in completely for the home button to activate
-
Disconnect the cellular antenna connector from the base of the logic board.
How the !&&* are you supposed to get this back on?! I just can't do it.
I usually hold the connector in place over the socket with a pair of tweezers, and then press it down with the flat end of a spudger.
-
Remove the following screws securing the Lightning connector to the rear case:
-
Two 3.4 mm Phillips #000 screws
-
One 2.2 mm Phillips #000 screw
-
One 2.7 mm Phillips #000 screw
-
The lower left corner (yellow circled) screw has probably "screwed" us - for some reason it just won't start turning. Perhaps some glue under this one, needs heat? Anyone else faced this issue?
I did not when doing this job. The only part that I found had some adhesive was the cellular antenna cable. Perhaps some heat in some cases is necessary, but go easy on it.
Follow Up on this one -- turns out I had loosened the screw already but it got kinda "soft-stuck" and just would not fall out of the hole (or turn any further). I almost stripped it totally but then poked around by trying steps 35-37 in advance, then I found I could turn the screw back inward (clockwise), then back out again, and kind of jimmy it out of the hole to complete the disassembly. I was VERY lucky that it was still usable for the re-assembly with the replacement part.
-
Gently peel the Lightning connector assembly up from the rear case.
-
You may need to use the flat end of a spudger to completely free the assembly.
-
Remove the Lightning connector assembly.
-
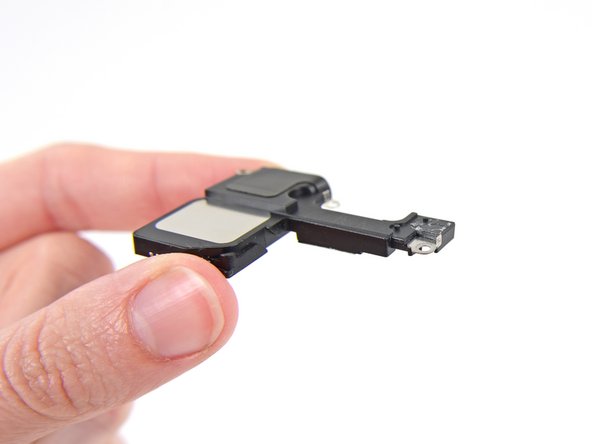
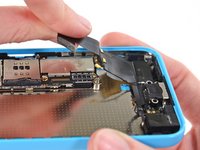
There is a small rubber gasket attached to the microphone. Be sure to transfer it to the new assembly.
To reassemble your device, follow these instructions in reverse order.
Cancel: I did not complete this guide.
107 other people completed this guide.
13 Comments
I fix it. Tomorrow I was got my packet from ifixit.com with lightning assembly and today my iPhone 5c can charge again.
And I would like to tell you several words about a process:
1. Thanks Ifixit for the tools - pentalope screwdriver and a magnet mat - it was great
2. All was simple with a step by step instructions on site.
3. IMPORTANT!!!! Unnecessary to remove a battery before the Lightning assembly replace - replacement possible without it)))
4. Don't forget to remove a rubber head from an old microphone - new hasn't such part.
5. Don't forget to lay an antenna cable properly when install a speaker back.
6. All the parts are very small - a magnifying glass required)))
7. I was made it for 1 hour )))
THOSE CHANGING JUST THE DOCK CONNECTOR!
Important! Steps 14, 15, and 19 through 28 are totally unnecessary. The SIM card is fine where it is, and the battery does not need to be removed to access everything. I would recommend disconnecting the battery connector while working, however.
Also, be careful with the little antenna where it connects to the dock connector flex. Mine broke off and had to be resoldered, but I bought the part on eBay.
Thanks for your feedback! We went ahead and removed the SIM card steps. It may be helpful to remove the battery in order to get enough clearance to separate the Lightning cable assembly from the rear case, but folks are certainly welcome to skip those steps if they are comfortable doing so. :)
It is certainly not necessary to remove the battery in order to do this repair. I do not recommend following those steps.
Can i replace my iphone 5s motherboard with iphone 5c's motherboard?
The connectors are in different places, plus the 5C does not have a connector for Touch ID. I would say no.
I ruined my battery, without necessity. But that's ok. Allways learning!
Just followed the steps, took me about 2:30 hours (I had to do 2 attempts) but phone is back working 100%
It was difficult cause I have huge hands but this guide is quite good.
As other stated, I didn’t had to remove the battery.
Thanks ifixit
Why do we need a microphone gasket?
The hardest part - to connect back the antenna.. this challenge took the most of the time, everything else is pretty simple. No needs to take off the battery, but making next steps and keep the screen connected - just less comfortable. The guid is really helpful, thank you guys, but it would be even better to add more details and picture of the “small rubber gasket“ mentioned in last step 37, how take it off.. It took a while until I figured out what is it and how it’s mounted.
I always use a bottle of wine and a rubber band to fix the upper part with the screen while working on the bottom part. Removing all connectors could result in connection problems so I avoid this by all means (ruined an iPhone 5s this way).
I also discovered that I didn’t needed to take off the screen protector. It fit that hard to the screen that the removal tool didn’t even cause the slightest bubbles.