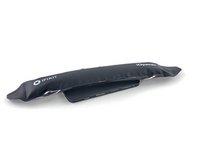
iOpener Instructions

What you need

  1. iOpener Instructions, iOpener Heating: step 1, image 1 of 2 iOpener Instructions, iOpener Heating: step 1, image 2 of 2
    • We recommend that you clean your microwave before proceeding, as any nasty gunk on the bottom may end up stuck to the iOpener.

    • Place the iOpener in the center of the microwave.

    • For carousel microwaves: Make sure the plate spins freely. If your iOpener gets stuck, it may overheat and burn.

  2. iOpener Instructions: step 2, image 1 of 1
    • Heat the iOpener for thirty seconds.

    • Throughout the repair procedure, as the iOpener cools, reheat it in the microwave for an additional thirty seconds at a time.

    • Be careful not to overheat the iOpener during the repair. Overheating may cause the iOpener to burst.

    • Never touch the iOpener if it appears swollen.

    • If the iOpener is still too hot in the middle to touch, continue using it while waiting for it to cool down some more before reheating. A properly heated iOpener should stay warm for up to 10 minutes.

  3. iOpener Instructions: step 3, image 1 of 1
    • Remove the iOpener from the microwave, holding it by one of the two flat ends to avoid the hot center.

    • The iOpener will be very hot, so be careful when handling it. Use an oven mitt if necessary.

  4. iOpener Instructions, Alternate iOpener heating method: step 4, image 1 of 2 iOpener Instructions, Alternate iOpener heating method: step 4, image 2 of 2
    • If you don't have a microwave, follow this step to heat your iOpener in boiling water.

    • Fill a pot or pan with enough water to fully submerge an iOpener.

    • Heat the water to a boil. Turn off the heat.

    • Place an iOpener into the hot water for 2-3 minutes. Make sure the iOpener is fully submerged in the water.

    • Use tongs to extract the heated iOpener from the hot water.

    • Thoroughly dry the iOpener with a towel.

    • The iOpener will be very hot, so be careful to hold it only by the end tabs.

    • Your iOpener is ready for use! If you need to reheat the iOpener, heat the water to a boil, turn off the heat, and place the iOpener in the water for 2-3 minutes.

  5. iOpener Instructions, iOpener Instructions: step 5, image 1 of 3 iOpener Instructions, iOpener Instructions: step 5, image 2 of 3 iOpener Instructions, iOpener Instructions: step 5, image 3 of 3
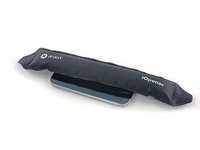
    • Lay the iOpener clear-side down, flat on the edge of the device, over an adhesive seal you wish to heat. The liquid will flatten the iOpener against the surface, ensuring good heat conduction.

    • Let the bag sit on the device for approximately 90 seconds before attempting to open the front panel.

    • At this point you should be able to begin prying under the screen with a plastic opening tool. Be sure to see your device's specific guide for where and how to do this.

    • During the procedure you may need to reheat the iOpener. To prevent overheating the iOpener, always wait until the iOpener has cooled enough to touch safely. Do not microwave the iOpener for more than thirty seconds at a time.

Finish Line

535 other people completed this guide.

Andrew Optimus Goldheart

Member since: 10/17/09

494,681 Reputation

407 Guides authored

Team

iFixit Member of iFixit

Community

141 Members

17,581 Guides authored

38 Comments

I bought two of these, and I can't get an iPad 2 to open using the iOpener; I'm going to keep trying, but heads up, it's not as easy as 1-2-3. I'll update if I get it to work.

Kevin McCartney - Reply

I used a flat toaster maker and turned it off and on as required, Fixed my Ipad mini ok.

Chris Newman -

Step 2 says to wait 5 minutes between reheating, step 4 says to wait 3 minutes.

Also, do you sell the "this is a microwave" stickers? xD

Mark Brown - Reply

Will this tool damage the lcd/ pixels or even the camera/sensor if placed on the edge above those? I need to soften up the adhesive only, not replacing the screen at all. I have a surface pro 4.

allanwl - Reply

A short remark about how much force will then be needed to separate the old battery from the heated adhesive would be helpful. I found that even after I was able to begin the insertion of a plastic card between the battery and the case, it required a great deal of force to push the card further under the battery to complete the separation.

Steven Aigner - Reply

Add Comment

View Statistics:

Past 24 Hours: 105

Past 7 Days: 697

Past 30 Days: 3,559

All Time: 362,718