
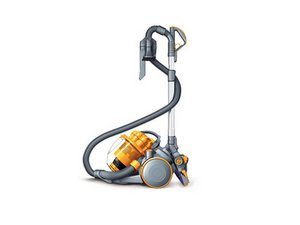
Initial Considerations
Dyson vacuums are known for their cyclonic approach to removing dirt. They all share some common traits which are both helpful and problematic. These are included to help point you to the problem areas you will encounter as you look at why your unit has lost suction.
The Helpful:
- They do not have dust bags, and use cyclonic separation as a primary means of separating the dirt from the airstream. It is quite effective when kept clean.
- They incorporate features designed to allow the vacuum to be used in multiple modes, with built in, often "automatic", ability to change.
- They incorporate washable filters. These are marked with faucet markings.
- Some models claim to need no filter replacement at all.
The Problematic:
- The numerous incorporated features often result in complex construction, which leads to more difficult cleaning and maintenance.
- The air passages in many of their units (especially the upright vacuums) are complex, small, and more easily clogged.
- The bagless design requires a number of filters which require consistent maintenance. You need to actually wash the washable filters (and let them dry for 24 hours per Dyson.)
- The bagless design incorporates relatively small dirt collection containers, which need regular emptying. Overfilling causes serious problems.
- They are prone to trapping dust in all of the small cyclone passages, which can lead to unpleasant operating odors and clogs.
- The Cinetic system can struggle with pet hair and the small cyclones can clog because of it.
- The focus on "just empty the dirt", "no bags" means that owners can forget that they need regular maintenance and cleaning (mentioned above) to stay at their most efficient, which causes problems for the units.
We will walk through these issues one by one, and help you sort out what has gone wrong, and find a solution.
Causes
The simplest place to start: empty your dirt container.
- Debris in the main cyclone passage will cut suction rapidly.
- If the container was really full, you should also check the filters because they can get loaded with dust if the Dirt container is too full.
- Test the vacuum, and see if the suction is back. If not, go to the next item.
This might seem to be an odd problem area to deal with, but if your Dyson has been used to vacuum up drywall dust recently, it is likely to cause reduced suction power, because drywall dust is very hard on any vacuum, not just a Dyson.
- You should thoroughly clean or, better still, replace the filters.
- Clean the screen in the cyclone.
- Washing air path parts of the vacuum (NOT THE MOTOR) will also be helpful.
- If you do wash anything give it a full day to dry.
- If you have access to compressed air, you can clean the unit outdoors with it.
The dirt container is emptied; there's still no suction. A clog is a common (perhaps the most common) reason that a Dyson unit loses suction. They have a number of choke points in the airflow paths. Some considerations follow:
- Hoses: because of their often rough inner surfaces and inevitable bends, hoses are prime locations for clogs.
- Bypass Valve: if you hear a high pitched whistle when you start and run your unit it could be the bypass valve operating. During normal operation, the motor is cooled by the airflow created by the vacuum, so the bypass valve allows air to get to the motor in the event of a clog. This is a fairly reliable symptom of a clog.
- It also serves to protect the numerous seals and gaskets from being sucked in by the unit. Dyson vacuums do have pretty good suction when clean.
As an initial diagnostic step, start by removing any attachments and check if there's suction as close to the motor as you can get it. On upright models where you can't remove attachments, start by removing the cyclone, and check for suction at the inlet to the motor. If the suction is poor at the inlet to the motor, skip down to Filters are Dirty.
If you are getting suction without attachments or through alternate airflow paths, you can narrow the problem to a clog in a hose, brush head, or attachment. Otherwise, your issue may be with the vacuum body itself.
- If your clog is in a hose, brush head, or attachment, your first step should be to remove and inspect the air passages in the brush head of the vacuum.
- The brush head on Dyson upright vacuums is secured by a clip that can be easily removed when the vacuum is set on its side.
- It is frequently red in color and can be pulled off without tools.
- When the clip is removed the head comes off readily. Check the air passages in the head for debris; if debris is present, remove it.
- On Dyson canister and cordless models, the brush head is connected to a wand or tube that leads to a hose which connects to the vacuum itself.
- The head itself will often have clogs in the air passages immediately behind the brush roll. This may necessitate removing a few screws to access, but most of the sole plates of the heads come off with only basic tools.
- Remove the brush rolls and clean them while you are checking for the clogs as it will give a better view of the air passages.
- The small hose segment incorporated in the heads of the canister models, near the small ball type wheels is another frequent clog location. Check for debris there, and if you find it, remove it.
- The brush head on Dyson upright vacuums is secured by a clip that can be easily removed when the vacuum is set on its side.
- On canister models, also check the hose and wand.
- You need to detach it from the machine and try looking through it first.
- Keep in mind, sometimes clogs don't show up fully when you look through the hose.
- You may find you can't get the hose straight enough to look through, especially if it is long.
- Follow up the visual inspection (which is valuable for checking the condition of the hose, such as locating holes) with the physical check.
- You can use a piece of stout wire (or a wooden dowel) to make sure there is no clog in the hose.
- A stout wire, like a metal clothes hanger that has been opened up, can be used. It has the right balance of rigidity and flexibility.
- Make sure you bend the end of the wire over into a small loop, so that it can't puncture your hose, and it will slide through more easily.
- Push the wire through the hose several times. There may be clogs that can only be dislodged in several tries. Rotate the wire if possible when you do this.
- If clearing the airflow path didn't work, or if you've eliminated hoses/attachments as a contributing factor, your issue may be with a clog in the vacuum body.
- On Dyson Uprights there is a complicated valve that allows switching between the hose when the handle is upright, and the power head, when the handle is down.
- This has changed between older Dyson uprights and the Ball models.
- This can also help you to get some ideas of the clog location. If in the upright position the vacuum shows good suction, but not in the floor position, you know the clog is between the power head and the valve.
- When you are cleaning the air passage, it is important to be sure to work with the handle in the down position, so you don't possibly damage the valve when it is in the position to feed the hose.
- From that valve the vacuum has a passage that leads the airflow to the inlet of the cyclone. because this passage is generally straight and smooth, the possible clog is found at the top where there is a bend.
- On canister models the hose from the wand connects to a small oval shaped hose which narrows the air passage. This is a frequent location for the formation of clogs. If you find a clog there remove it with a wire or even better with another vacuum.
- Canisters also have a tube in the vacuum body which connects to the oval hose that should be checked and cleared.
- On Dyson Uprights there is a complicated valve that allows switching between the hose when the handle is upright, and the power head, when the handle is down.
Another contributor to poor suction is dirty secondary or internal filters. You may notice that your vacuum is louder because it sounds like it is plugged and is "straining" even after you have emptied the dirt container and checked for clogs.
- Some models can have up to three filters, There can be a primary filter (screen), a motor pre-filter and a motor post-filter.
- The filters are especially important for bagless models like Dyson.
- These internal filters can become slowly clogged with very fine particles.
- The first stage of filtration in the cyclone is a screen filter that can become clogged, which will reduce suction radically. Clean it if dirty.
- The filter immediately after the cyclonic portion (might be in the center of the cyclone (the dirt container), will frequently clog as well.
- It is usually washable, but is best pre-cleaned with a vacuum first before washing
- If you wash it, make sure it has time to dry (24 hours is recommended) before reinstalling it.
- You may find that replacing the washable filter is necessary after several cleanings as it begins to sort of disintegrate internally.
- Dyson also has made a line called "Cinetic", that claims to have dispensed with replaceable filters altogether.
- The Big Ball Animal Canister, for example, has a filter that is downstream of the motor, but requires disassembly to replace. You should check it and if it is dirty, replace it.
- Other ball models have HEPA filters located behind the ball wheels.
- Some of these filters should just have the dirt knocked off, or better still, vacuumed off of them if you have another small vacuum.
- You may need to replace, rather than clean that type of filter after a few cleanings.
- When cleaning this type, you should do it outdoors or at least not over carpet, as it can be a bit messy if the vacuum has become dirty.
- The downstream filters are what often gives the vacuum a HEPA (High Efficiency Particulate Air - filter) capability.
- If you have cleaned or replaced the filters, test the vacuum and if the vacuum works normally again, you are done.

Find compatible replacement parts for your Dyson Vacuum. All parts and fix kits are backed by the iFixit Quality Guarantee.
Check to see that the hose has no holes or cracks. This can also create a whistling sound, like the relief valve.
- Make sure you flex and stretch the hose thoroughly.
- Sometimes, a crack will not show up until the hose is stretched.
- Do this test while the vacuum is operating as you will likely hear a leak more easily than you might see it.
- If the hose is damaged, you may be able to find a replacement direct from Dyson. If you have an older model that's no longer supported, you may need to search on eBay or find an aftermarket solution.
- You can follow this Dyson Ball Animal Hose Replacement Guide for an idea of what this process will look like. The process should be fairly similar across upright Dyson models.

- 3 minutesEasy

Find compatible replacement parts for your Dyson Vacuum. All parts and fix kits are backed by the iFixit Quality Guarantee.
You have eliminated clogs and leaks, now it is time to check the heart of the Dyson vacuum. The cyclones are the next spot, and since there is more disassembly required, we leave it until now. You might even want to take it to a vacuum repair specialist as the complexity rises considerably here.
The cyclonic dirt separation in Dyson Vacuums is truly quite effective.
- It works best with dirt particles like fine flour, fine sand, or other particles that do not have a tendency to clump or cling.
- Moisture is enemy number one as it can greatly increase clumping.
- Since there are many kinds of organically produced household dust that are much stickier (pet dander, people dander, spilled food particles, and hair to name a few), the cyclones of a Dyson often get dirty and, contrary to claims, can and do clog.
- The suction will be slowly impaired as material sticks to the cyclones, because as the air passages have more dust and dirt adhering to them the surfaces become rougher and less efficient.
- There are many online videos that detail disassembly of the cyclone components of your Dyson vacuum. The basic steps are similar from unit to unit. You can likely find a video that will walk you through the cleaning steps for your specific model of vacuum.
- To give you an idea, the process will probably look something like this for upright models, or this for cordless stick vac models.

- 5 - 10 minutesEasy

- 4 minutesModerate
- If you don't locate a clog and have cleaned the vacuum, consider the age of your unit. Because of the complexity of your Dyson vacuum's air passages, especially on uprights, it is possible for the various joints to develop leaks over time that reduce the suction. You can try replacing the cyclone of your unit, but there may be enough cracks or leaks throughout that it doesn't make sense to keep it going.
- Either sell your vacuum for parts to help others trying to fix theirs, or try to find another broken vacuum to combine the working parts from both.
You're seeing solutions for Dyson Vacuum. Select your model to find parts for your device.
Related Problems


3 common problems
View all