Introduction
Samsung's Galaxy line of smartphones used to fare quite well in the repairability department, but last year's flagship S5 model took a tumble, scoring a meh-inducing 5/10. Will the newly redesigned S6 lead us back into star-studded territory, or will we sink further into the depths of a repairability black hole? Hop aboard as we tear down the Samsung Galaxy S6!
Interested in the S6's curvy counterpart? Check out the Samsung Galaxy S6 Edge Teardown.
Join us in the social network stratosphere! Get quick news on Twitter, follow us on Facebook, and browse our photo gallery on Instagram.
What you need
-
-
Compared with the S5, the S6 certainly looks good on paper. Its specs line up point-for-point with the flashy S6 Edge:
-
5.1" Super AMOLED capacitive touchscreen (1440 x 2560 pixels, ~577 ppi, 16M colors)
-
Exynos 7 Octa 7420 Processor with integrated Mali-T760 GPU and 3 GB memory
-
16 MP rear camera with HDR, LED Flash, and dual-video recording
-
Built-in wireless charging
-
32, 64, and 128 GB storage options
-
Corning Gorilla Glass 4 backing
-
It's got more power. It's got more pixels. Still, it feels like something's missing. We can't quite put our finger on it, so let's dig our fingers into it. It's teardown time!
-
-
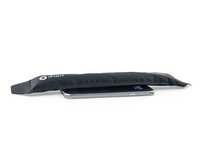
Tool used on this step:iOpener$24.99
-
-
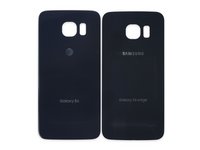
The rear panels are so similar we had to put them to the side-by-side comparison test: as we should have expected, the S6 Edge (right) panel is slightly smaller than the standard S6 (left) panel.
-
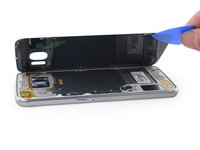
The adhesive stayed globbed to the midframe this time, hiding the screws. We had a moment of panic, thinking we'd have to go through the display, S5-style.
-
But after peeling up the adhesive, all screws are present and accounted for—and now, removed!
-
-
-
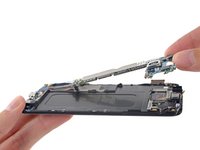
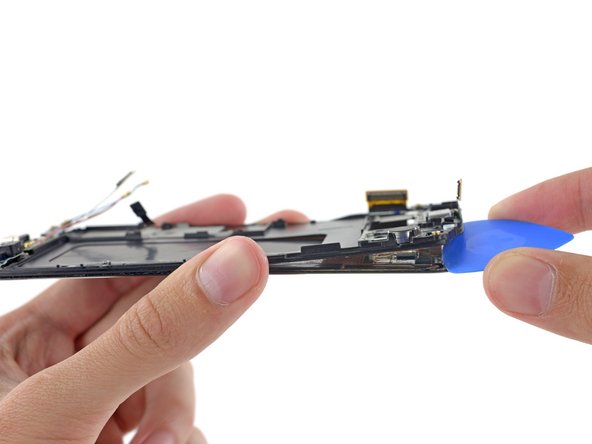
It's time to blow this Galaxy wide open.
-
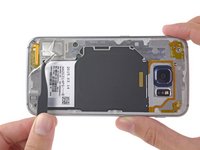
Removing the midframe reveals... an S6 Edge?
-
Maybe not—but it takes a keen eye to spot the difference. Apart from a slight rejiggering of the vibrator placement, these internals are a dead ringer for that other flagship Samsung smartphone we tore down recently.
-
-
-
-
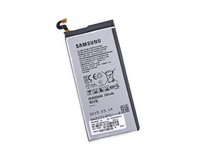
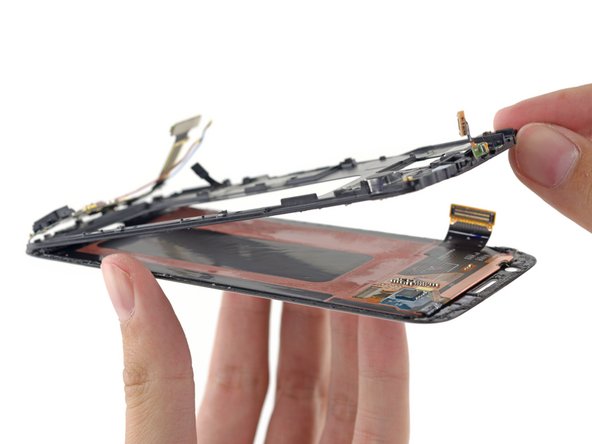
Who runs the phone? Battery!
-
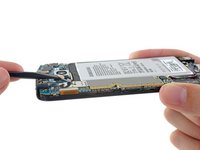
Removing the battery from the S6 should be a little bit easier than from the Edge. In the Edge, the battery cable was routed under the motherboard before connecting on top, necessitating removing the motherboard to get to the battery.
-
Looks like with the bit of extra room inside the regular S6, Samsung was able to run the cable on top of the board, to save a step for battery removal.
-
Also, thanks to the flat-screen design of the S6, it's easier to push an opening pick straight into the gap between the battery and display assembly, making it easier to cut the (just-as-strong) adhesive holding the battery.
-
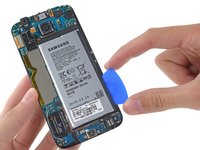
This hardly qualifies as a user-replaceable battery, but it is a bit easier than in the S6 Edge. Still, it's a flying leap backwards from previous Galaxies like the S5, where you could replace the battery using nothing but your wits, and you didn't even really need those.
-
-
-
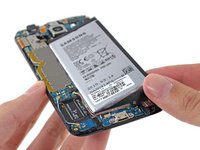
The Galaxy sports a 3.85 V, 9.82 Wh battery, which Samsung claims will provide up to 23 hours of 3G talk time, 12 hours of Wi-Fi internet use, and up to 57 hours of music playback.
-
With the transition to heavier case materials, perhaps Samsung was interested in cutting weight by trimming batteries. The 9.82 Wh battery in the S6 and 10.01 Wh battery in the S6 Edge feel pretty small compared to the Galaxy S5's 10.78 Wh pack.
-
The battery is quite a bit bigger than the 6.91 Wh we saw in the iPhone 6, but arguably provides less talk time. It seems like that extra screen real estate takes a lot of juice.
-
-
Tool used on this step:Tweezers$4.99
-
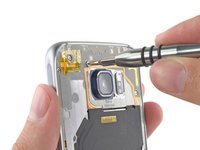
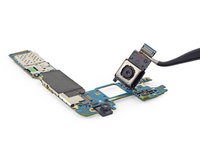
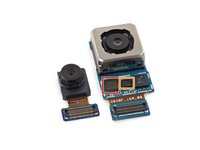
We grab some tweezers and take a closer look at the Galaxy's cameras.
-
The S6's 5 MP selfie camera is the spitting image of the front-facing camera we found in its sister Galaxy.
-
The similarities don't end there. The 16 MP OIS rear-facing camera looks nearly identical to the one in the Edge. There is definitely some similar hardware on this PCB:
-
Winbond W25Q32FW Serial Flash Memory
-
InvenSense IDG-2030 dual axis gyroscope for optical image stabilization
-
-
-
We scope out the back side of the motherboard first, and find some familiar heavy hitters:
-
Samsung Exynos 7420 Octa-core Processor - 64-bit, 2.1 GHz Quad + 1.5 GHz Quad, with Samsung K3RG3G30MM-DGCH 3 GB LPDDR4 RAM layered in
-
Samsung KLUBG4G1BD 32GB NAND Flash
-
Skyworks 78041 Hybrid Multimode Multiband (MMMB) Front-End Module (FEM)
-
Avago AFEM-9020 PAM
-
Broadcom BCM4773 GNSS Location Hub
-
Samsung C2N8AF (possibly image processor)
-
Avago A7007 (seen previously in the Galaxy S5)
-
-
-
A few more familiar faces grace the front side of the mobo:
-
Wolfson Microelectronics WM1840 Audio Codec
-
Samsung S2MPS15 (likely power management IC similar to the S2MPS11)
-
Samsung Shannon 928 RF Transceiver
-
Maxim MAX77843 Companion PMIC
-
Maxim MAX98505 Class DG Audio Amplifier
-
Samsung Shannon 600B5D
-
-
-
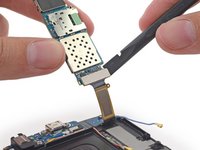
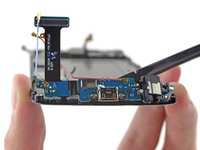
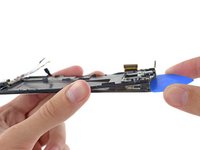
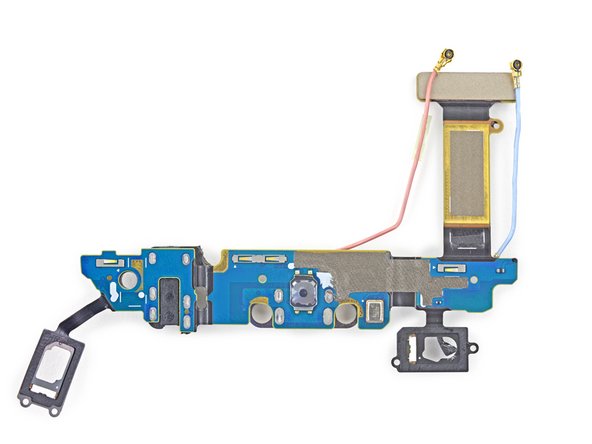
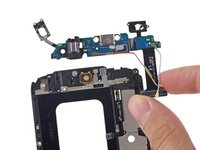
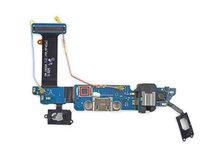
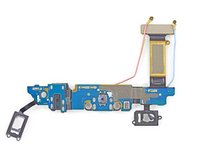
Once extricated, the daughterboard provides a clear view of its audio jack and space-aged microUSB (2.0) port.
-
This represents another seeming step backwards from the S5, which packed a 10x faster USB 3.0 port.
-
Onboard, we spy a single IC:
-
Cypress 3175 1501 1885 (likely touch or fingerprint sensor controller)
-
-
-
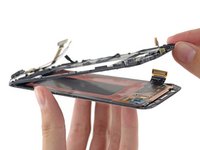
With the display removed, we find the same STMicro FT6BH touchscreen controller as the S6 Edge.
-
-
-
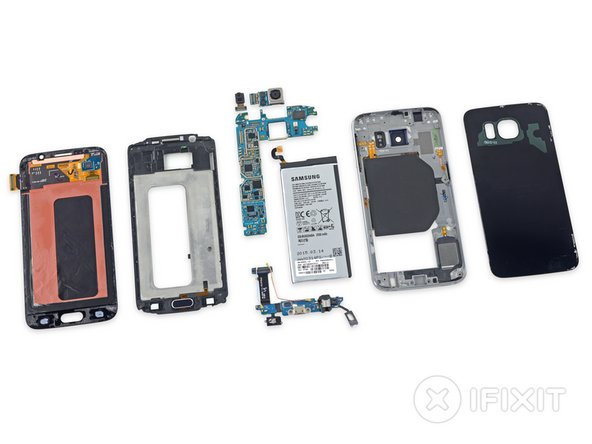
Samsung Galaxy S6 Repairability Score: 4 out of 10 (10 is easiest to repair).
-
Many components are modular and can be replaced independently.
-
The S6 doesn't have the S5's display-first entry, but the display still needs to be removed if you want to replace the USB port.
-
Unlike the S6 Edge, the battery can be removed without first ousting the motherboard—but tough adhesive and a glued-on rear panel make replacement more difficult than necessary.
-
Front and back glass make for double the crackability, and strong adhesive on the rear glass makes it very difficult to gain entry into the device.
-
Replacing the glass without destroying the display is probably impossible.
-


24 Guide Comments
So once the rear glass is removed once the screws are removed the chassis is removed? As I want to replace my chassis on my s6 at some point and don't want to remove anything I don't need to.
Any help is appriated.
We have a full set of step-by-step replacement guides for the components in this phone!
My wife dunked hers in the Pool right after my Daughter's Wedding so we need to get the pictures off.
I tried drying it out for a week before even attempting to turn it on. However it is dead!
Any suggestions?
dissemble it first and replace the dead battery. Usually that's the first component that fails upon touching water. Once dissambled, replaced the dead battery and try again. You will be able to check the rest of component with a minimum investment. Cheers.
kavenzc -
My son put my s6 in the bath. The motherboard is blown. My data is fine to retrieve. Is there a way I can retrieve my data and how much would it cost? and also without replacing the motherboard? I just want my photos and videos. I'm not worried if my phone does not fixed afterwards.