Introduction
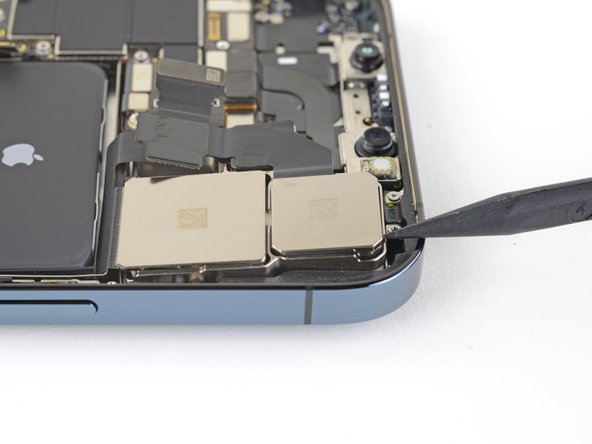
Use this guide to remove and replace the rear cameras in the iPhone 12 Pro Max. All the camera modules are replaced as a single unit.
What you need
-
-
Power off your iPhone before beginning disassembly.
-
Remove the two 6.7 mm-long pentalobe P2 screws at the bottom edge of the iPhone.
-
-
-
Measure 3 mm from the tip and mark the opening pick with a permanent marker.
-
-
-
Lay overlapping strips of clear packing tape over the iPhone's screen until the whole face is covered.
-
If you can't get the suction cup to stick in the next few steps, fold a strong piece of tape (such as duct tape) into a handle and lift the screen with that instead.
-
-
-
Pull the blue handle backwards to unlock the Anti-Clamp's arms.
-
Slide the arms over either the left or right edge of your iPhone.
-
Position the suction cups near the bottom edge of the iPhone—one on the front, and one on the back.
-
Squeeze the cups together to apply suction to the desired area.
-
-
-
Support your iPhone on something sturdy such as a hardcover book so it rests hands-free and parallel to the ground; this makes it easier to work with in the following steps.
-
Use a hair dryer to heat along the bottom edge of the iPhone. The screen should feel slightly too hot to touch.
-
Wait one minute to give the adhesive a chance to release and present an opening gap.
-
Insert an opening pick under the screen's plastic bezel when the Anti-Clamp creates a large enough gap.
-
Skip the next three steps.
-
-
-
Use a hair dryer or a heat gun to heat the bottom edge of the iPhone for 90 seconds or until the screen is slightly too hot to touch.
-
-
-
If you're using a single suction handle, apply it to the bottom edge of the phone, while avoiding the very edge of the glass.
-
-
-
Pull up on the suction cup with firm, constant pressure to create a slight gap between the screen and the frame.
-
Insert an opening pick into the gap under the screen's plastic bezel.
-
-
-
Use a hair dryer to heat the right edge of the iPhone (the edge with the power button) for 90 seconds or until the screen is slightly too hot to touch.
-
-
-
-
Use a hair dryer to heat the top edge of the iPhone for 90 seconds or until the screen is slightly too hot to touch.
-
-
-
Slide the opening pick around the top right corner of the iPhone to separate the top adhesive.
-
Leave the pick in the top left corner before continuing.
-
-
-
Use a hair dryer to heat the left edge of the iPhone for 90 seconds or until the screen is slightly too hot to touch.
-
-
-
Insert a second opening pick in the bottom left corner of the iPhone.
-
Twist both picks simultaneously until the left edge clips release.
-
-
-
Rotate your iPhone so the right edge faces you.
-
Open the iPhone by swinging the display up from the right side, like the front cover of a book.
-
Lean the display against something to keep it propped up while you're working on the phone.
-
-
-
Remove four 1.1 mm-long Y000 screws securing the battery and display connector cover.
-
-
-
Remove the battery and display connector cover.
-
-
-
Use a spudger or a clean fingernail to pry the battery connector up from its socket on the logic board.
-
Bend the connector slightly away from the logic board to prevent it from accidentally making contact with the socket and providing power to the phone during your repair.
-
-
-
Use a spudger or a fingernail to disconnect the display cable connector.
-
-
-
Use a Y000 driver to remove the four 1.1 mm-long screws securing the front sensor connector cover.
-
-
-
Swing the cover up from the left until the small clip on the right unhooks.
-
Remove the cover.
-
-
-
Use a spudger or a fingernail to disconnect the front sensor assembly cable connector.
-
-
-
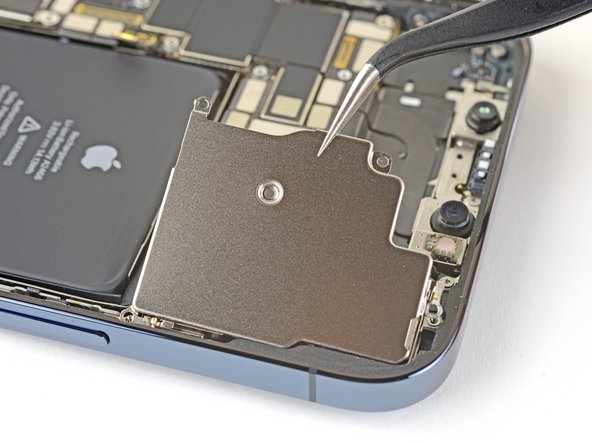
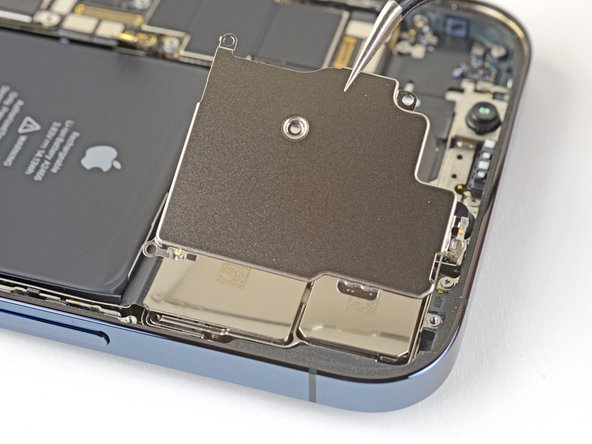
Use a Y000 driver to remove the five 1.5 mm screws securing the rear-facing camera cover.
-
-
-
Lift the camera cover from the edge closest to the logic board, and remove it.
-
-
-
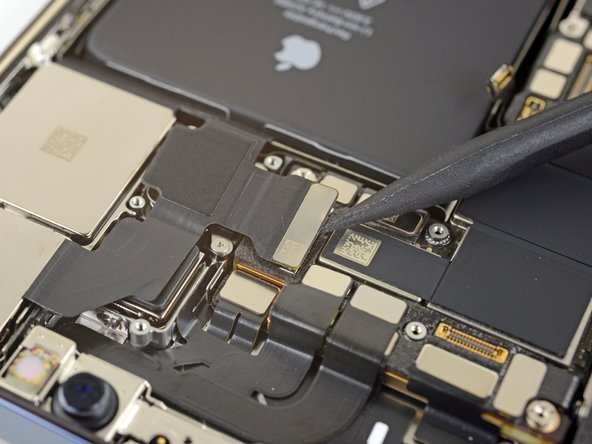
Use a spudger or a fingernail to disconnect the first camera cable connector by prying it straight up from its socket.
-
-
-
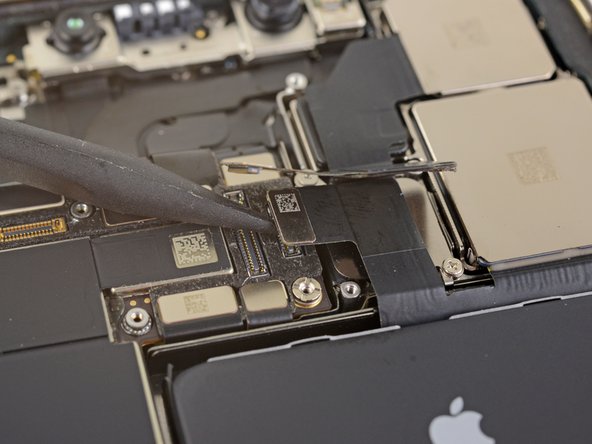
Use the point of a spudger to lift the camera assembly out of the iPhone.
-
Remove the rear-facing cameras.
-
Compare your new replacement part to the original part—you may need to transfer remaining components or remove adhesive backings from the new part before installing.
To reassemble your device, follow the above steps in reverse order.
Take your e-waste to an R2 or e-Stewards certified recycler.
Repair didn’t go as planned? Try some basic troubleshooting, or ask our iPhone 12 Pro Max Answers community for help.
Cancel: I did not complete this guide.
11 other people completed this guide.
7 Comments
I am having issues with image focusing after replacing the back camera for this model. The camera is able to focus on wide angles but not on 1x zoom or higher. We have reset the device and ensured it is fully up to date and the issue has persisted. My conclusion is that the camera is faulty and I will need a new replacement camera. Anything else I might be missing?
This guide should start by saying that an iPhone 12 camera repair or replacement can NOT be made without access to a proprietary Apple tool which is only available to technicians authorized by the company. The issue was confirmed by an Apple training guide, which informs technicians that they will need to run Apple’s proprietary, cloud-linked System Configuration app in order to carry out camera repairs or replacements.
In short, this prevents DIY repairs at home, as well as those by third-party companies who do not have access to the online software tool …
So the repair guide is great. However you should not buy the camera from ifixit. You need to go to https://selfservicerepair.com/ and buy the camera there. You can get all the tools and anything you need from ifixit but you need to order the part from the apple selfservicerepair and enter your serial number. Then follow this guide and contact them through your order details to initiate the calibration. The process requires you to contact the service rep and have them connect to your phone and lead you through the calibration. Worked like a charm and wasn't that hard of a repair. Thanks ifixit for all of the info!
Would this fix a buzzing noise coming from the camera?


