Introduction
Use this guide to replace a worn out or dead battery in a SteelSeries Nimbus+ controller.
For your safety, discharge the battery below 25% before disassembling your controller. This reduces the risk of fire if the battery is accidentally damaged during the repair. If your battery is swollen, take appropriate precautions.
You’ll need replacement adhesive when reassembling your device.
What you need
-
-
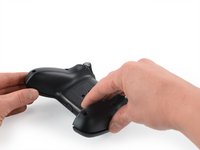
Use your fingers to remove the phone mount by pulling it straight out of the controller.
 Ask FixBot
-
-
-
Use your fingers to remove the sticker located on the back cover of the Nimbus+.
-
-
-
Use a Y1 Tri-point screwdriver to remove the five 9.1 mm-long screws securing the back cover.
-
-
-
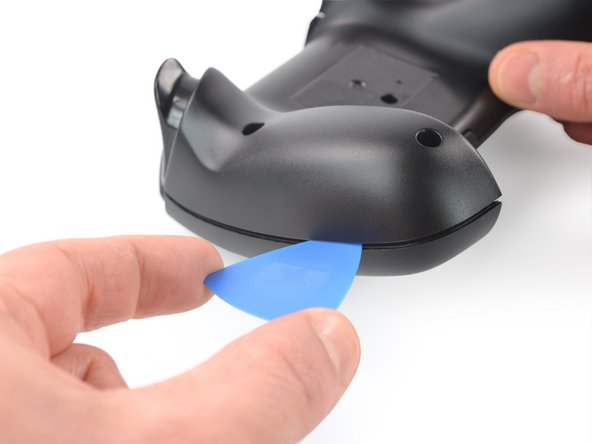
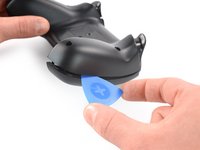
Insert an opening pick into the gap between the front and back cover assembly at the outside of the right controller handle.
-
-
-
-
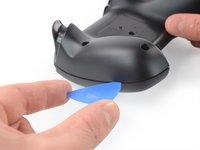
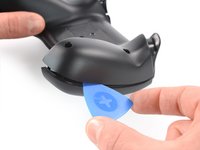
Slide the opening pick to the top of the controller to release the remaining plastic clips on the right edge.
-
-
-
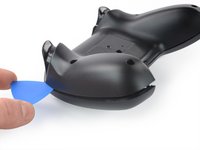
Insert an opening pick into the gap between the front and back cover assembly at the outside of the left controller handle.
-
-
-
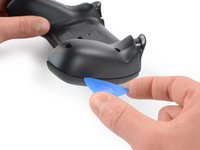
Slide the opening pick to the top of the controller to release the remaining plastic clips on the left edge.
-
-
-
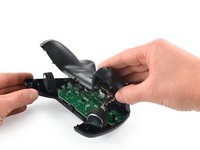
Carefully fold the back cover assembly to the top of the SteelSeries Nimbus+ and bring it in an 90 degree angle.
-
-
Tool used on this step:Tweezers$4.99
-
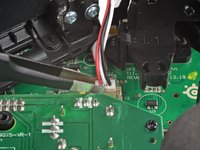
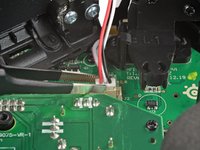
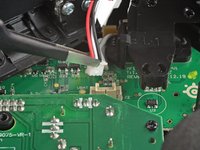
Use a pair of blunt nose tweezers to disconnect the battery cable from the mainboard.
-
-
-
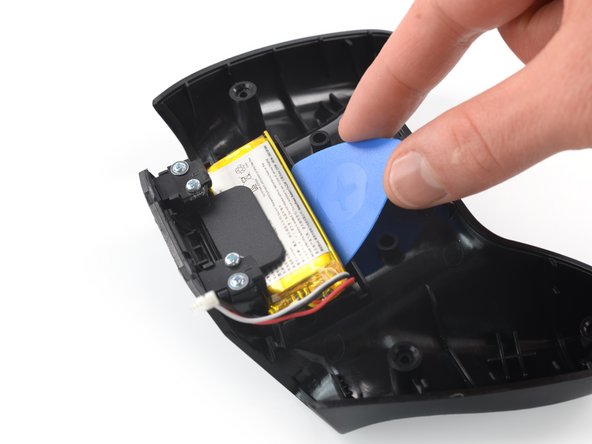
Insert the edge of an opening pick into the gap between the battery and the back cover assembly.
-
Use the opening pick to carefully pry up the battery and loosen the adhesive.
-


To reassemble your device, follow these instructions in reverse order.
For optimal performance, calibrate your newly installed battery after completing this guide.
Take your e-waste to an R2 or e-Stewards certified recycler.
Repair didn’t go as planned? Check out our Answers community for troubleshooting help.
Cancel: I did not complete this guide.
One other person completed this guide.


1 Guide Comment
Useless directions. The battery has 3 connectors. What is the mode? Where can you buy it? Polarity? If you have one with the right voltage and amps; but has two connectors what's do you do?
All this so-called repair guide says is: "This is how you open the case". Fantastic and then what???