Introduction
Use this guide to replace the Moto G4’s rechargeable battery. If your battery is swollen, take appropriate precautions.
Before you begin, download the Rescue and Smart Assistant app to backup your device and diagnose whether your problem is software or hardware related.
For your safety, discharge your existing battery below 25% before disassembling your phone. This reduces the risk of a dangerous thermal event if the battery is accidentally damaged during the repair.
What you need
-
-
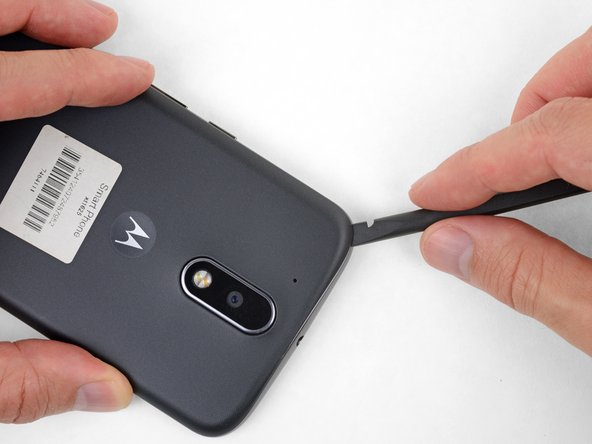
Insert a fingernail or a spudger into the notch on the bottom edge of the phone, near the charge port.
-
Gently twist or pry to open a small gap between the back cover and the body of the phone.
-
While keeping your tool (or fingernail) inserted into the gap between the back cover and the body of the phone, slide it around the corner to begin loosening the plastic clips holding the cover in place.
-
-


Carefully compare your new replacement part to the original part. Remove any adhesive backings before installing your new battery.
To reassemble your device, follow the above steps in reverse order.
After completing this guide, calibrate your newly-installed battery.
Take your e-waste to an R2 or e-Stewards certified recycler.
Repair didn’t go as planned? Check out our Answers community for troubleshooting help.
Cancel: I did not complete this guide.
45 other people completed this guide.


17 Comments
Bought the battery from Ifixit because I’ve enjoyed your videos. I changed the battery, all seemed well, but now I get no sound out of the speakers! They are not mentioned on any of the topics. Help!?
See the comment on this step. Make sure the two little copper prongs on the back of the speaker make good contact with their respective pads on the back of the midframe. It’s okay to (very gently) bend them up slightly if needed.
bought battery and kit from ifixit. replacement went pretty well. Careful with those tiny little screws. They do not like to come out after loosening. I worked over a small tray and still had two get away from me. I also had some tape on the sim card side of battery not mentioned in instructions. I tore it pulling it back. Was concerned as it seemed to be foil faced on back side which sepperated when pulling up. All works though so no worries.
Bonjour,
Etes-vous sûr pour le modèle du tournevis ?
J’ai échoué avec le Torx T3, mais réussi avec le Torx T4
It definitely should be a T3, but not all driver kits are created equal. If a T4 works better for you, go with that ;)