Free Shipping on Domestic Orders $75+

Introduction
There are few electronics problems more disheartening than a device that doesn't power on. Other issues have workarounds. But a device that won't power on can't be circumvented. It feels so final like there are only so many things you can try before you write its death certificate and toss it in the trash. In truth, resurrecting a dead MacBook is more like a mystery novel. A few good clues can make all the difference.
The Basics
Before undertaking any of the more time-consuming solutions below, these are a few fundamentals to get you started.
- Perform a hard reset. Press and hold your power button for about fifteen seconds, then release it. Wait a few seconds, then try to power it on again.
- Disconnect any peripherals. Docks or multi-port hubs are notoriously problematic, especially if they have many items connected.
- Reset the System Management Controller (or SMC). They can clear any incorrect or bad startup settings which are handled by the SMC.
- Reset the PRAM or NVRAM. These are terms for a small amount of memory that contains system settings for the Mac. Resetting it may clear a bad setting.
- Check for any signs of power. If you're getting any response here, your issue is more likely to be related to a blank display.
- Trackpad clicks. Note: This only applies to MacBook Pros 2015 and newer, MacBook Airs 2018 and newer, and all Retina MacBooks.
- Keyboard lights are on
- CAPS Lock LED lights when pressed
- The Touch Bar is on.
- Audible fan spin, or heat exhausting from the vents.
- The display backlight is on. This can be subtle and is best observed in a dark room. The Apple logo would also be lit if your model has a white Apple logo on the lid.
- Sound when connecting a charger.
Causes
Your computer itself could be perfectly fine, but you’ve got a faulty charger. Or even your electrical outlet. Be certain to try another charger, if you have one available to you.
- If it’s a MagSafe model, check to see if the charger light is on. If it is not, it narrows the issue down some. No MagSafe LED points to the charger, Power-In Board, Logic Board, or even the trackpad on some models.
- Flip the charger the other way (180 degrees from the way you connected it before). Sometimes an issue only exists on one side of the reversible charger plug.
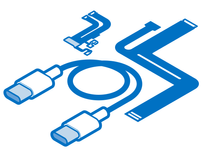
- USB C models may just need a new cable. Chargers for these no longer have the cable permanently attached to the power brick.

Batteries are nefarious. They fail often, due to their “consumable” nature, but not always in predictable ways. Although they typically die slowly and with diminishing power on time, a bunk battery could absolutely cause a no-power problem.
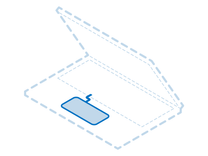
- Disconnect the battery and try to power it on. Most MacBooks will boot without it. If it powers up, your battery is likely your issue.
- Note: Some Macs have unconventional means of disconnecting the battery. Consult the Guide for your model to ensure it is done properly.
- It is normal for Macs to boot slowly with high fan speed in the absence of a connected battery. This is a protective mode that kicks in if data from thermal sensors, like those in the battery, are outside expected values.
- Check for visual signs of battery age, swelling, or leak. Swollen batteries may manifest as difficulty in using the trackpad or the keyboard. As the battery expands, it exerts upward pressure on the underside of these components.
If you need to, you can replace your MacBook battery with a quality-tested unit from our store.

Find compatible replacement parts for your Mac Laptop. All parts and fix kits are backed by the iFixit Quality Guarantee.
If your Mac is from 2018 or newer, it’s possible your MacBook encountered an error or lost power when it was updating the firmware. This might make it appear as though it is not powering on when it just doesn’t have the directions to boot up properly. Direct Firmware Upgrade or DFU mode can help to diagnose or solve this issue.
- Press and hold the power button for a solid twenty seconds. Release the button, wait a few seconds, and attempt to power it on again. This will force a normal boot attempt if your device was inadvertently put into DFU mode.
- To reinstall a known good copy of the firmware, you will need a second Mac that can run Apple Configurator 2 and a USB C cable.
- Follow the Apple Support page to get your Mac into DFU mode. You may need to disconnect and reconnect the cable between the two Macs to get Configurator to recognize the device.
- Note: The procedure for Macs with Apple Silicon processors varies slightly.
- If your device is not recognized, or will not enter DFU mode, skip ahead to the next section.
- Attempt a revive first. This will install a new copy of the device firmware. You should get an Apple logo on the device screen at some point during this process.
- If the Revive is unsuccessful, ensure you have a good backup and try a Restore. Note: This will reinitialize the internal storage. Your data will be erased, you may also need to reinstall the operating system depending on the device model.
- If you encounter an error during this process, try a different USB cable, internet connection, or both. If you are still unsuccessful, head over to the Answers Forum where you can get some more individual assistance. Make note of any error codes you get. They can help diagnose the underlying issue.

- 30 minutes - 1 hourVery easy
MacBook power input comes in several flavors, depending on the model. Whether sporting an old-fashioned barrel connector, one of the three MagSafe varieties, or USB C, it’s a common failure point and the conduit for power to enter the system.
- Perform a thorough visual inspection of the port. Use a flashlight for USB C port interiors. It’s an easy entry point for liquid. Corrosion can live here easily, undetected.
- Check for signs of corrosion or burn. If anything looks questionable, open up the machine and pull out the affiliated part. USB C ports in particular will benefit from this sort of inspection.
- USB C ports are commonly damaged by spills. Even if liquid doesn't penetrate the machine's interior, corrosion in the port can spell trouble.
- MagSafe ports will more often be visibly charred externally.
- Pay extra attention if you are using a third-party charger. They are significantly more likely to cause damage to the port or your computer.
- MacBook Airs, have their MagSafe board attached to a general Input Output (I/O) Board (some can be found here), which may need to be replaced if the light on your charger isn’t coming on.
- These boards are full of test points, (the metallic circles scattered across the board). Due to their proximity to the edge of the machine, they are prone to patina, corrosion, or deterioration.
- Some of these are purely test points intended to measure the circuit. Others are points where you can tap into an existing electrical path. If the copper has degraded, the line it is on may be broken.
- Cables connecting these boards to the logic board may also be at fault.
 Bent Pins on USB C Port |  MacBook Air IO Board with discolored test points |  Charred MagSafe 2 Port |

Find compatible replacement parts for your Mac Laptop. All parts and fix kits are backed by the iFixit Quality Guarantee.
Find compatible replacement parts for your Mac Laptop. All parts and fix kits are backed by the iFixit Quality Guarantee.
Although it seems like an unusual cause for No Power, trackpads, or the trackpad cable is an extremely common cause due to one simple culprit—liquid. The lack of significant protection from liquid in this area makes it a hot spot for corrosion.

- Unplug the trackpad from the logic board and attempt to power it on. You’ll likely get a very slow boot and high fan speeds. This is expected. It is a result of a protective mode Macs use when data from thermal sensors, like the one in the trackpad, are absent.
- MacBook Air is especially prone to this fault. Remove the battery and check along the edges of the trackpad for signs of liquid. The cable connector here tends to get hit.
- If the trackpad has been affected by liquid, clean it up with some isopropyl alcohol and a cotton swab, then retest.
- The metal contacts on the connectors often take a beating in cases of liquid exposure. Replacement of the cable, the trackpad, or both may be necessary. Magnification may be helpful to determine the extent of the damage.

$29.99
3.9
14 reviews
Find compatible replacement parts for your Mac Laptop. All parts and fix kits are backed by the iFixit Quality Guarantee.
Find compatible replacement parts for your Mac Laptop. All parts and fix kits are backed by the iFixit Quality Guarantee.
Like many other devices, Wi-Fi functionality for MacBooks was added by connecting a dedicated card for wireless internet and Bluetooth. These cards have since become integrated into the logic board itself but can malfunction in either form.
2017 MacBook Airs, 2015 MacBook Pros, and Earlier
- These models have a dedicated Wi-Fi or Airport Card. Try removing it and rechecking for power.
- Be sure to note the order of the antenna cables when you disconnect them. It is not always intuitive.
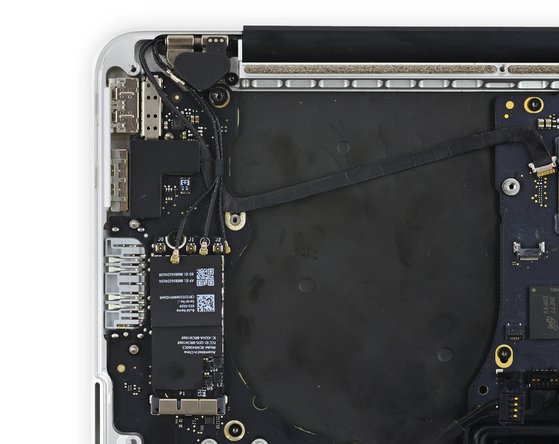
All Retina MacBooks, 2018 MacBook Airs, 2016 MacBook Pros, and Later
- These devices have their Wi-Fi card soldered directly to the logic board. This makes a correct diagnosis more difficult, but not impossible.
- Check for signs of heat, liquid, or any other damage to the Wi-Fi chip itself or the surrounding areas.
- If you suspect this may be the issue, you'll want to skip ahead to the "Logic Board" section of this page.

Find compatible replacement parts for your Mac Laptop. All parts and fix kits are backed by the iFixit Quality Guarantee.
Believe it or not, a bad hard drive or solid state drive (SSD), can result in no power. Storage has evolved a lot in the last few decades so you'll have to determine which sort of storage your device has first and foremost.
Non-Retina 2012 MacBook Pros, 2009 MacBook Airs, and Earlier
- These MacBooks contain a "traditional" style Hard Drive Disk or HDD in the 2.5" form factor.
- Disconnect the hard drive cable from the logic board and recheck for signs of power.
- If you do get power, reconnect the cable and disconnect the drive itself to isolate the problematic part. Replace whichever part results in no power when connected
- You may want to replace the cable regardless if you have a 2012 Unibody MacBook Pro due to its notoriety for failure.
- Replacing your existing HDD with a Solid State Drive (SSD) is a great way to give your aging Mac a speed boost, even if you determine it's not the issue.
Retina 2012-2015 MacBook Pros and 2010-2017 MacBook Airs
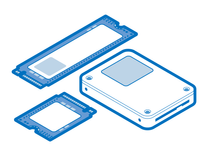
- These Macs have a removable SSD which Apple designed in their own proprietary blade style. The number of pins varies slightly depending on the model, but are essentially a smaller board that connects to a slot on the logic board.
- Remove the SSD and recheck for power.
- If your device powers on without the driver connected, replace it.
- Do some research on the various types of replacements since there are a bevy of options.
- First-party Apple SSDs are available used, third-party vendors also make SSDs in Apple's form factor, and adapters are also available to convert an m.2 style SSD to Apple's slot.
2016-2017 13" MacBook Pro With Function Keys
These Macs have a removable SSD which Apple designed in their own proprietary blade style.
- Remove the SSD and recheck for power.
- If your device powers on, do some research on the various types of replacements since there are a bevy of options. First-party Apple SSDs are available used. Third-party vendors also made SSDs in Apple's form factor and adapters are also available to convert an m.2 style SSD to Apple's slot.
All Retina MacBooks, 2016 MacBook Pros, 2018 MacBook Airs, and Newer
- Newer models will have their storage soldered onto the logic board, so disconnecting it isn’t an option. The storage itself is unlikely to be the cause in this case anyway, although it may have become collateral damage. Skip ahead to the “Faulty Logic Board” section if you suspect this might be the case.
Find compatible replacement parts for your Mac Laptop. All parts and fix kits are backed by the iFixit Quality Guarantee.
The logic board is the hub for the vast majority of a MacBook’s functionality. Any number of the small components on the board may have failed or become damaged. Logic board fault is a safe assumption of cause if nothing else on this page has worked.
- Check for obvious signs of a board issue - burned or cracked components, liquid residue, corrosion, or bend. If there are signs of liquid, there’s still hope your Mac can be resurrected.
- Replacing the logic board is often the most practical solution for a DIYer whose board has failed. If your board has failed, and you need data, you still have options.
- If you’re feeling especially curious, the tiny components on the board can be repaired with microsoldering. It is an art unto itself, but a worthy endeavor. If you’re curious and want to know more about getting into micro soldering, here’s some good reading and some good watching to get you started.

- No estimateModerate

Find compatible replacement parts for your Mac Laptop. All parts and fix kits are backed by the iFixit Quality Guarantee.
About the Author
Despite holding an ACMT certification (or maybe specifically because of this), the MacBook I’m writing this on is cobbled together from at least three separate machines and the touchpad is entirely the wrong color. I think this says everything you need to know about me as a Mac technician.
You're seeing solutions for Mac Laptop. Select your model to find parts for your device.
Related Problems


7 common problems
View all