Introduction
Is your phone not detecting your charging cable? Does your charging port feel loose? It might be time to replace your Lightning connector assembly. Use this guide to replace the Lightning connector assembly which includes the lower microphones, antenna cable, and Lightning connector.
Note that this repair does require a fair amount of disassembly, and it will require time and caution.
What you need
-
-
Power off your iPhone before beginning disassembly.
-
Remove the two 3.4 mm pentalobe screws on the bottom edge of the iPhone.
-
-
-
Use a hairdryer or prepare an iOpener and apply it to the lower edge of the iPhone for about a minute in order to soften up the adhesive underneath.
-
-
-
Pull up on the suction cup to create a small gap between the display assembly and the rear case.
-
Insert the flat end of a spudger into the gap.
-
-
-
Slide the spudger to the left along the lower edge of the iPhone.
-
Twist the spudger to widen the gap between the display and rear case.
-
-
-
Slide the spudger up the left side of the iPhone, starting at the lower edge and moving towards the volume control buttons and silent switch.
-
-
-
Insert the flat edge of a spudger into the bottom right corner of the device.
-
Twist the spudger to widen the gap between the display assembly and the rear case.
-
Slide the flat end of the spudger up the right side of the phone to break up the adhesive holding the display in place.
-
-
-
Slide an opening pick along the top edge of the iPhone, between the rear case and front panel, to break up the remaining adhesive holding the screen in place.
-
-
-
Pull the display assembly slightly away from the top edge of the phone to disengage the clips holding it to the rear case.
-
Open the iPhone by swinging the display up from the left side, like the back cover of a book.
-
-
-
Remove four tri-point Y000 screws securing the lower connector bracket, of the following lengths:
-
Three 1.2 mm screws
-
One 2.4 mm screw
-
-
-
Use the point of a spudger to lift the battery connector out of its socket on the logic board.
-
-
-
Use a spudger or a fingernail to disconnect the two lower display connectors by prying them straight up from their sockets on the logic board.
-
-
-
Remove the two 1.3 mm Phillips #000 screws securing the bracket over the front panel sensor assembly connector.
-
-
-
Remove the two 1.9 mm Phillips screws securing the barometric vent to the rear case.
-
-
-
Use the flat end of a spudger to disconnect the Taptic Engine connector from its socket on the logic board.
-
-
-
-
Remove the Phillips screw securing the Wi-Fi diversity antenna to the rear case:
-
One 3.2 mm screw
-
-
-
Remove the following three Phillips screws securing the speaker to the rear case:
-
Two 1.3 mm screws
-
One 2.0 mm screw
-
-
-
Use the point of a spudger to lift the two antenna cable connectors up off of the sockets on the logic board.
-
-
-
Use the tip of a spudger to slide the speaker assembly towards the logic board and off of the rear case.
-
-
-
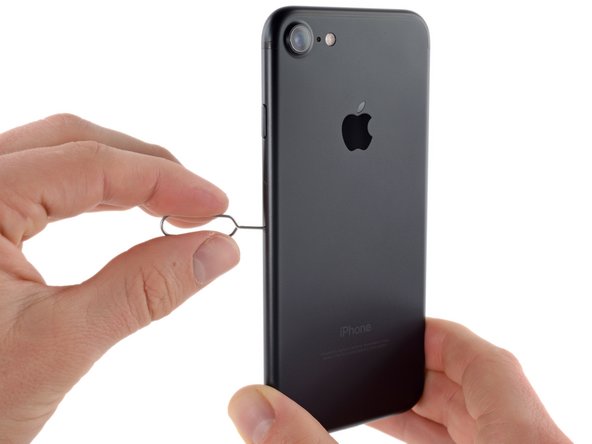
Insert a SIM card eject tool or a paperclip into the small hole in the SIM card tray.
-
Press to eject the tray.
-
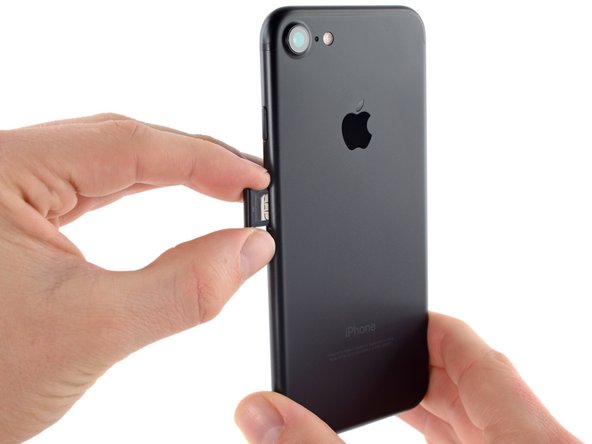
Remove the SIM card tray assembly from the iPhone.
-
-
-
Use the flat end of a spudger to disconnect the rear-facing camera connector.
-
-
-
Remove the following Phillips screws securing the rear camera bracket to the rear case:
-
One 1.3 mm screw
-
One 2.5 mm screw
-
-
-
Use the pointed end of a spudger to pry up and disconnect the antenna bus connector, just left of the rear camera module.
-
-
-
Remove the four Phillips screws securing the Wi-Fi antenna:
-
Three 1.2 mm screws
-
One 1.7 mm screw
-
-
-
Use the point of a spudger to disconnect the lower cable connector.
-
-
-
Remove the following screws:
-
One 1.4 mm Phillips screw
-
Three 2.2 mm standoff screws
-
In a pinch, a small flathead screwdriver will do the job—but use extra caution to ensure it doesn't slip and damage surrounding components.
-
-
-
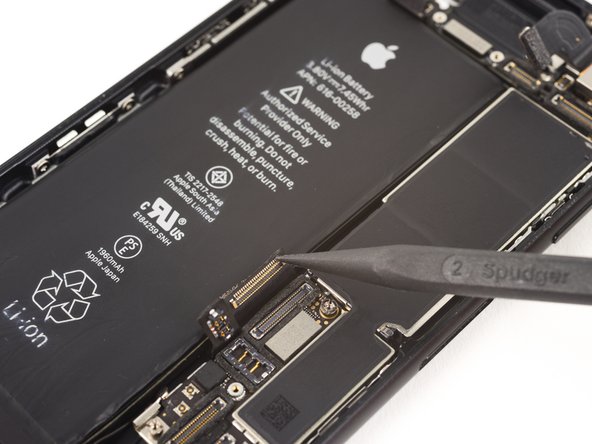
Use the flat end of a spudger to gently lift the battery connector end of the logic board up.
-
-
-
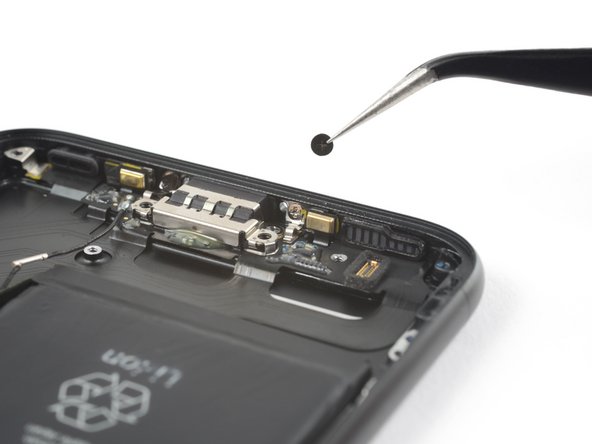
Remove the two stickers covering the screws that secure the lightning connector to the bottom of the rear case.
-
-
-
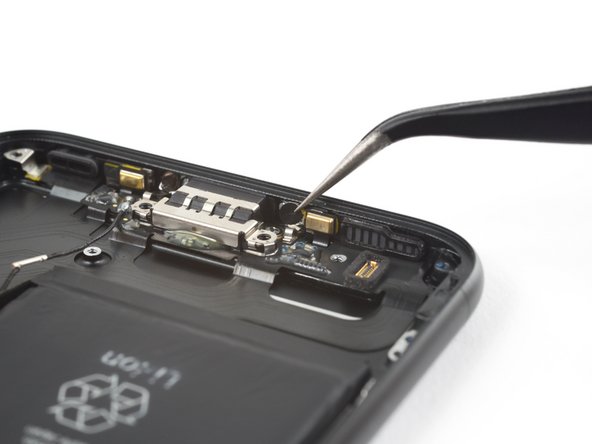
Use the pointed end of a spudger to separate the two microphones from the bottom of the rear case.
-
-
-
Use a hairdryer or reheat your iOpener to heat the lower edge of the phone.
-
Wait for about a minute, allowing the adhesive to warm up before proceeding to the next step.
-
-
-
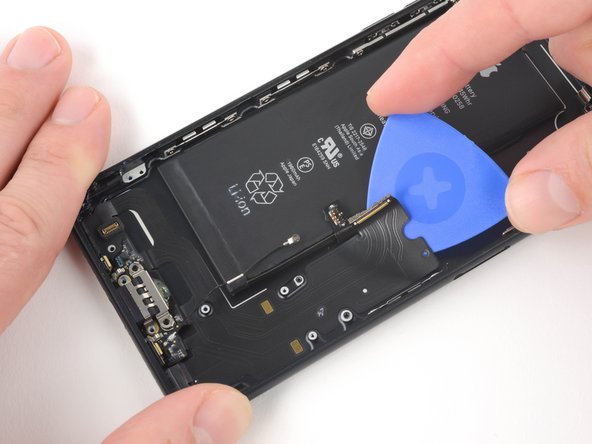
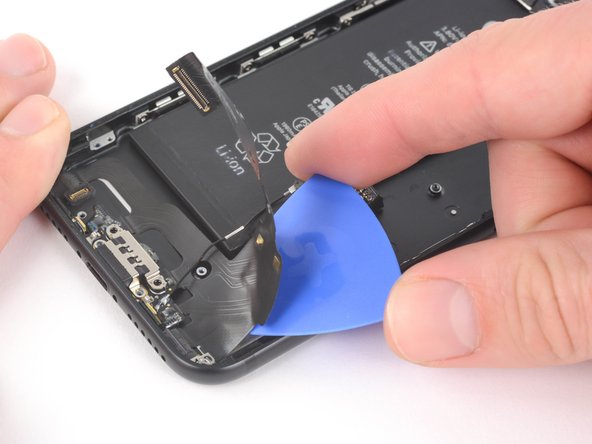
Starting from the middle of the phone, slide an opening pick underneath the lightning connector to separate it from the rear case.
-
-
-
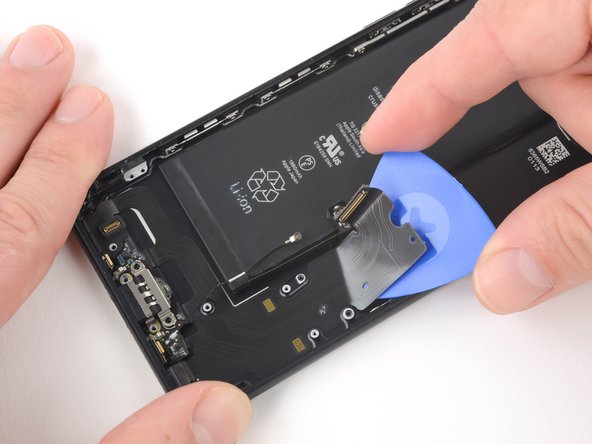
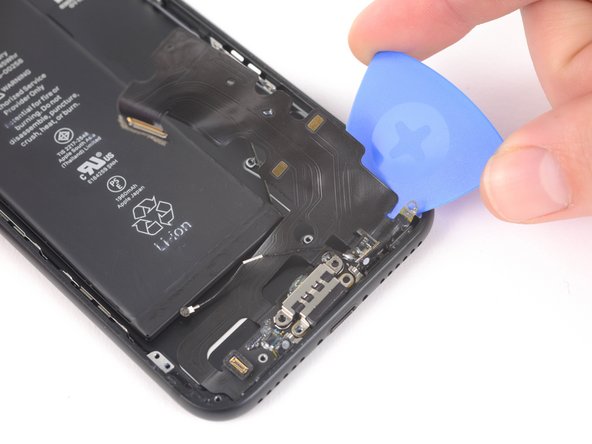
Continue to slide the pick towards the lightning connector to further separate the assembly from the rear case.
-
-
-
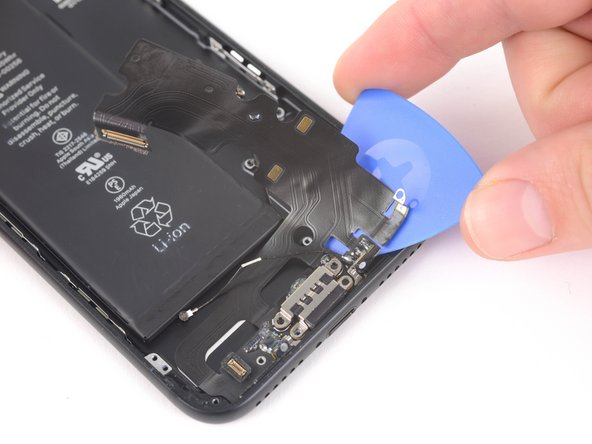
Continue to slide the pick underneath the lightning connecter assembly.
-
Stop sliding the pick once it passes the battery.
-
-
-
Starting at the corner of the phone, slide the pick underneath the assembly towards the lightning connector.
-
Stop sliding the pick when it reaches the lightning connector.
-
-
-
Slide a pick below the lightning connector to further separate the lightning connector assembly from the rear case.
-
Continue to slide the pick until the lightning connector assembly is no longer adhered to the rear case.
-
-
-
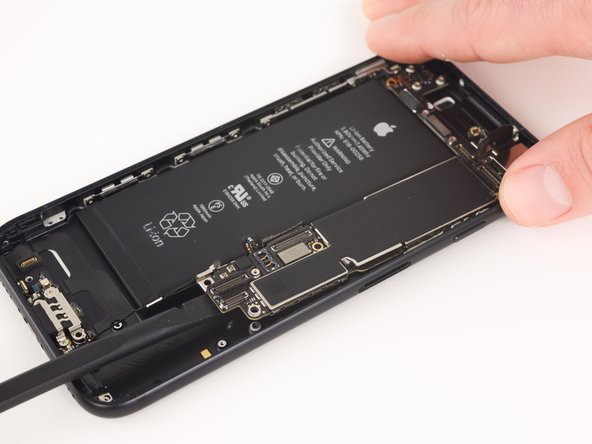
Remove the lightning connector assembly.
-
Use a plastic tool to scour any bits of adhesive residue from the rear case.
-
Make sure the Lightning connector assembly is correctly positioned so that the two white dots on the iPhone's rear case show through the two circular cutouts in the Lightning flex cable. If they don't, the flex cable will remain misaligned and you won't be able to reconnect it to its socket on the logic board.
-