Free Shipping on Domestic Orders $75+

iPad Pro 12.9" 3rd Gen Battery Blocking

Prerequisite Only
This is a prerequisite-only guide! This guide is part of another procedure and isn’t meant to be used alone.

What you need

    1. iPad Pro 12.9" 3rd Gen Battery Blocking, Heat the right edge: step 1, image 1 of 1
      • Apply a heated iOpener to the right edge of the screen for two minutes.

      • A hair dryer, heat gun, or hot plate may also be used, but be careful not to overheat the iPad—the screen and internal battery are susceptible to heat damage.

      Ask FixBot

      Add Comment

    2. iPad Pro 12.9" 3rd Gen Battery Blocking, Anti-Clamp instructions: step 2, image 1 of 3 iPad Pro 12.9" 3rd Gen Battery Blocking, Anti-Clamp instructions: step 2, image 2 of 3 iPad Pro 12.9" 3rd Gen Battery Blocking, Anti-Clamp instructions: step 2, image 3 of 3
      Tool used on this step:
      Clampy - Anti-Clamp
      $24.95
      Buy
      • The next three steps demonstrate the Anti-Clamp, a tool we designed to make the opening procedure easier. If you aren't using the Anti-Clamp, skip down three steps for an alternate method.

      • For complete instructions on how to use the Anti-Clamp, check out this guide.

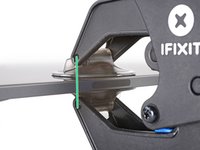
      • Pull the blue handle backward to unlock the Anti-Clamp's arms.

      • Place an object under your iPad so it rests level between the suction cups.

      • Position the suction cups near the middle of the right edge—one on the top, and one on the bottom.

      • Hold the bottom of the Anti-Clamp steady and firmly press down on the top cup to apply suction.

      • If you find that the surface of your iPad is too slippery for the Anti-Clamp to hold onto, use tape to create a grippier surface.

      Ask FixBot

      Add Comment

    3. iPad Pro 12.9" 3rd Gen Battery Blocking: step 3, image 1 of 3 iPad Pro 12.9" 3rd Gen Battery Blocking: step 3, image 2 of 3 iPad Pro 12.9" 3rd Gen Battery Blocking: step 3, image 3 of 3
      • Pull the blue handle forward to lock the arms.

      • Turn the handle clockwise 360 degrees or until the cups start to stretch.

      • Make sure the suction cups remain aligned with each other. If they begin to slip out of alignment, loosen the suction cups slightly and realign the arms.

      Ask FixBot

      Add Comment

    4. iPad Pro 12.9" 3rd Gen Battery Blocking: step 4, image 1 of 2 iPad Pro 12.9" 3rd Gen Battery Blocking: step 4, image 2 of 2
      • Wait one minute to give the adhesive a chance to release and present an opening gap.

      • If your screen isn't getting hot enough, you can use a hair dryer to heat along the right edge of the iPad.

      • For complete instructions on how to use a hair dryer, check out this guide.

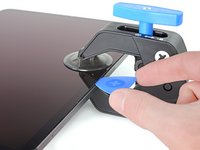
      • Insert an opening pick under the screen when the Anti-Clamp creates a large enough gap.

      • If the Anti-Clamp doesn't create a sufficient gap, apply more heat to the area and rotate the handle clockwise half a turn.

      • Don't crank more than a half a turn at a time, and wait one minute between turns. Let the Anti-Clamp and time do the work for you.

      • Skip the next step.

      Ask FixBot

      Add Comment

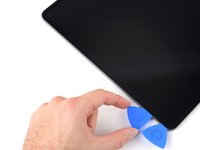
    5. iPad Pro 12.9" 3rd Gen Battery Blocking, Insert an opening pick: step 5, image 1 of 3 iPad Pro 12.9" 3rd Gen Battery Blocking, Insert an opening pick: step 5, image 2 of 3 iPad Pro 12.9" 3rd Gen Battery Blocking, Insert an opening pick: step 5, image 3 of 3
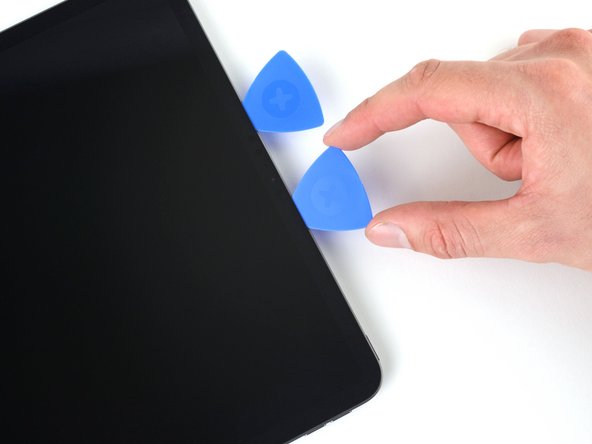
      • If your screen is badly cracked, covering it with a layer of clear packing tape may allow the suction cup to adhere. Alternatively, very strong tape may be used instead of the suction cup. If all else fails, you can superglue the suction cup to the broken screen.

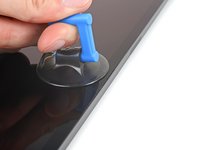
      • Apply a suction handle to the screen as close to the center of the right edge as possible.

      • Pull up on the suction handle with a strong, steady force to create a small gap between the frame and screen.

      • The large screen is very fragile. Only create a gap big enough to insert an opening pick.

      • If you're having trouble making a gap, reapply a heated iOpener to the right edge for two minutes.

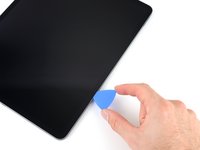
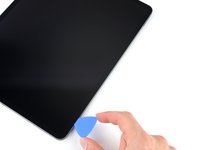
      • Insert an opening pick into the gap.

      • Don't insert the pick more than 5 mm to avoid damaging the screen.

      Ask FixBot

      Add Comment

    6. iPad Pro 12.9" 3rd Gen Battery Blocking, Right edge information: step 6, image 1 of 3 iPad Pro 12.9" 3rd Gen Battery Blocking, Right edge information: step 6, image 2 of 3 iPad Pro 12.9" 3rd Gen Battery Blocking, Right edge information: step 6, image 3 of 3
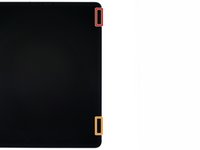
      • There are two 2 cm-long magnets along the right edge of the screen. Don't insert your opening pick more than 2 mm to avoid damaging the screen in these locations:

      • The first magnet begins about 3 cm from the top of the iPad.

      • The second magnet begins about 3 cm from the bottom of the iPad.

      • Everywhere else, don't insert your opening pick more than 5 mm.

      Ask FixBot

      Add Comment

    7. iPad Pro 12.9" 3rd Gen Battery Blocking, Separate the right adhesive: step 7, image 1 of 3 iPad Pro 12.9" 3rd Gen Battery Blocking, Separate the right adhesive: step 7, image 2 of 3 iPad Pro 12.9" 3rd Gen Battery Blocking, Separate the right adhesive: step 7, image 3 of 3
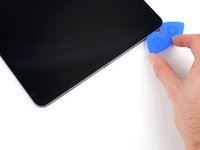
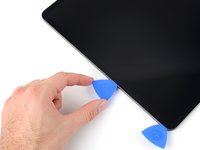
      • Slide your opening pick along the right edge of the screen to separate the adhesive.

      • Angle your pick downward and insert up to a 2 mm depth near the magnet cutouts and 5 mm everywhere else.

      • Leave the pick inserted in the bottom right corner before continuing.

      Ask FixBot

      Add Comment

    8. iPad Pro 12.9" 3rd Gen Battery Blocking, Separate the corner adhesive: step 8, image 1 of 2 iPad Pro 12.9" 3rd Gen Battery Blocking, Separate the corner adhesive: step 8, image 2 of 2
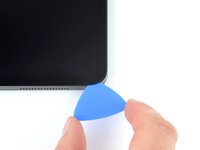
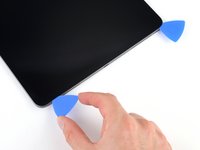
      • Slide your opening pick around the bottom right corner of the screen to separate the adhesive.

      • Leave your pick in the bottom right corner to prevent the adhesive from resealing.

      Ask FixBot

      Add Comment

    9. iPad Pro 12.9" 3rd Gen Battery Blocking, Heat the bottom edge: step 9, image 1 of 1
      • Apply a heated iOpener to the bottom edge of the screen for two minutes.

      Ask FixBot

      Add Comment

    10. iPad Pro 12.9" 3rd Gen Battery Blocking, Separate the bottom adhesive: step 10, image 1 of 3 iPad Pro 12.9" 3rd Gen Battery Blocking, Separate the bottom adhesive: step 10, image 2 of 3 iPad Pro 12.9" 3rd Gen Battery Blocking, Separate the bottom adhesive: step 10, image 3 of 3
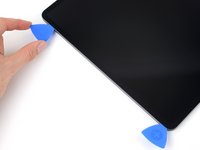
      • Insert a second opening pick under the bottom right corner of the screen.

      • Don't insert your opening pick more than 5 mm.

      • Slide your pick to the bottom left corner to separate the bottom adhesive.

      Ask FixBot

      Add Comment

    11. iPad Pro 12.9" 3rd Gen Battery Blocking, Slice the corner adhesive: step 11, image 1 of 2 iPad Pro 12.9" 3rd Gen Battery Blocking, Slice the corner adhesive: step 11, image 2 of 2
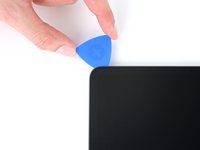
      • Rotate your opening pick around the bottom left corner of the screen.

      • Leave your pick in the bottom left corner to prevent the adhesive from resealing.

      Ask FixBot

      Add Comment

    12. iPad Pro 12.9" 3rd Gen Battery Blocking, Heat the left edge: step 12, image 1 of 1
      • Apply a heated iOpener to the left edge of the screen for two minutes.

      Ask FixBot

      Add Comment

    13. iPad Pro 12.9" 3rd Gen Battery Blocking, Left edge information: step 13, image 1 of 3 iPad Pro 12.9" 3rd Gen Battery Blocking, Left edge information: step 13, image 2 of 3 iPad Pro 12.9" 3rd Gen Battery Blocking, Left edge information: step 13, image 3 of 3
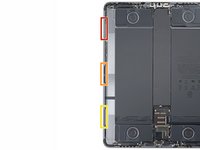
      • There are three cutouts along the left edge of the screen where the adhesive is very thin. Don't insert your opening pick more than 2 mm to avoid damaging the screen at these cutouts:

      • The upper cutout begins 4 cm from the top of the frame and is 3 cm long.

      • The middle cutout begins 12 cm from the top of the frame and is 3 cm long.

      • The bottom cutout is 4 cm from the bottom of the frame and is 3 cm long.

      • Everywhere else, don't insert your opening pick more than 5 mm.

      Ask FixBot

      Add Comment

    14. iPad Pro 12.9" 3rd Gen Battery Blocking, Slice the left adhesive: step 14, image 1 of 3 iPad Pro 12.9" 3rd Gen Battery Blocking, Slice the left adhesive: step 14, image 2 of 3 iPad Pro 12.9" 3rd Gen Battery Blocking, Slice the left adhesive: step 14, image 3 of 3
      • Insert a third opening pick under the bottom left corner of the screen.

      • Slide your pick to the top left corner to slice the left adhesive, making sure to avoid the cutouts shown in the previous step.

      • Leave the pick inserted in the top left corner before continuing.

      Ask FixBot

      Add Comment

    15. iPad Pro 12.9" 3rd Gen Battery Blocking, Slice the corner adhesive: step 15, image 1 of 2 iPad Pro 12.9" 3rd Gen Battery Blocking, Slice the corner adhesive: step 15, image 2 of 2
      • Slide your opening pick around the top left corner of the screen.

      • Leave your pick in the top left corner to prevent the adhesive from resealing.

      Ask FixBot

      Add Comment

    16. iPad Pro 12.9" 3rd Gen Battery Blocking, Heat the top edge: step 16, image 1 of 1
      • Apply a heated iOpener to the top edge of the screen for two minutes.

      Ask FixBot

      Add Comment

    17. iPad Pro 12.9" 3rd Gen Battery Blocking, Top edge information: step 17, image 1 of 3 iPad Pro 12.9" 3rd Gen Battery Blocking, Top edge information: step 17, image 2 of 3 iPad Pro 12.9" 3rd Gen Battery Blocking, Top edge information: step 17, image 3 of 3
      • While the top edge adhesive softens, note the following:

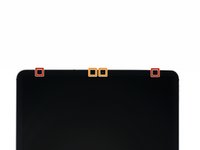
      • There are two ambient light sensors near the corners. Don't insert your pick more than 1 mm here.

      • The front-facing camera and additional sensors are in the center of the top edge. Don't insert your pick here—there is less than 1 mm of adhesive and you may damage the components.

      • For everywhere else, don't insert your pick more than 5 mm to avoid damaging the screen.

      Ask FixBot

      Add Comment

    18. iPad Pro 12.9" 3rd Gen Battery Blocking, Separate the top adhesive: step 18, image 1 of 2 iPad Pro 12.9" 3rd Gen Battery Blocking, Separate the top adhesive: step 18, image 2 of 2
      • Slide your opening pick 9 cm toward the top right edge, stopping just before the camera assembly.

      • If you slide any farther, you risk damaging the camera's sensors.

      • Leave your pick inserted before continuing.

      Ask FixBot

      Add Comment

    19. iPad Pro 12.9" 3rd Gen Battery Blocking: step 19, image 1 of 2 iPad Pro 12.9" 3rd Gen Battery Blocking: step 19, image 2 of 2
      • Insert a new opening pick on the other side of the camera assembly, 4 cm from the previous pick.

      • Slide your pick to the top right corner to slice the remaining adhesive.

      Ask FixBot

      Add Comment

    20. iPad Pro 12.9" 3rd Gen Battery Blocking, Reposition the screen: step 20, image 1 of 3 iPad Pro 12.9" 3rd Gen Battery Blocking, Reposition the screen: step 20, image 2 of 3 iPad Pro 12.9" 3rd Gen Battery Blocking, Reposition the screen: step 20, image 3 of 3
      • Don't fully remove the screen, as it's attached to the frame by several cables.

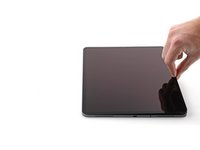
      • Grab two opposing corners of the screen and lift up to separate it from the frame.

      • If the screen feels stuck, slide your opening picks around the perimeter to separate any remaining adhesive. Pay attention to sensitive areas shown in previous steps.

      • Shift the screen towards the bottom right corner of the frame until the ribbon cable near the top edge is uncovered.

      Ask FixBot

      Add Comment

    21. iPad Pro 12.9" 3rd Gen Battery Blocking, Unfasten the upper cable shield: step 21, image 1 of 1
      Tool used on this step:
      FixMat
      $36.95
      Buy
      • Throughout this guide, keep track of each screw and reinstall it exactly where it came from.

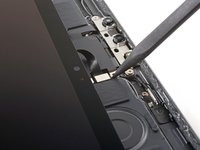
      • Use a Phillips screwdriver to remove the two screws securing the upper cable shield:

      • One 2.0 mm-long screw

      • One 1.8 mm-long screw

      • During reassembly, this is a good point to power on your iPad and test all functions before sealing it up. Be sure to power your iPad back down before you continue working.

      Ask FixBot

      Add Comment

    22. iPad Pro 12.9" 3rd Gen Battery Blocking, Remove the upper cable shield: step 22, image 1 of 2 iPad Pro 12.9" 3rd Gen Battery Blocking, Remove the upper cable shield: step 22, image 2 of 2
      Tool used on this step:
      Tweezers
      $4.99
      Buy
      • Use tweezers, or your fingers, to grab and remove the upper cable shield.

      Ask FixBot

      Add Comment

    23. iPad Pro 12.9" 3rd Gen Battery Blocking, Disconnect the upper sensors: step 23, image 1 of 2 iPad Pro 12.9" 3rd Gen Battery Blocking, Disconnect the upper sensors: step 23, image 2 of 2
      • Use the tip of a spudger to pry up and disconnect the upper sensors press connector.

      • To re-attach press connectors, carefully align and press down on one side until it clicks into place, then repeat on the other side. Don't press down on the middle. If the connector is misaligned, the pins can bend and cause permanent damage.

      Ask FixBot

      Add Comment

    24. iPad Pro 12.9" 3rd Gen Battery Blocking, Reposition the screen: step 24, image 1 of 3 iPad Pro 12.9" 3rd Gen Battery Blocking, Reposition the screen: step 24, image 2 of 3 iPad Pro 12.9" 3rd Gen Battery Blocking, Reposition the screen: step 24, image 3 of 3
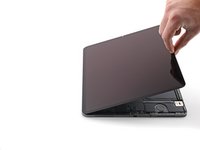
      • Grip the right edge of the screen and open it like a book.

      • Don't pull up on the screen—the display cables are still attached.

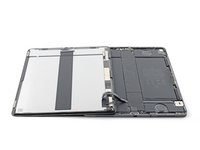
      • Lay the screen down over the left edge of the iPad.

      • Be careful not to strain the display cables.

      Ask FixBot

      Add Comment

    1. iPad Pro 12.9" 3rd Gen Battery Blocking, Unfasten the display cable bracket: step 25, image 1 of 1
      • Use a Phillips screwdriver to remove the five screws securing the display cable bracket:

      • Four 1.1 mm-long screws

      • One 2.0 mm-long screw

      Ask FixBot

      Add Comment

    2. iPad Pro 12.9" 3rd Gen Battery Blocking, Remove the display cable bracket: step 26, image 1 of 2 iPad Pro 12.9" 3rd Gen Battery Blocking, Remove the display cable bracket: step 26, image 2 of 2
      Tool used on this step:
      Tweezers
      $4.99
      Buy
      • Use tweezers, or your fingers, to remove the display cable bracket.

      Ask FixBot

      Add Comment

    3. iPad Pro 12.9" 3rd Gen Battery Blocking, Disconnect the SIM card reader: step 27, image 1 of 2 iPad Pro 12.9" 3rd Gen Battery Blocking, Disconnect the SIM card reader: step 27, image 2 of 2
      • Use a spudger to pry up and disconnect the SIM card reader cable press connector.

      Ask FixBot

      Add Comment

    4. iPad Pro 12.9" 3rd Gen Battery Blocking, Reposition the SIM card reader cable: step 28, image 1 of 2 iPad Pro 12.9" 3rd Gen Battery Blocking, Reposition the SIM card reader cable: step 28, image 2 of 2
      • The SIM card reader cable is lightly adhered to the battery.

      • Use tweezers, or your fingers, to peel the SIM card reader cable away from the battery connector.

      Ask FixBot

      Add Comment

    5. iPad Pro 12.9" 3rd Gen Battery Blocking, Unfasten the battery connector: step 29, image 1 of 1
      • Use a Phillips screwdriver to remove the 1.7 mm-long screw securing the battery connector to the logic board.

      Ask FixBot

      Add Comment

    6. iPad Pro 12.9" 3rd Gen Battery Blocking, Reposition the Wi-Fi antenna cable: step 30, image 1 of 2 iPad Pro 12.9" 3rd Gen Battery Blocking, Reposition the Wi-Fi antenna cable: step 30, image 2 of 2
      • Use tweezers to grab the corner of the Wi-Fi antenna cable laying parallel to the battery connector.

      • Lift the cable out of its recess and fold it over the battery.

      Ask FixBot

      Add Comment

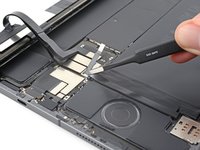
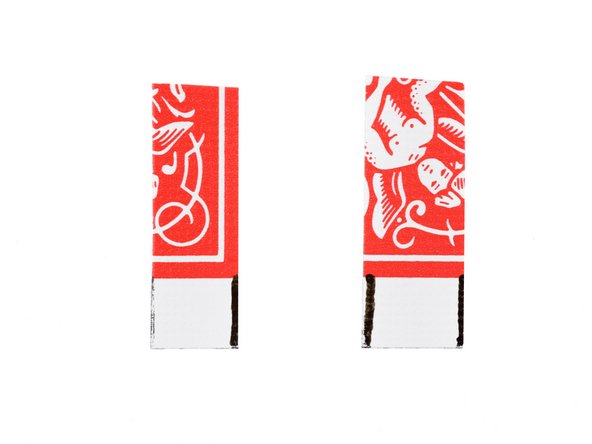
    7. iPad Pro 12.9" 3rd Gen Battery Blocking, Create a battery blocker: step 31, image 1 of 3 iPad Pro 12.9" 3rd Gen Battery Blocking, Create a battery blocker: step 31, image 2 of 3 iPad Pro 12.9" 3rd Gen Battery Blocking, Create a battery blocker: step 31, image 3 of 3
      • Follow the next two steps to make a battery blocker out of a playing card.

      • Cut two 6 mm-wide strips from a playing card.

      • The strips should be at least one inch long.

      Ask FixBot

      Add Comment

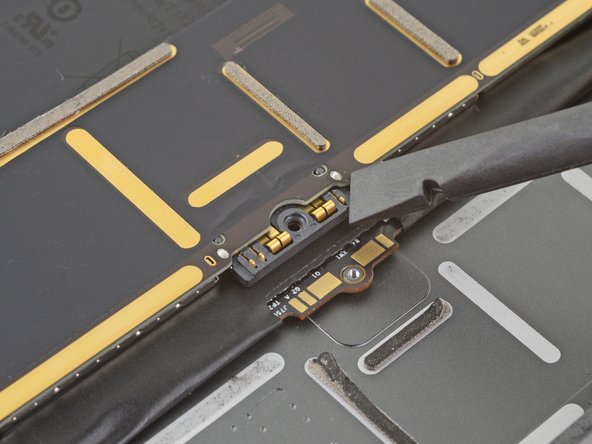
    8. iPad Pro 12.9" 3rd Gen Battery Blocking, Battery connector information: step 32, image 1 of 3 iPad Pro 12.9" 3rd Gen Battery Blocking, Battery connector information: step 32, image 2 of 3 iPad Pro 12.9" 3rd Gen Battery Blocking, Battery connector information: step 32, image 3 of 3
      • These photos show what the battery connector looks like underneath the logic board. Use these photos as a reference while you safely disconnect the battery.

      • Notice that the battery connector has cantilever springs on the logic board that press against the battery contact pads. Since both the logic board and battery are glued down, you'll need to slide something thin and flexible between the contact points to disconnect the battery.

      Ask FixBot

      Add Comment

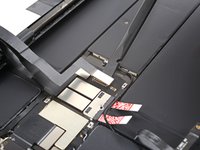
    9. iPad Pro 12.9" 3rd Gen Battery Blocking, Insert the card strips: step 33, image 1 of 3 iPad Pro 12.9" 3rd Gen Battery Blocking, Insert the card strips: step 33, image 2 of 3 iPad Pro 12.9" 3rd Gen Battery Blocking, Insert the card strips: step 33, image 3 of 3
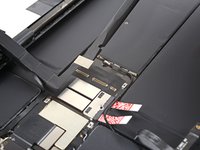
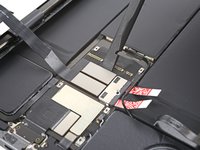
      • Insert the card strips under each side of the battery connector.

      • If you can't slide the cards under the battery connector, use an opening pick to lift the connector enough to insert the card strips.

      Ask FixBot

      Add Comment

    10. iPad Pro 12.9" 3rd Gen Battery Blocking, Disconnect the top display cables: step 34, image 1 of 3 iPad Pro 12.9" 3rd Gen Battery Blocking, Disconnect the top display cables: step 34, image 2 of 3 iPad Pro 12.9" 3rd Gen Battery Blocking, Disconnect the top display cables: step 34, image 3 of 3
      • Use a spudger to pry up and disconnect the two top display cable press connectors.

      Ask FixBot

      Add Comment

    11. iPad Pro 12.9" 3rd Gen Battery Blocking, Disconnect the bottom display cables: step 35, image 1 of 3 iPad Pro 12.9" 3rd Gen Battery Blocking, Disconnect the bottom display cables: step 35, image 2 of 3 iPad Pro 12.9" 3rd Gen Battery Blocking, Disconnect the bottom display cables: step 35, image 3 of 3
      • Use a spudger to pry up and disconnect the two bottom display cable press connectors.

      Ask FixBot

      Add Comment

    12. iPad Pro 12.9" 3rd Gen Battery Blocking, Remove the screen: step 36, image 1 of 3 iPad Pro 12.9" 3rd Gen Battery Blocking, Remove the screen: step 36, image 2 of 3 iPad Pro 12.9" 3rd Gen Battery Blocking, Remove the screen: step 36, image 3 of 3
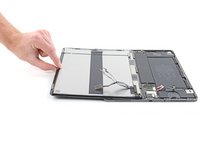
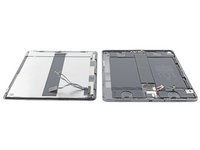
      • Remove the screen.

      Ask FixBot

      Add Comment

Conclusion

To reassemble your device, follow these instructions in reverse order.

Cancel: I did not complete this guide.

Alex Diaz-Kokaisl

Member since: 01/16/22

250,018 Reputation

1,203 Guides authored

Team

Guide Team Member of Guide Team

Staff

10 Members

61,630 Guides authored

0 Guide Comments

Add Comment

View Statistics:

Past 24 Hours: 1

Past 7 Days: 1

Past 30 Days: 15

All Time: 232