This translation may not reflect the most recent updates from the source guide. Help update the translation or view the source guide.
Introduction
簡単なパワーブーストのために、RAMを交換します。ディスプレイの後ろにあり接着剤を切断する必要のない唯一のアップグレードです。
What you need
-
-
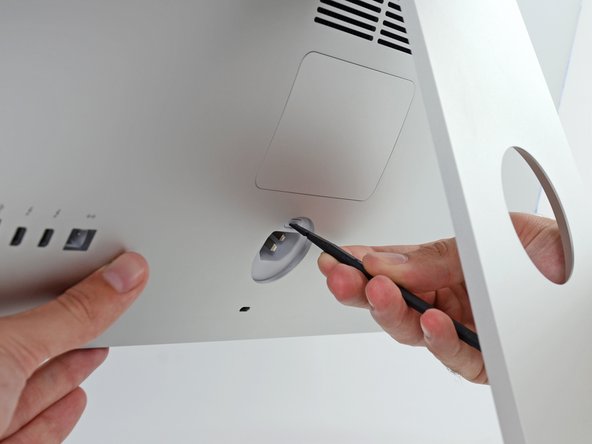
ディスプレイをしっかりと固定したまま、スパッジャー(修理用ツール)の平らな先端を使用して、電源ポートのすぐ上にあるRAMドアリリースボタンを押し込みます。
-
-
-
-
タブを外側に押してRAMから離して、親指または人差し指でトレイのロックを解除します。
-
タブを上下に引っ張って、RAMトレイを水平に近い位置までスイングさせます。
-
-
-
RAMのスティックを両手でつかみ、RAMトレイからまっすぐ引き出して取り外します。
-
新しいモジュールを取り付けるには、モジュールをトレイ上の所定のスロットに挿入し、しっかりと押し込みます。 トレイが所定の位置に収まるまで押してください。
-
RAMアクセスドアを元の場所に戻してください。
-
e-wasteを処理する場合は、認可済みリサイクルセンターR2を通じて廃棄してください。
修理が上手く進みませんか?ベーシックなトラブルシューティングのページを参照するか、アンサーコミュニティに尋ねてみましょう。
e-wasteを処理する場合は、認可済みリサイクルセンターR2を通じて廃棄してください。
修理が上手く進みませんか?ベーシックなトラブルシューティングのページを参照するか、アンサーコミュニティに尋ねてみましょう。
Cancel: I did not complete this guide.
60 other people completed this guide.
Special thanks to these translators:
91%
These translators are helping us fix the world! Want to contribute?
Start translating ›
3 Comments
Ich habe diese Anleitung genutzt bei meinem 27“ late 2013 Mac. Zu den vorhandenen Speichern von 2x4GB habe ich in die leeren Slots je einen 8GB Speicher eingesetzt. Das ging problemlos so wie beschrieben. Habe kein Werkzeug gebraucht. Die Taste zum Öffnen konnte ich mit dem Daumennagel hineindrücken. Der gesamte Speicher wird mit 24GB angezeigt. Vielen Dank für diese Hilfe!
Hello. My Imac (27-inch, Late 2012) has the original memory (2x4GB Elpida) in slots 1 and 2. When trying to install in slots 1+3, 1+4, 2+3, 2+4 it beeps three times and the Mac does not start. Replacing the original memory in slots 1+2 with new memory (2x8GB) is successful. Can not add memory to slots 3 and 4 (old memory or new). Please advise where to look for the problem.


