Introduction
Use this guide to remove or replace the battery on your Sony WH-1000XM3 headphones.
If your battery is swollen, take appropriate precautions.
For your safety, discharge your battery below 25% before disassembling your headphones. This reduces the risk of a dangerous thermal event if the battery is accidentally damaged during the repair.
You’ll need replacement adhesive to reattach components when reassembling the device.
What you need
-
-
Before beginning any repairs, turn off your headphones.
-
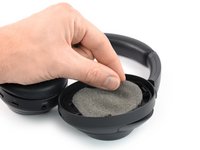
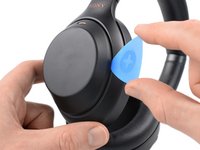
Insert a spudger into the gap between the earcup cushion and the earcup frame.
-
Pry up the earcup cushion by tilting the spudger downwards to release the plastic clips.
-
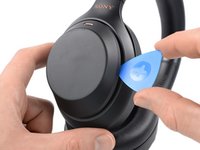
Repeat the previous step around the perimeter of the earcup cushion to release the remaining clips.
 Ask FixBot
-
-
-
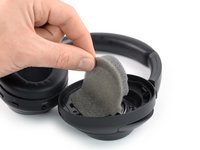
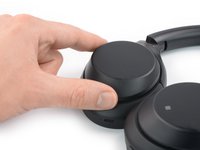
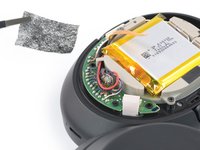
Carefully peel the foam liner off the earcup frame.
-
Remove the foam liner.
-
-
-
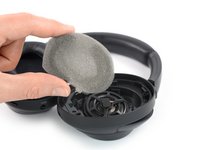
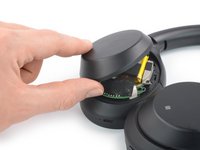
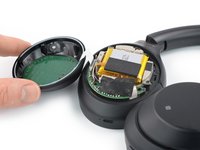
Use a Phillips screwdriver to remove the four 10.4 mm-long screws securing the plastic cover of the earcup frame.
-
-
-
Turn the headphones over.
-
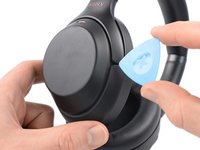
Insert an opening pick into the gap between the plastic cover and the earcup frame.
-
Use the opening pick to pry up the plastic cover until you can get a good grip to it.
-
-
-
Carefully fold the right earcup cover to the left like you would open the front page of a book and place it next to the earcup frame.
-
-
-
Tool used on this step:Tweezers$4.99
-
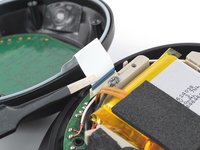
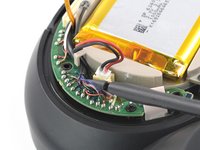
Use a pair of blunt nose tweezers or your fingers to disconnect the gesture control ribbon cable by pulling it straight out of its socket.
-
-
-
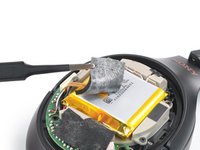
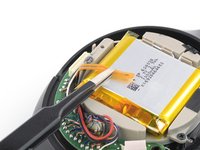
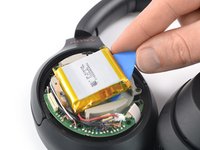
Use a pair of tweezers to carefully peel the protective foam sticker off the battery and the thermal sensor.
-
-
-
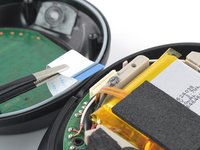
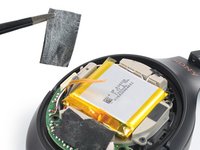
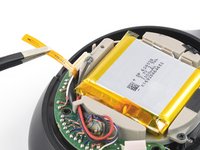
Use a pair of tweezers or your fingers to carefully remove the protective cloth sticker.
-
-
-
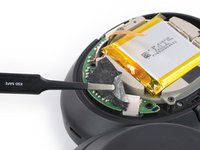
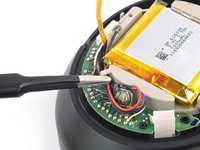
Use a pair of tweezers to carefully bend the thermal sensor to the side to get free access to the battery.
-
-
-
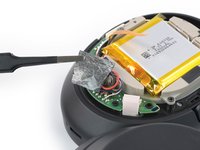
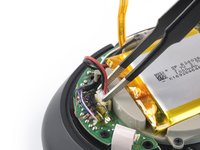
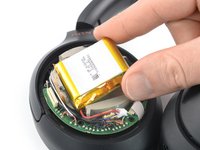
Use a pair of tweezers to carefully free the battery cables.
-
-
-
Use the flat end of a spudger or an opening pick to carefully fold the cables blocking the battery connector to the side until you get free access to the connector.
-
-
-
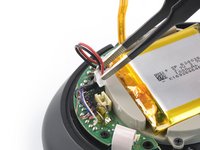
Use a pair of blunt nose tweezers to grasp the sides of the battery connector.
-
Pull the connector up and out of its socket, gently rocking it back and forth to loosen the clips securing it.
-
-
-
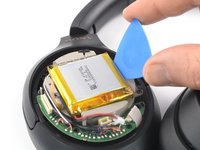
Insert the tip of an opening pick into the gap between the right edge of the battery and the battery housing.
-
Rotate the opening pick to insert one of its long edges into the gap.
-
-
-
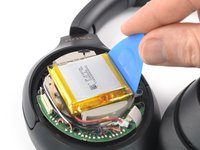
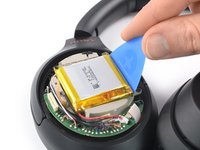
Slide the opening pick underneath the battery.
-
Pry up the battery intermittently to work it away from its adhesive.
-
-
Tool used on this step:Tesa 61395 Tape$8.95
-
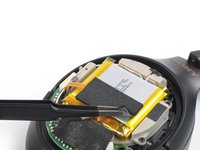
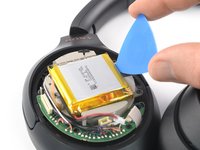
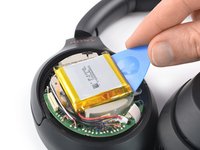
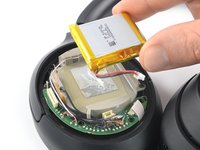
Remove the battery.
-


If possible, turn on your device and test your repair before installing new adhesive and resealing.
For optimal performance, calibrate your newly installed battery: Charge it to 100% and keep charging it for at least 2 more hours. Then use your device until it shuts off due to low battery. Finally, charge it uninterrupted to 100%.
To reassemble your device, follow the above steps in reverse order.
Take your e-waste to an R2 or e-Stewards certified recycler.
Repair didn’t go as planned? Try some basic troubleshooting, or ask our Answers community for help.
Cancel: I did not complete this guide.
79 other people completed this guide.


26 Guide Comments
Thank you! This is a very detailed and helpful guide. I especially appreciated the battery calibration tip at the end of it! The battery removal was probably the most difficult part, as the adhesive was strong. Slowly working the opening pick under the battery as directed did the trick, though.
Thank you! This is a very detailed and helpful guide. I especially appreciated the battery calibration tip at the end of it! The battery removal was probably the most difficult part, as the adhesive was strong. Slowly working the opening pick under the battery as directed did the trick, though.
Thank you very much. This gonna help me out. Draining the battery now and gonna give it a shot later today. I love this headphones and I didn't want to get rid of them.
Hola. Aparte de cambiar la bateria de estos auriculares, no sabria usted donde puedo comprar para cambiarla la toma del puerto de carga de estos auriculares. Porque parece que se dañó de alguna forma. No me entra el cable , me lo hecha para atras. Tengo que apretarlo con mucha fuerza para que cargue, aun así me lo despide para atras y no carga. Gracias si pudiera ayudarme.
francisco-tiscar@hotmail.com
The batterie replacement was very easy. The guide described everything perfectly. Well done and thanks! I already tried to do the calibration once, but it seems it has not worked yet as the software gave me, for instance, 80% first and 5 minutes later it has dropped down to 30% and then very quickly to 10%. I have these 10% now for more than 8 hours. So it seems it is not calibrated. Any ideas? I also tried to reset the headphones. It not really worked.