
Quickmill 05000A automatic expresso brewing group revision

What you need

  1. Quickmill 05000A automatic expresso brewing group revision, Open: step 1, image 1 of 1
    • Never forget to unplug the power cord!

    • Remove the water tank, pulp drawer and bean container.

  2. Quickmill 05000A automatic expresso brewing group revision: step 2, image 1 of 3 Quickmill 05000A automatic expresso brewing group revision: step 2, image 2 of 3 Quickmill 05000A automatic expresso brewing group revision: step 2, image 3 of 3
    • Remove two Phillips screws at the top.

    • Remove four Phillips screws from the back panel. They are very deep and you need a screwdriver with a very long shaft.

    • Remove three Phillips screws from the bottom of the back panel

  3. Quickmill 05000A automatic expresso brewing group revision: step 3, image 1 of 3 Quickmill 05000A automatic expresso brewing group revision: step 3, image 2 of 3 Quickmill 05000A automatic expresso brewing group revision: step 3, image 3 of 3
    • Unscrew the two Phillips screws on both sides of the back.

    • Then pull the back part backwards. Watch out for the power cord.

  4. Quickmill 05000A automatic expresso brewing group revision: step 4, image 1 of 2 Quickmill 05000A automatic expresso brewing group revision: step 4, image 2 of 2
    • Open the front door.

    • The front part is still attached with two Phillips screws. turn them out.

  5. Quickmill 05000A automatic expresso brewing group revision: step 5, image 1 of 1
    • The front part now only hangs with cables on the connection buttons of the control panel. In order to get better access to the brew group or the grinder, it is sufficient to push the front part forward about 10 cm. If that's not enough, you have to free the control panel.

  6. Quickmill 05000A automatic expresso brewing group revision, Brewing Group: step 6, image 1 of 2 Quickmill 05000A automatic expresso brewing group revision, Brewing Group: step 6, image 2 of 2
    • Open the front cover

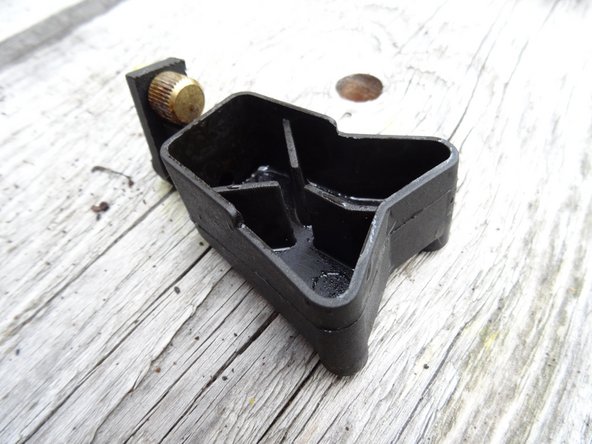
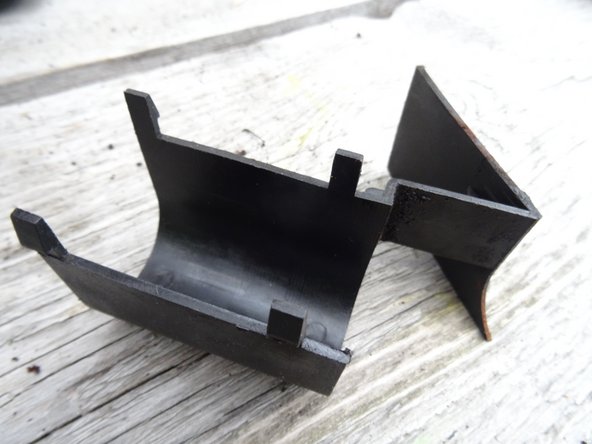
    • Unscrew the coffee spout on the thumbscrew with your fingers.

    • Clean thoroughly the coffee spout

  7. Quickmill 05000A automatic expresso brewing group revision: step 7, image 1 of 3 Quickmill 05000A automatic expresso brewing group revision: step 7, image 2 of 3 Quickmill 05000A automatic expresso brewing group revision: step 7, image 3 of 3
    • Pull off the two black protective caps above the mechanism at the top and bottom.

    • The upper cap goes slightly upwards.

    • The lower cap is hooked with four lateral rests. Push the cap a little together to loosen it.

  8. Quickmill 05000A automatic expresso brewing group revision: step 8, image 1 of 3 Quickmill 05000A automatic expresso brewing group revision: step 8, image 2 of 3 Quickmill 05000A automatic expresso brewing group revision: step 8, image 3 of 3
    • The upper piston is attached to the drive with a splint.

    • Pull out the sap with pliers.

    • The piston is free, but still hangs on the pressure hose of the water inlet.

    • A brass ring is placed on top of the piston, do not lose it.

    • This piston seal is damaged and needs to be replaced.

  9. Quickmill 05000A automatic expresso brewing group revision: step 9, image 1 of 1
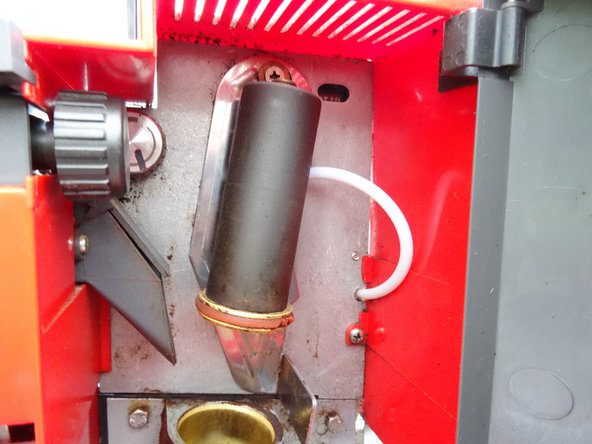
    • The upper piston is generally not as dirty as the lower one, as the fresh water flows in here.

    • Unscrew the Phillips screw on the brewing sieve and remove the brewing sieve.

    • Clean the plunger very thoroughly.

    • Clean the brewing sieve very thoroughly. Leave it in machine detergent for some time. Check if all holes are free, if necessary you can open them gently with a needle tip.

  10. Quickmill 05000A automatic expresso brewing group revision: step 10, image 1 of 2 Quickmill 05000A automatic expresso brewing group revision: step 10, image 2 of 2
    • The lower piston is secured with a cotter pin. Pull it out with pliers.

    • When the piston rod is free, you can push the piston up and remove it.

  11. Quickmill 05000A automatic expresso brewing group revision: step 11, image 1 of 1
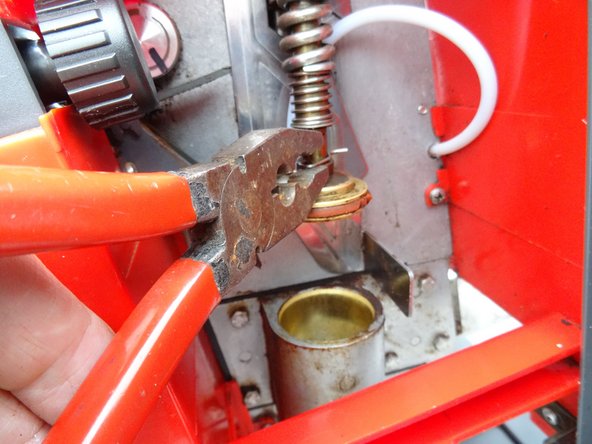
    • The lower plunger has coffee flowing through it and is therefore more contaminated. Loosen the Phillips screw, then it will break into three parts: strainer, shaft and piston with chamber.

    • Put everything in machine detergent for some time and then clean it very thoroughly. The piston chamber must not contain any more coffee grease, the holes in the sieve must be free.

    • You can keep the piston rod very thinly lubricated with a food-safe lubricant, but this is not absolutely necessary.

Conclusion

Complete the steps in reverse order to reassemble the device.

One other person completed this guide.

Special thanks to these translators:

de en

100%

These translators are helping us fix the world! Want to contribute?
Start translating ›

VauWeh

Member since: 10/19/15

203,508 Reputation

246 Guides authored

Team

Repair is War on Entropy Member of Repair is War on Entropy

Community

25 Members

1,121 Guides authored

One Comment

Gibt es ein Elektroschema?

Daniel Manser - Reply

Add Comment

View Statistics:

Past 24 Hours: 1

Past 7 Days: 3

Past 30 Days: 12

All Time: 1,134