Introduction
Replacing your lower case requires removing nearly every component from your PowerBook.
What you need
-
-
Use your thumbs to push the two battery retaining tabs away from the battery.
-
The battery should pop up enough to rotate it toward yourself and lift it out of the lower case.
-
-
-
Remove the three 2.3 mm Phillips screws securing the memory cover to the lower case.
-
-
-
Remove the following ten screws:
-
Two 14.7 mm shouldered Phillips.
-
Three 12.3 mm Phillips.
-
One 3.8 mm T8 Torx.
-
One 6.8 mm T8 Torx.
-
Three 1.3 mm Phillips.
-
-
-
-
Close your PowerBook, minding any cables that may interfere, and flip it over.
-
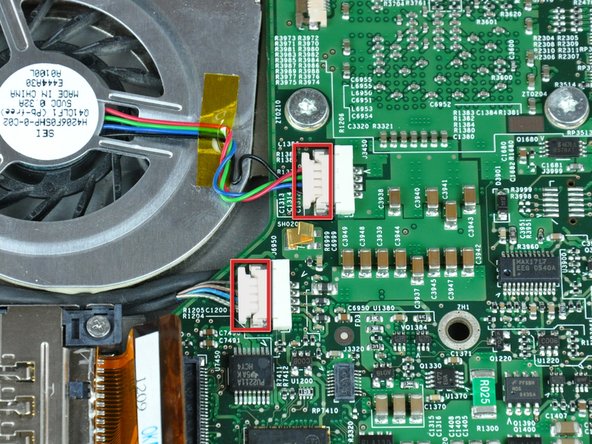
Disconnect the power cable connector by pulling it straight away from its socket on the logic board.
-
-
-
Use the flat end of a spudger to pry the modem cable connector up off the modem.
-
-
-
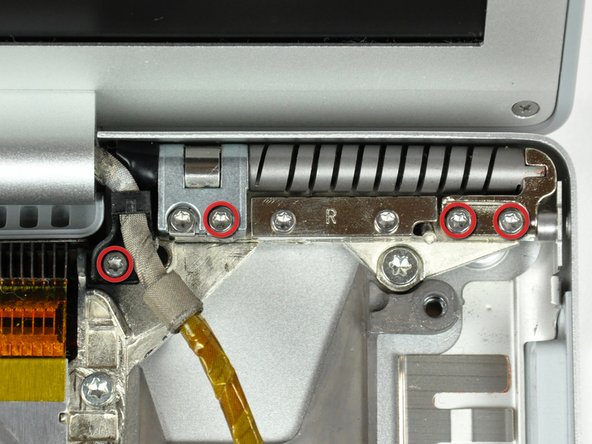
Remove the following four screws:
-
Three 11.1 mm T8 Torx.
-
One 3.9 mm T8 Torx.
-
Lift the hard drive out of the lower case.
-


To reassemble your device, follow these instructions in reverse order.
To reassemble your device, follow these instructions in reverse order.
