Introduction
This is a prerequisite-only guide! This guide is part of another procedure and is not meant to be used alone.
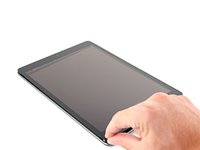
Use this guide to open the iPad 9 LTE's digitizer.
What you need
-
-
Heat an iOpener and apply it to the left edge of the iPad for two minutes.
-
-
-
While you're waiting for the adhesive to loosen, note the following areas that are sensitive to prying:
-
Front camera
-
Ambient light sensors
-
Antennas
-
Display cables
-
-
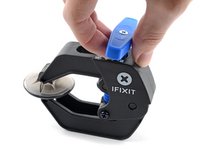
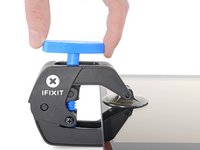
Tool used on this step:Clampy - Anti-Clamp$24.95
-
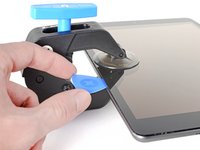
Pull the blue handle backwards to unlock the Anti-Clamp's arms.
-
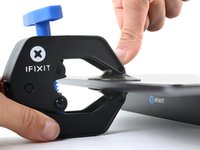
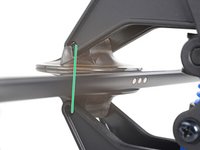
Place an object under your iPad so it rests level between the suction cups.
-
Position the suction cups near the middle of the left edge—one on the top, and one on the bottom.
-
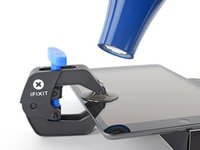
Hold the bottom of the Anti-Clamp steady and firmly press down on the top cup to apply suction.
-
-
-
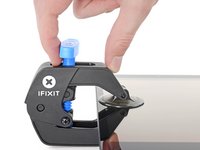
Wait one minute to give the adhesive a chance to release and present an opening gap.
-
If your screen isn't getting hot enough, you can use a hair dryer to heat along the left edge of the iPad.
-
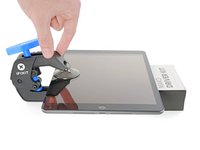
Insert an opening pick under the digitizer when the Anti-Clamp creates a large enough gap.
-
Skip the next step.
-
-
-
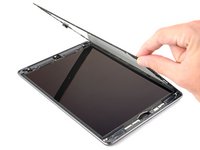
Once the screen is warm to touch, apply a suction handle to the left edge of the screen and as close to the edge as possible.
-
Lift the screen with the suction handle to create a small gap between the digitizer and the frame.
-
Insert an opening pick into the gap between the digitizer and the frame.
-
-
-
Insert a second opening pick into the gap you just created.
-
Slide the pick toward the bottom-left corner of the iPad to separate the adhesive.
-
Leave the pick in the bottom-left corner to prevent the adhesive from re-sealing.
-
-
-
-
Heat an iOpener and apply it to the top edge of the iPad for two minutes.
-
-
-
Rotate the pick around the top-left corner of the iPad to separate the adhesive.
-
-
-
Slide the opening pick along the top edge of the iPad, stopping just before you reach the front camera.
-
-
-
Heat an iOpener and apply it to the right edge of the iPad for two minutes.
-
-
-
Rotate the pick around the top-right corner of the iPad to separate the adhesive.
-
-
-
Insert a new opening pick and slide it to the middle of the iPad's right edge.
-
-
-
Heat an iOpener and apply it to the bottom edge of the iPad for two minutes.
-
-
-
Slide the bottom-left pick to the bottom-left corner to separate the adhesive.
-
Leave the pick in the corner before moving to the next step.
-
-
-
Insert a new opening pick into the gap you just created on the bottom edge of the iPad.
-
Slide the pick over the antenna, stopping just before the home button.
-
Leave the pick to the left of the home button before continuing.
-
-
-
Heat an iOpener and apply it to the right edge of the iPad for two minutes.
-
-
-
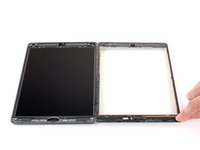
While supporting the digitizer, slide an opening pick between the two display cables to separate the last of the adhesive.
-


To reassemble your device, follow these instructions in reverse order.

