Introduction
If your OnePlus 12 is experiencing battery drainage issues or won’t hold a charge/won’t charge, then it may be time to replace the phone’s battery.
For your safety, discharge your battery below 20% before disassembling your device. This reduces the risk of a dangerous thermal event if the battery is accidentally damaged during the repair. If your battery is swollen, take appropriate precautions.
This repair involves removing the phone's back glass. You will need replacement adhesive for it or may even need a replacement back glass in order to complete this repair.
What you need
-
Step 1 Back Glass
Careful: steps 1-4 are sourced from a guide that's marked as in-progress.
-
Ensure the phone is powered off and placed with the back glass facing towards you on a stable surface.
 Ask FixBot
-
-
-
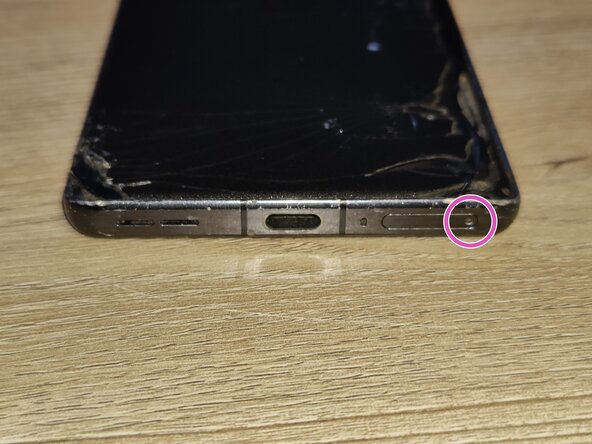
Pop open the SIM card tray by inserting a SIM card removal tool into the SIM card tray on the bottom of the phone.
-
Remove the SIM card tray from the phone and set it aside for when we are done.
-
-
-
Loosen the glue holding the back glass in place by using a hairdryer or an iOpener.
-
-
Tool used on this step:Jimmy$7.95
-
Insert a Jimmy into the seam of the back glass to lift it slightly. Try to reduce pressure on any single spot of the glass to avoid cracking it.
-
Insert a plastic card underneath the small gap created on the back glass and gently glide the card under the lifted glass.
-
Remove the back glass from the phone by working your way around the glass slowly. You may need to re-heat after a while to keep the glue soft. Otherwise, you may shatter the glass.
-
-
-
-
Remove the twelve Phillips #0 screws from the motherboard plastic.
-
Remove the eight Phillips #0 screws from the bottom plastic.
-
-
Tool used on this step:Jimmy$7.95
-
Unstick the wireless charging pad from the bottom plastic. Try to get under one of the corners with a Jimmy.
-
Once it's unstuck, leave it for now. Don't try to remove it from the motherboard plastic - it and the plastic are one piece.
-
-
Tool used on this step:Jimmy$7.95
-
Insert a Jimmy between the motherboard plastic and the frame of the phone, then gently pry up to unclip the plastic.
-
The motherboard plastic can lift up and out of the phone. The wireless charging coil is part of the plastic, so be mindful of it when moving the plastic.
-
Undo the battery press connector with a plastic spudger or tool.
-
-
Tool used on this step:Jimmy$7.95
-
Insert a Jimmy on the side of the loudspeaker between the frame of the phone and the loudspeaker.
-
Once it is inserted into the gap between the frame and the loudspeaker, you can gently pry the loudspeaker up to release it from the phone.
-
-
Tool used on this step:Jimmy$7.95
-
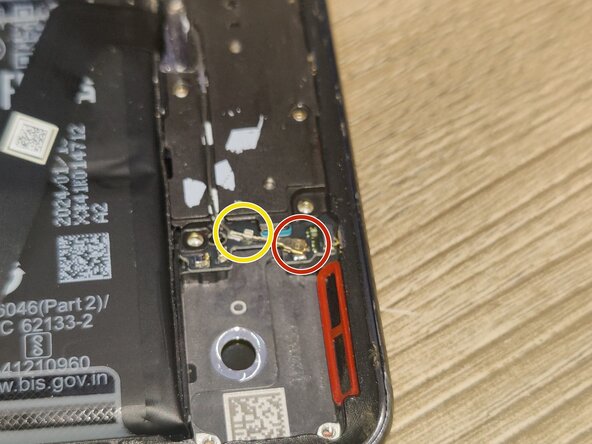
Disconnect the coaxial connector carefully.
-
Gently release the wire from the cable guide by pulling it up and out. It has some retaining force but there is no clip or latch.
-
Insert your Jimmy on the other side of the bottom plastic between the frame and the plastic, then gently pry up to pop out the plastic just like the speaker.
-
Undo the press connector for the communication flex cable.
-
-
-
Undo the other press connector for the communication flex cable with a plastic spudger or tool.
-
With the two press connectors for the communication flex cable removed, you can remove the flex cable and set it aside.
-
-
-
Use your fingernail to get the battery pull tabs unstuck
-
Grab ahold of one battery pull tab with one hand and stabilize the phone with the other. I like to hold the phone by the frame with the other hand. You can then start pulling the pull tab directly away from the phone - don't pull it to the side.
-





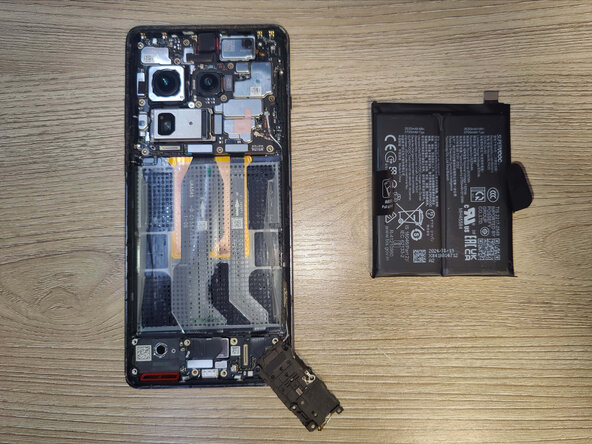


To reassemble your device, follow these instructions in reverse order.
Take your e-waste to an R2 or e-Stewards certified recycler.
Repair didn’t go as planned? Try some basic troubleshooting, or ask our Answers community for help.

