Introduction
Use this guide to replace the Moto G4’s rechargeable battery. If your battery is swollen, take appropriate precautions.
Before you begin, download the Rescue and Smart Assistant app to backup your device and diagnose whether your problem is software or hardware related.
For your safety, discharge your existing battery below 25% before disassembling your phone. This reduces the risk of a dangerous thermal event if the battery is accidentally damaged during the repair.
What you need
-
-
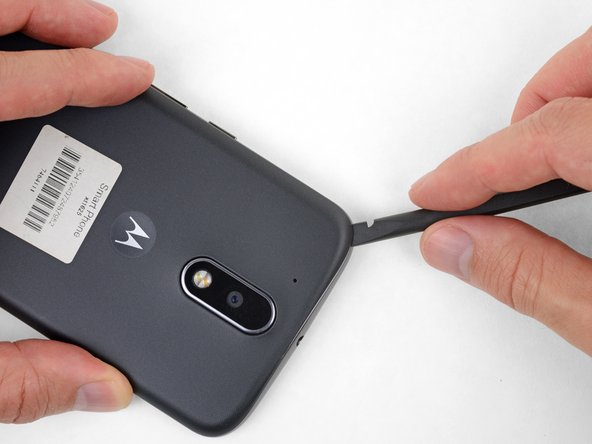
Insert a fingernail or a spudger into the notch on the bottom edge of the phone, near the charge port.
-
Gently twist or pry to open a small gap between the back cover and the body of the phone.
-
While keeping your tool (or fingernail) inserted into the gap between the back cover and the body of the phone, slide it around the corner to begin loosening the plastic clips holding the cover in place.
-
-
-
Slide your tool all along the side of the phone to separate more of the clips securing the back cover.
-
-
-
Keep your tool inserted slightly under the back cover, and slide it around the top corner.
-
If necessary, continue prying around the remaining edges of the phone until the back cover comes free.
-
-
-
-
Insert a spudger under the midframe at the top left corner, and gently twist to separate it from the body of the phone.
-
-
-
Insert a thin tool (such as one of your tweezer tips) under the red and black battery wires, and slide it underneath the battery connector.
-
Gently pry straight up to disconnect the battery.
-
-
-
Push the battery wires towards the battery to de-route them from the black bracket on the motherboard.
-
-
-
Peel up the black pull tab at the top of the battery, and pull slowly but firmly to separate the battery from the adhesive holding it in place.
-
If the pull tab breaks, use a spudger or an old credit card to pry up carefully on the edges of the battery until it comes loose.
-