Introduction
Follow this guide to replace the screen in your 2021 Motorola Moto G Play with a genuine Motorola part.
Before you begin, download the Rescue and Smart Assistant app to backup your device and diagnose whether your problem is software or hardware related.
Note: This procedure is for a screen that's pre-installed in a new frame (a.k.a. chassis). You'll need to transplant all of your phone's internals to the new screen. If you're replacing the display panel by itself, follow this guide instead.
For your safety, discharge the battery below 25% before disassembling your device. This reduces the risk of fire if the battery is accidentally damaged during the repair. If your battery is swollen, take appropriate precautions.
What you need
-
-
Insert a SIM card eject tool or a straightened paperclip into the hole adjacent to the SIM card tray.
-
Press firmly to eject the tray.
-
Grab and remove the SIM card tray from the phone.
-
-
-
Heat an iOpener and apply it to the left edge of the cover for two minutes.
-
-
-
Apply a suction cup to the back cover, as close to the center of the left edge as possible.
-
Pull up on the suction cup with strong, steady force to create a gap between the cover and the frame.
-
Insert an opening pick into the gap.
-
-
-
Slide your opening pick back and forth along the left edge to slice through the adhesive.
-
Leave the pick in at the bottom left corner to prevent the adhesive from resealing.
-
-
-
Insert and slide a second opening pick to the bottom right corner to slice through the adhesive.
-
Leave the pick inserted to prevent the bottom edge from resealing.
-
Repeat this process for the right and top edges of the cover.
-
-
-
Grab and lift the bottom edge of the cover.
-
As you lift the back cover, press and unstick the fingerprint reader from it.
-
-
-
Grab and remove the back cover.
-
This is a good point to test your phone before sealing it up. Follow this guide to perform a hardware test. Be sure to power your phone back down completely before you continue working.
-
To adhere the back cover with custom-cut adhesives, follow this guide.
-
To adhere the back cover with tape, follow this guide.
-
-
-
Flip the fingerprint reader to the left, away from the phone.
-
-
-
Use your Phillips screwdriver to remove the twelve 3.9 mm-long screws securing the motherboard cover.
-
-
-
Insert the pointed end of a spudger between the bottom right corner of the motherboard cover and the frame.
-
Pry the cover upward until you can grab it with your fingers.
-
-
-
Grab the bottom edge of the motherboard cover and remove it from the frame.
-
-
-
Use the pointed end of your spudger to pry and disconnect the battery's press connector.
-
-
-
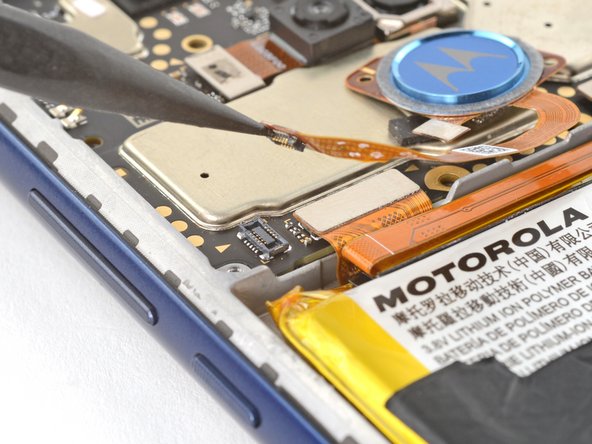
Use the pointed end of your spudger to pry and disconnect the fingerprint reader's press connector.
-
-
-
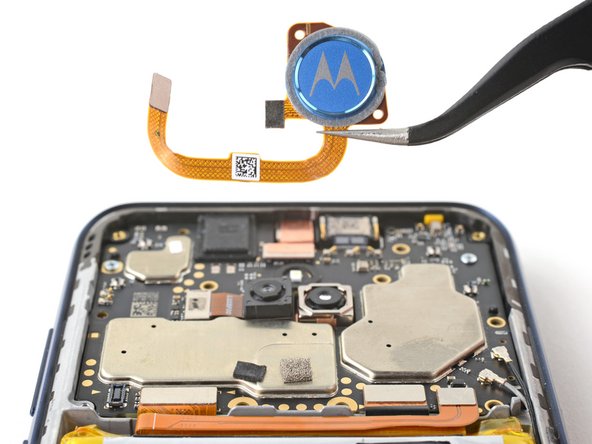
Use your fingers or tweezers to remove the fingerprint reader.
-
-
-
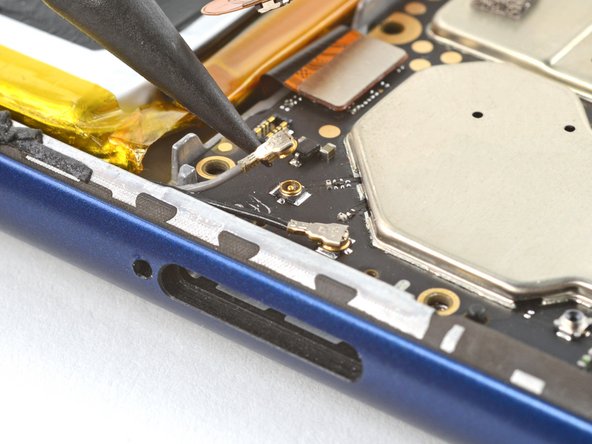
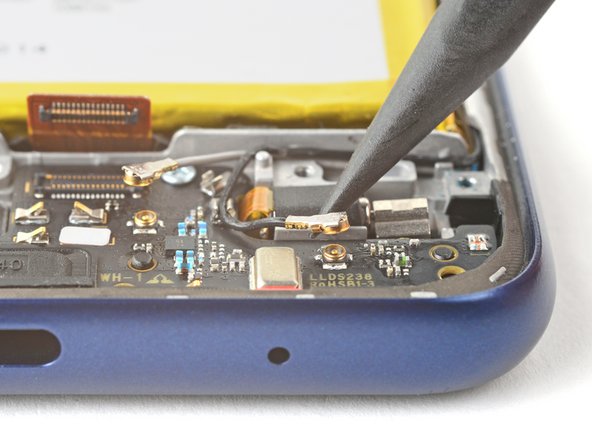
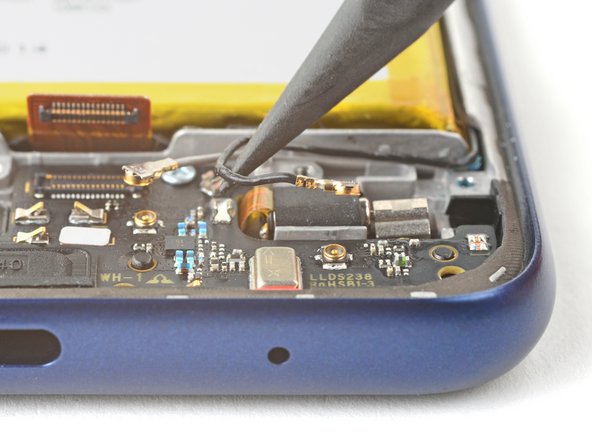
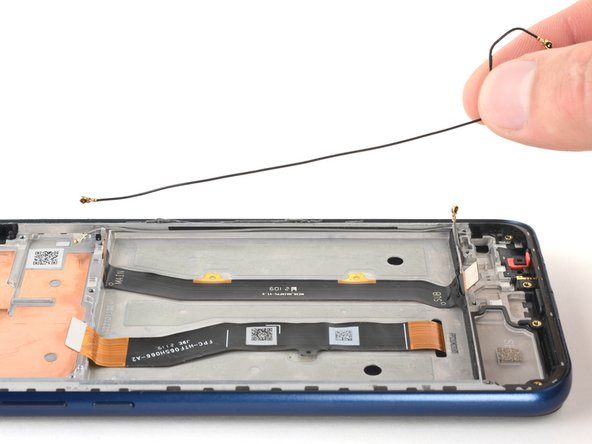
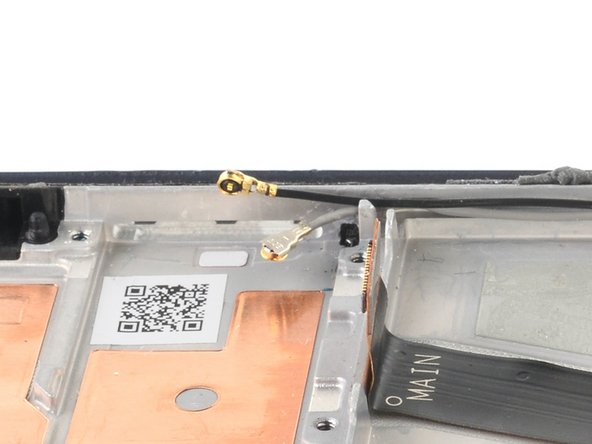
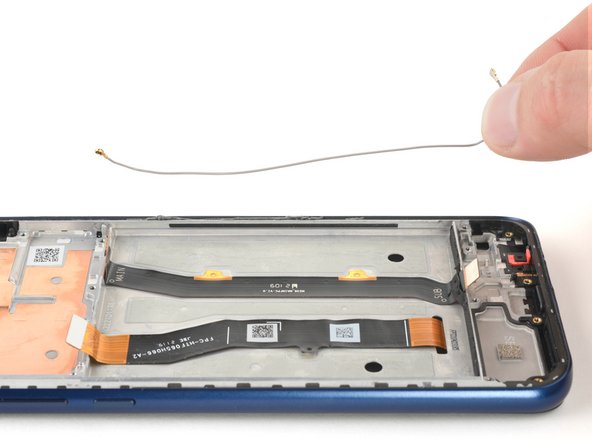
Use the pointed end of your spudger to pry and disconnect the gray antenna cable.
-
-
-
-
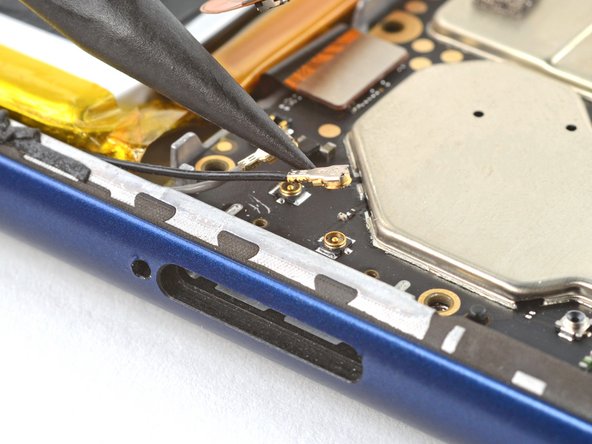
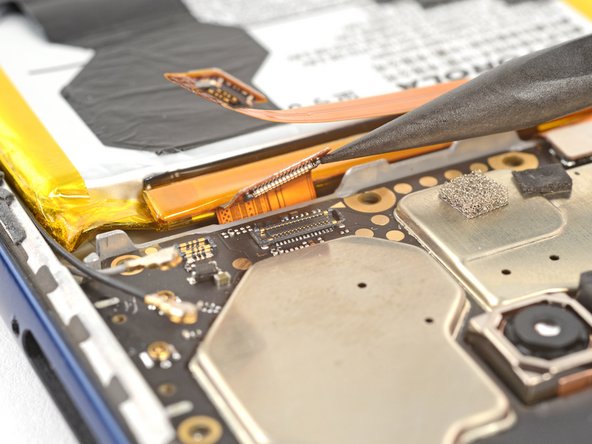
Use the pointed end of your spudger to pry and disconnect the board cable's press connector.
-
-
-
Use the pointed end of your spudger to pry and disconnect the display's press connector.
-
-
-
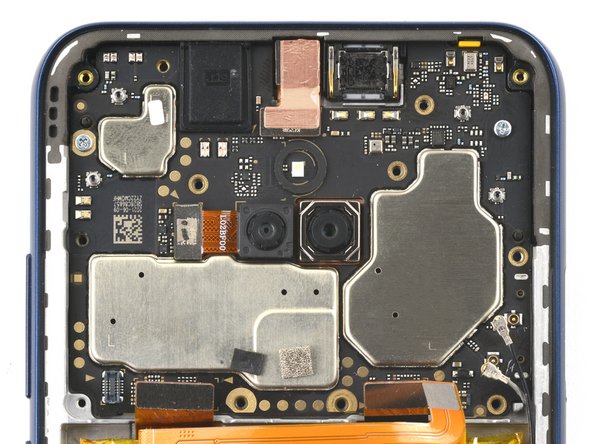
Use your Phillips screwdriver to remove the two 2.5 mm-long screws securing the motherboard.
-
-
-
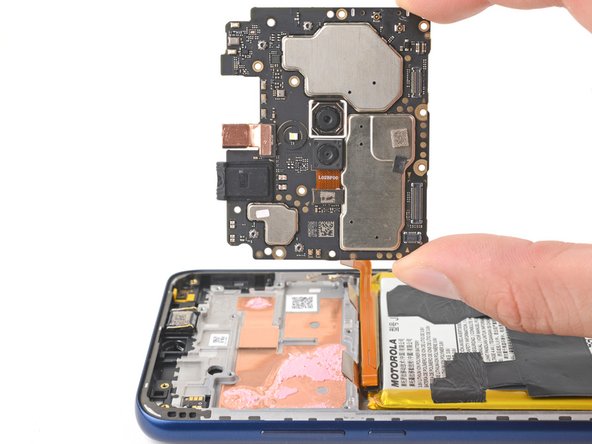
Insert the pointed end of your spudger between the bottom left edge of the motherboard and the frame.
-
Lift the motherboard from its recess.
-
-
-
Use your Phillips screwdriver to remove the eight 3.8 mm-long screws securing the loudspeaker.
-
-
-
Insert your spudger between the top right corner of the loudspeaker and the frame.
-
Pry up to release the loudspeaker.
-
-
-
Use the pointed end of your spudger to pry and disconnect the board cable's press connector.
-
-
-
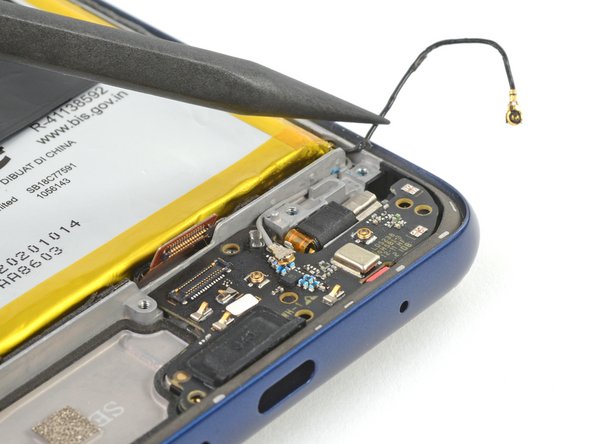
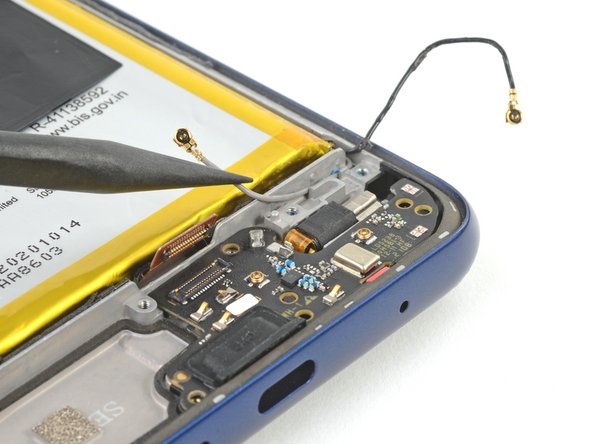
Use the pointed end of your spudger to pry and disconnect the gray antenna cable.
-
Free the cable from the retaining clip.
-
-
-
Use your Phillips screwdriver to remove the 2.5 mm-long screw securing the daughterboard.
-
-
-
Move the black and gray antenna cables away from the daughterboard.
-
-
-
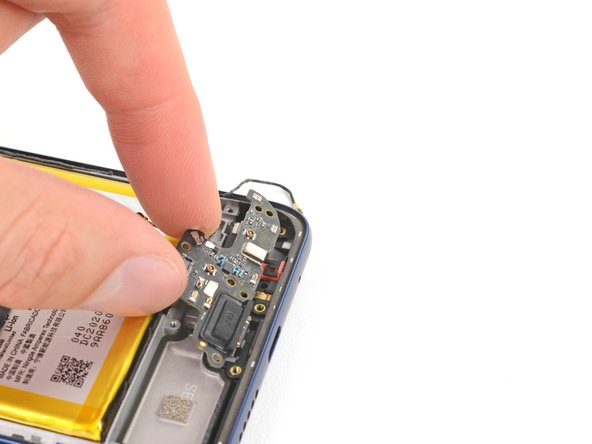
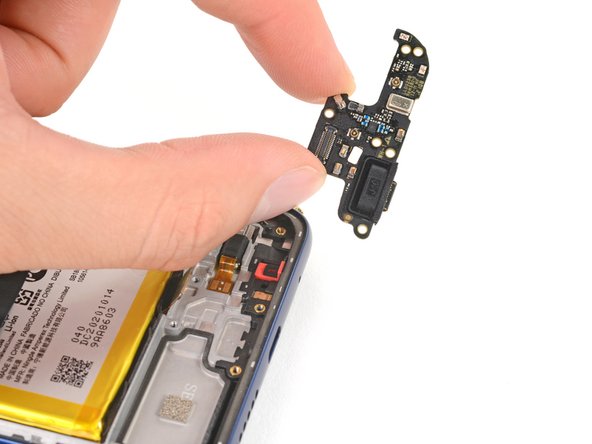
Grip the top edge of the daughterboard.
-
Lift and remove the daughterboard from its recess.
-
-
-
Apply highly-concentrated isopropyl alcohol (over 90%) to the vibration motor's flex cable.
-
Alternatively, use a heated iOpener, hair dryer, or heat gun to soften the adhesive.
-
-
-
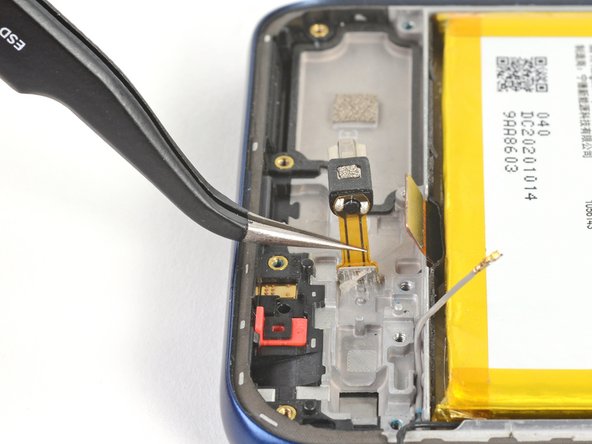
Insert the point of your spudger between the motor counterweight and the frame.
-
Pry the motor out of its recess and flip it over.
-
-
-
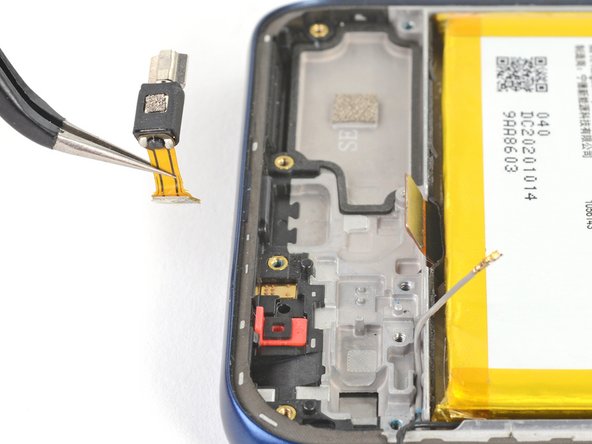
Use tweezers to grab and peel the base of the flex cable from the frame.
-
Remove the vibration motor from the frame.
-
-
-
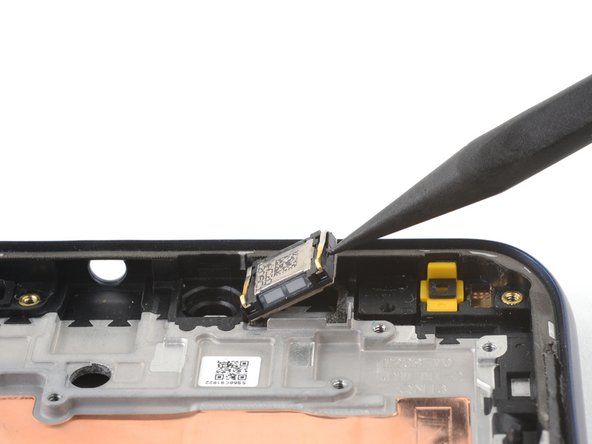
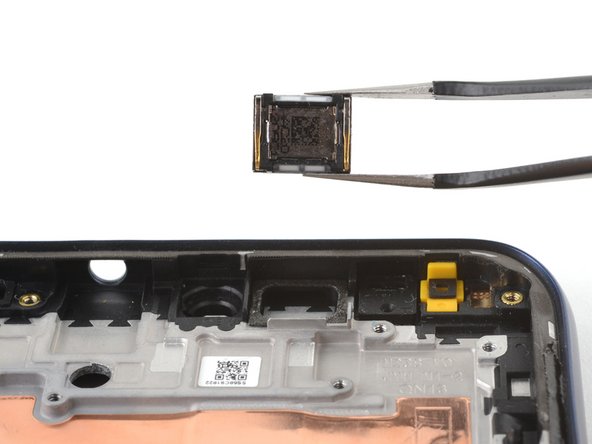
Insert the pointed end of your spudger between the right edge of the earpiece speaker and the motherboard.
-
Pry up on the speaker and remove it
-
-
-
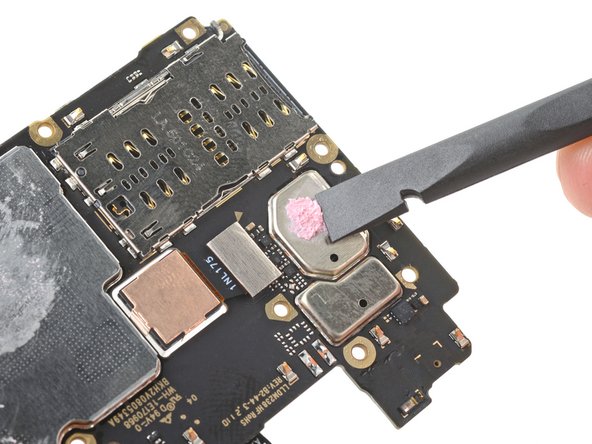
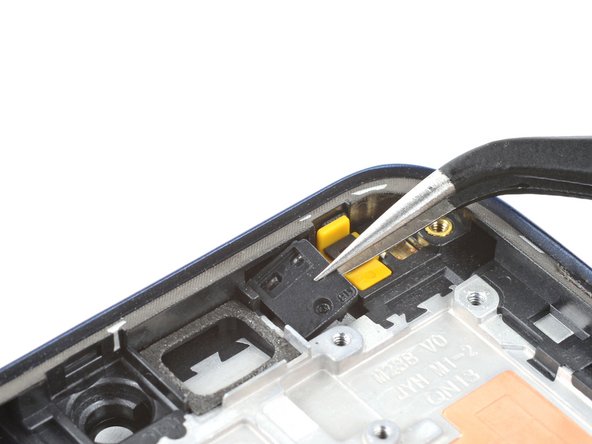
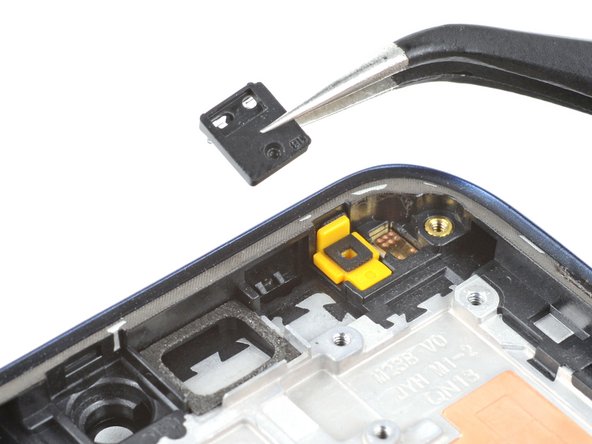
Use tweezers to grab and remove the proximity sensor bracket from its recess.
-
-
-
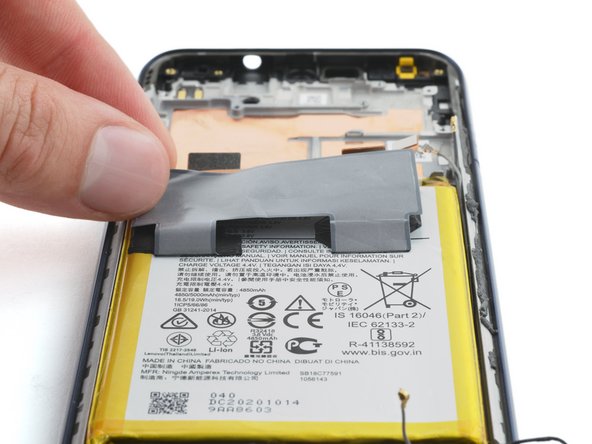
Fold the graphite heat dispersion film toward the top of the battery.
-
-
-
Heat an iOpener and apply it to the left edge of the screen for about two minutes.
-
-
-
Apply the isopropyl alcohol into the gaps between the sides of the battery and the frame.
-
-
-
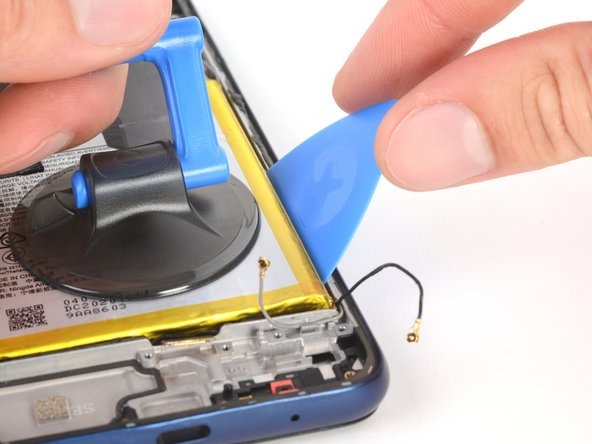
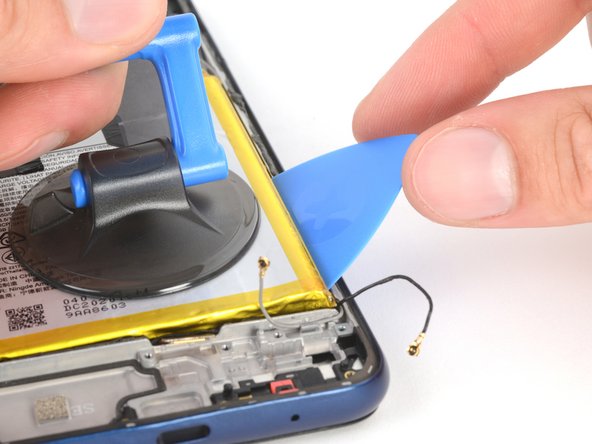
Place a suction handle on the center of the battery.
-
Insert an opening pick between the right edge of the battery and the frame.
-
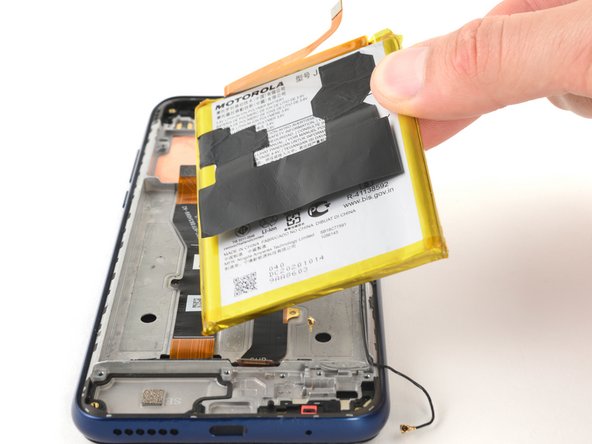
Use a steady force to pull on the suction handle and simultaneously pry with the pick.
-
-
-
Grab and remove the black antenna cable from its recess in the frame.
-
-
-
Use your tweezers to peel and remove the foam strip from the bottom of the battery recess.
-
-
-
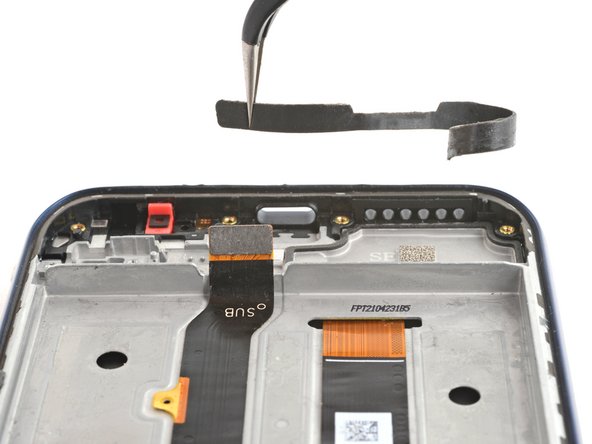
Heat an iOpener and apply it to the board cable for two minutes.
-
-
-
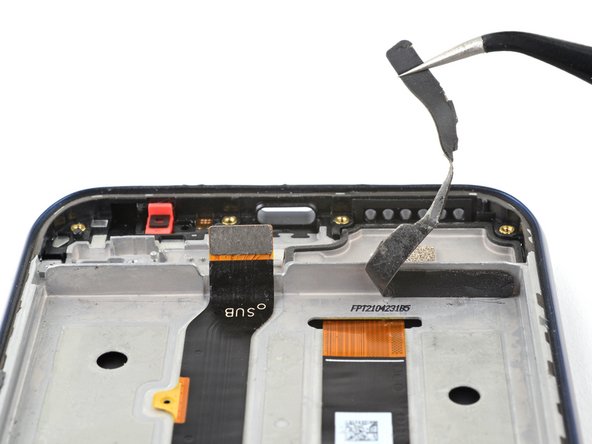
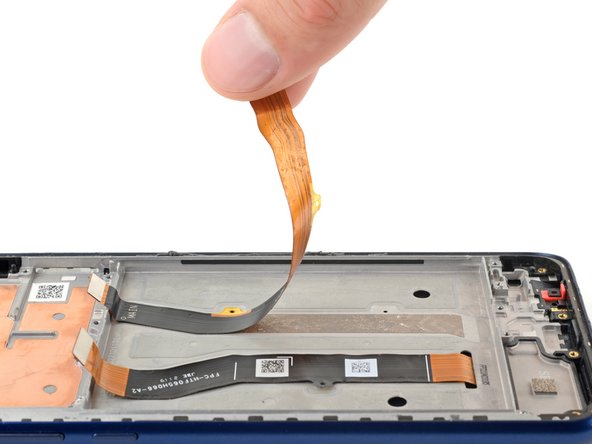
Grab the upper end of the board cable.
-
Peel and remove the cable from the frame.
-


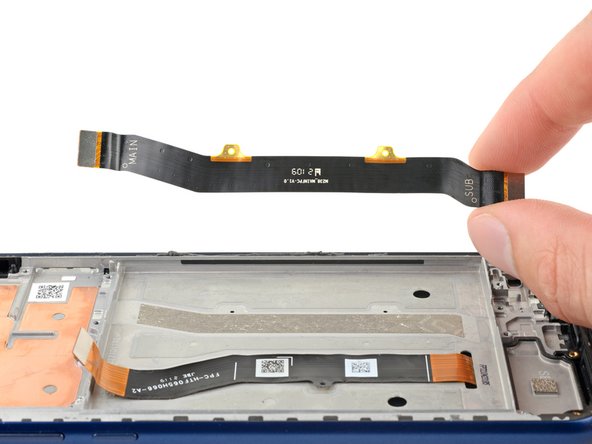

Compare your new replacement part to the original part—be sure to transfer remaining components and remove adhesive backings from the new part before installing.
To reassemble your device, follow these instructions in reverse order.
Take your e-waste to an R2 or e-Stewards certified recycler.
Repair didn’t go as planned? Try some basic troubleshooting, or ask our Answers community for help.
Cancel: I did not complete this guide.
8 other people completed this guide.


2 Comments
Excellent presentation. After looking at my broken phone for five months after it took a hundred mile trip stuck under the car hood being smashed over and over by the wiper arm, I decided to take the plunge.
Removing the battery was my biggest challenge, I was a bit concerned about getting the battery too hot, then got real concerned when I pried a little too hard because the glue wasn't softened enough, a little more heat gun and it cooperated.
Thanks for the concise instructions.
please who can help in fix the motorola g 2021