Introduction
Use this guide to replace the display assembly of your MacBook Pro 13" Touch Bar Late 2016.
Before starting this procedure, you may want to check with Apple to see if you qualify for a free repair. If your display’s backlight has stopped working, or the display shows vertical bright areas along the entire bottom of the screen (a.k.a. “stage lights”), your MacBook Pro may be eligible for Apple’s display backlight service program.
For your safety, drain your MacBook Pro's battery below 25% charge before starting repairs.
What you need
-
-
Power on your Mac and launch Terminal.
-
Copy and paste the following command (or type it exactly) into Terminal:
-
sudo nvram AutoBoot=%00
-
Press [return]. If prompted, enter your administrator password and press [return] again. Note: Your return key may also be labeled ⏎ or "enter."
-
sudo nvram AutoBoot=%03
 Ask FixBot
-
-
Tool used on this step:Magnetic Project Mat$19.95
-
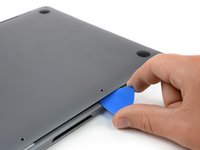
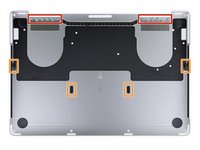
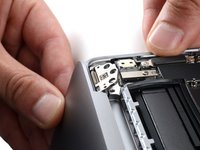
Use a P5 Pentalobe driver to remove the six screws securing the lower case:
-
Two 6.2 mm screws
-
Four 3.4 mm screws
-
-
-
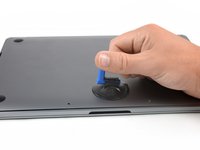
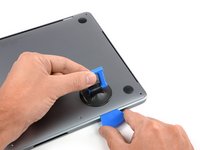
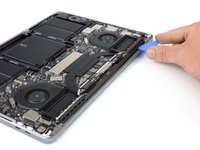
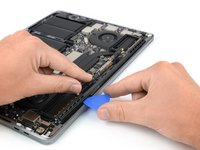
Apply a suction handle to the lower case near the front-center area of the MacBook Pro.
-
Lift the suction handle to create a slight gap between the lower case and the chassis.
-
-
-
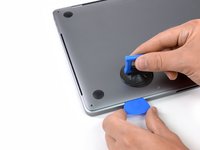
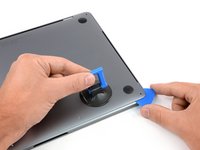
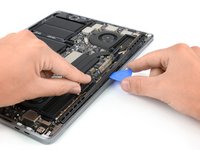
Insert one corner of an opening pick into the space between the lower case and the chassis.
-
Slide the opening pick around the nearest corner and halfway up the side of the case.
-
-
-
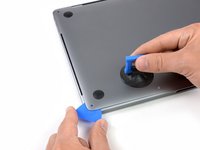
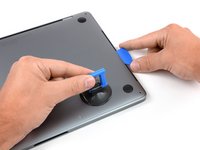
Repeat the previous step on the opposite side, sliding your opening pick under the lower case and up the side to pop the second clip free.
-
-
-
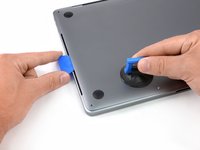
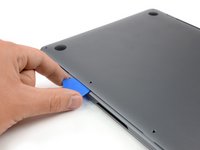
Insert your opening pick once again under the front edge of the lower case, near one of the two centermost screw holes.
-
Give the pick a firm twist to pop free the third clip securing the lower case to the chassis.
-
Repeat this procedure near the other of the two centermost screw holes, popping the fourth clip free.
-
-
-
Pull the lower case firmly towards the front of the MacBook (away from the hinge area) to separate the last of the clips securing the lower case.
-
Pull first at one corner, then the other.
-
-
-
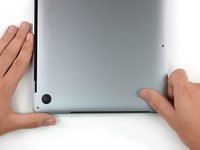
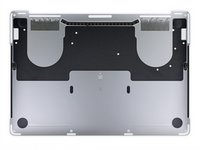
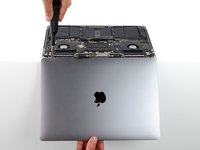
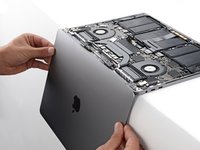
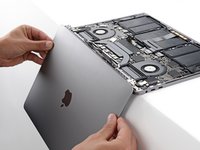
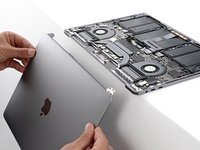
Remove the lower case.
-
Set it in place and align the sliding clips near the display hinge. Press down and slide the cover toward the hinge. It should stop sliding as the clips engage.
-
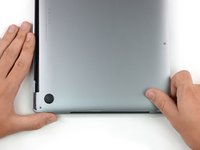
When the sliding clips are fully engaged and the lower case looks correctly aligned, press down firmly on the lower case to engage the four hidden clips underneath. You should feel and hear them snap into place.
-
-
-
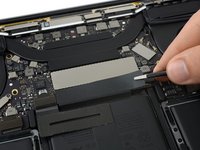
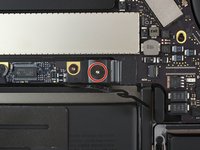
Carefully peel up the large piece of tape covering the battery connector, on the edge of the logic board nearest the battery.
-
Remove the tape.
-
-
-
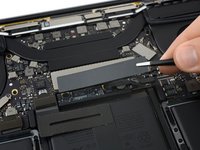
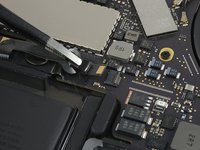
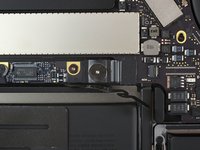
Gently peel back the small piece of tape covering the battery board data cable connector.
-
-
-
Use the tip of a spudger to flip up the small black locking tab securing the cable in its connector.
-
-
-
-
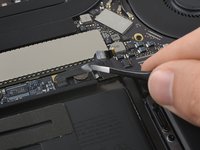
Disconnect the battery board data cable by sliding it out from its socket.
-
Slide parallel to the logic board, in the direction of the cable.
-
-
-
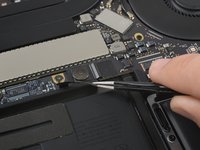
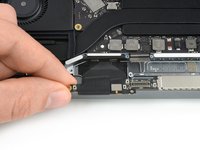
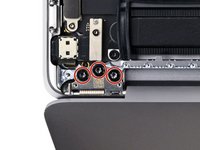
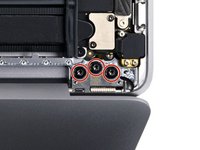
Use a T5 Torx driver to remove the 3.7 mm pancake screw securing the battery power connector.
-
-
-
Use a spudger to gently lift the battery power connector, disconnecting the battery.
-
Lift the connector high enough so that it stays separated from its socket. If it accidentally makes contact during the course of your repair, it could damage your MacBook Pro.
-
-
-
Remove the four 1.9 mm T3 Torx screws securing the plastic covers on top of the display hinges.
-
Remove both plastic hinge covers.
-
-
-
Remove the two 2.9 mm T3 Torx screws securing the aluminum cover on top of the main display cable.
-
Remove the cover.
-
-
-
Remove the two 1.7 mm T3 Torx screws securing the aluminum cover on top of the display cable flex connector.
-
Remove the cover.
-
-
-
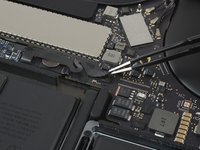
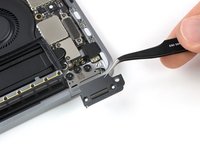
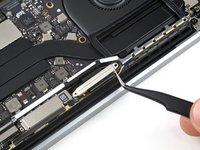
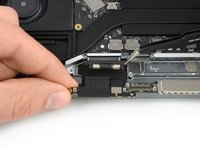
Pry the display board flex cable straight up from its socket to disconnect it from the display board.
-
-
Tool used on this step:Tweezers$4.99
-
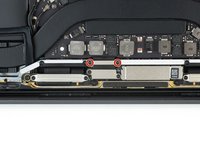
Remove the four 1.5 mm T3 Torx screws securing the two aluminum covers on top of the two display cable connectors.
-
Use a pair of tweezers to remove the two aluminium covers.
-
-
-
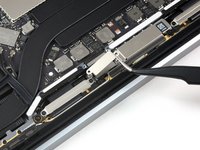
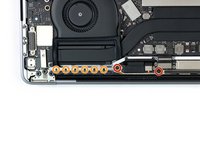
Remove the four 3.9 mm T5 Torx screws (two from each side) securing the antenna cable assembly.
-
Also remove the twelve 1.1 mm P2 pentalobe screws (six from each side).
-
-
-
Carefully disconnect the three antenna coax cables by prying them straight up from the logic board.
-
Slide your tweezers or the flat end of your spudger underneath each cable until it's near the socket, and then gently twist or pry up to disconnect it.
-
-
-
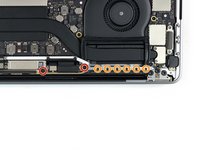
Remove the 2.8 mm T5 Torx screw securing the three antenna coax cables to the main board.
-
-
-
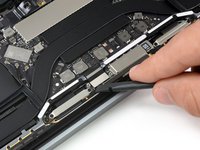
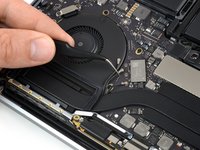
Use an opening pick to lever out the antenna cable assembly in the areas shown.
-
-
-
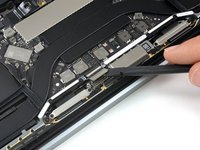
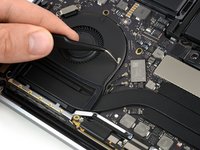
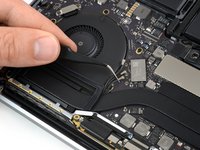
Carefully remove the antenna assembly, while simultaneously feeding the antenna cable bundle out from underneath the heat pipe.
-
-
-
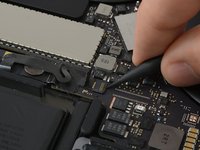
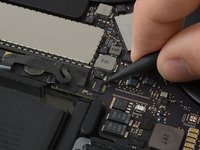
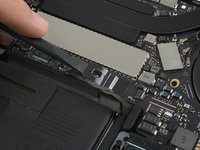
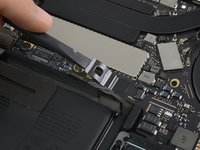
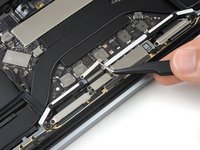
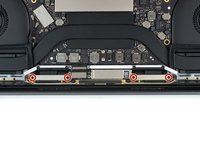
Remove the four 3.9 mm T3 Torx screws securing the two display cable cover springs.
-
-
Tool used on this step:Tweezers$4.99
-
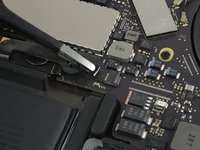
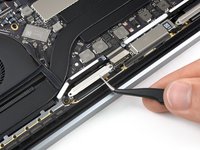
Grab the left side of the display cable assembly and pull it towards the bottom end of the MacBook and away from the cover spring.
-
Use a pair of tweezers to pull the cover spring of the display cable out of its recess.
-
Repeat this step with the right cover spring of the display cable assembly.
-
-
-
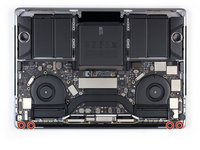
Fully open your MacBook and gently place it keyboard-side-down on a table so the screen hangs over the edge.
-
-
-
Support the screen with one hand and use your free hand to remove the six T8 Torx screws securing the hinges.
-
-
-
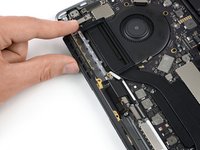
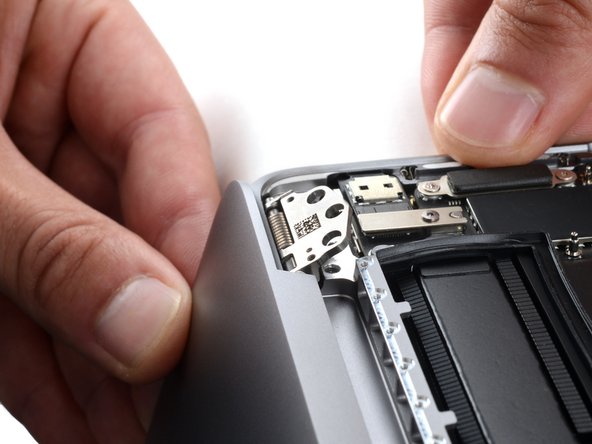
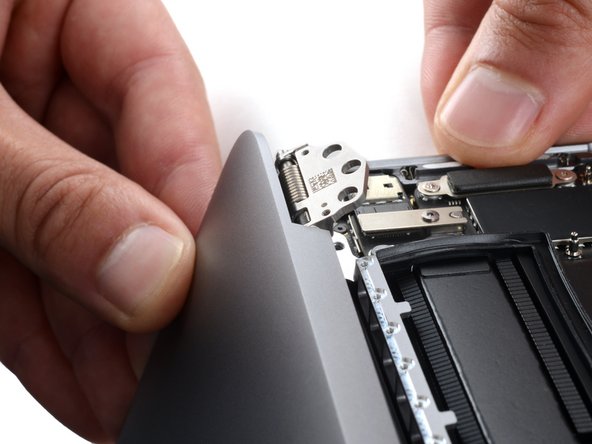
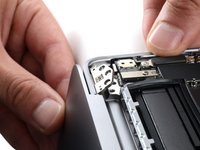
Firmly secure the main body of your MacBook with one hand.
-
With your free hand, push the left side of the screen up and towards the bottom of your laptop to free the left hinge.
-
-
-
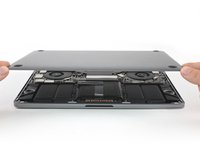
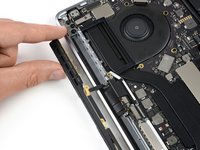
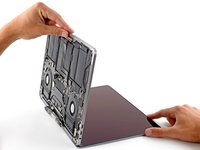
Free the right hinge and remove the screen.
-
Make sure the screen hinges are fully open and guide them into their recesses in the frame.
-
Partially tighten the six hinge screws.
-
Close your laptop and make sure the screen is properly aligned. If it clicks or snaps, readjust the alignment.
-
Fully tighten the hinge screws.
-


Compare your new replacement part to the original part—you may need to transfer remaining components or remove adhesive backings from the new part before installing.
To reassemble your device, follow the above steps in reverse order.
Take your e-waste to an R2 or e-Stewards certified recycler.
Repair didn’t go as planned? Try some basic troubleshooting or search our Answers community for help.
Cancel: I did not complete this guide.
85 other people completed this guide.


30 Guide Comments
Hello Lucas Zhu,
the interior build of the A1708 model is a bit different to this one. Especially the connection of the battery. You can check our guides for the A1708 model for the disconnection procedure. The removal of the display in general, is more or less the same with a few differences (e.g. two instead of 3 coax cables). Although the A1708 is a different model you might be able to remove the display following this guide.
THANK YOU THANK YOU THANK YOU!! You made my life so much easier. This guide was thorough and definitely made things a lot easier to understand.
Thanks for the guide! I’ve completed mine around 1 1/2 hours while being really careful not to short-circuit any components. Other video that I used for reference: https://youtu.be/153tVLIZVm8 and https://youtu.be/bEDhEWLrkUs