
Google Pixel 3 Antenna Cable Disconnect

Prerequisite Only
This guide is only intended to be used as a prerequisite for other guides. It's incomplete by itself.

What you need

  1. Google Pixel 3 Antenna Cable Disconnect, Google Pixel 3 Antenna Cable Disconnect: step 1, image 1 of 2 Google Pixel 3 Antenna Cable Disconnect, Google Pixel 3 Antenna Cable Disconnect: step 1, image 2 of 2
    • Use the point of a spudger to pry up and disconnect the blue antenna cable from its socket on the charging assembly.

  2. Google Pixel 3 Antenna Cable Disconnect: step 2, image 1 of 2 Google Pixel 3 Antenna Cable Disconnect: step 2, image 2 of 2
    • Use the point of a spudger to carefully pry up and release the blue antenna cable from its grounding clips.

    • The cable is fragile and prone to breaking. If it feels like the wire is firmly clamped in place, use the point of a spudger to push the clip open slightly, then try again.

  3. Google Pixel 3 Antenna Cable Disconnect: step 3, image 1 of 2 Google Pixel 3 Antenna Cable Disconnect: step 3, image 2 of 2
    • Use the point of a spudger to pry up and disconnect the black antenna cable from its socket near the USB-C port.

  4. Google Pixel 3 Antenna Cable Disconnect: step 4, image 1 of 1
    • Carefully de-route both antenna cables and move them away from the charging assembly.

  5. Google Pixel 3 Antenna Cable Disconnect: step 5, image 1 of 3 Google Pixel 3 Antenna Cable Disconnect: step 5, image 2 of 3 Google Pixel 3 Antenna Cable Disconnect: step 5, image 3 of 3
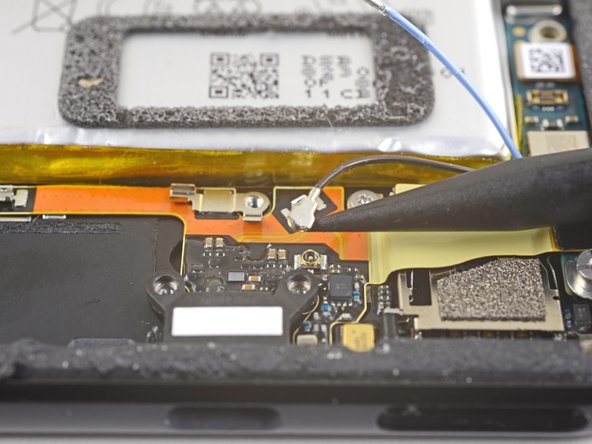
    • Use the point of a spudger to pry up and disconnect the charging assembly's connector from its motherboard socket, near the right edge of the phone.

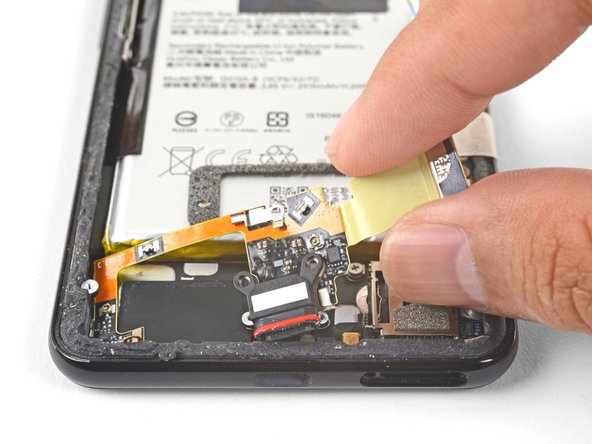
    • Carefully peel the flex cable from the top of the SIM card reader.

  6. Google Pixel 3 Antenna Cable Disconnect: step 6, image 1 of 3 Google Pixel 3 Antenna Cable Disconnect: step 6, image 2 of 3 Google Pixel 3 Antenna Cable Disconnect: step 6, image 3 of 3
    • When you are installing a replacement assembly:

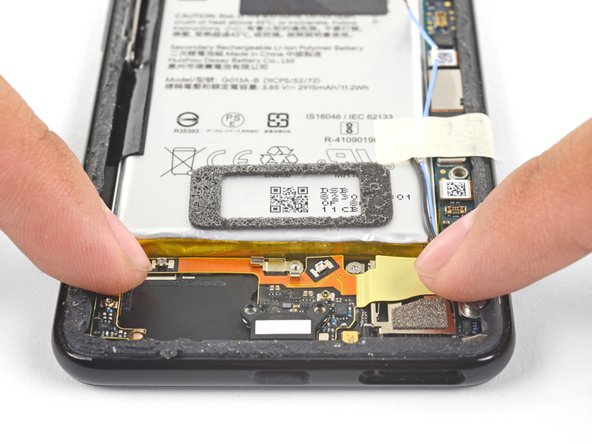
    • Be sure to remove all plastic liners from the assembly to expose the adhesive.

    • Line up the assembly's bottom left corner into place.

    • Carefully lay the rest of the assembly in place, making sure that the USB-C port is correctly seated in its cutout.

    • Use your fingers to press the assembly onto the frame.

Arthur Shi

Member since: 01/03/18

253,588 Reputation

526 Guides authored

Team

iFixit Member of iFixit

Staff

135 Members

17,228 Guides authored

View Statistics:

Past 24 Hours: 0

Past 7 Days: 3

Past 30 Days: 7

All Time: 48