
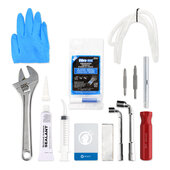
Troubleshooting Essentials
$35.95
5
1 reviews
Introduction
You had one job - make ice. Perhaps your machine isn't ejecting ice, hums, or just isn't creating ice quickly. These fixes will help reset your ice maker in the event that your fridge still dispenses water. Let's jump into potential solutions.
If you need a replacement ice maker assembly, iFixit offers several of the most common assemblies.
The Basics
As a sanity check, does your fridge display ICE OFF? If it does, toggle that setting off, and wait 12 hours for ice production to start.
Safety Note: Power Down Fridge
Before removing and replacing or continuity testing electrical components, power down the fridge. This will prevent damage to the components and prevent you from being electrocuted. Still, some electrical components — like capacitors — will store their charge and should not be tampered with.
- If the fridge is pulled away from the wall, or if the power switch is easily accessible, remove the plug.
- Otherwise, find the fridge’s circuit breaker in your breaker box and turn the circuit off.
- Verify your fridge has lost power by opening the doors and seeing if the fridge lights turn on.
Safety Note: Sharp Sheet Metal
When working underneath the fridge, consider wearing gloves to avoid cuts from the sharp sheet metal. The sheet metal is the thin structural metal where components mount.
While wearing gloves may make certain motions more challenging, it’s worth protecting yourself.
Reset Ice Maker
Reset your ice maker first.
Reset Power
When refrigerators experience temporary power outages, they may enter a safe mode. The safe mode protects the fridge's internal components from electrical overloading. You'll have to reset the power to your fridge.
- Unplug your refrigerator. If the plug is too hard to reach, switch the circuit breaker off.
- Wait 5 minutes before returning power to the fridge.
- Once power is back, open your freezer and push the light switch 3 times to trigger a cooling cycle.
- Monitor temperature over the next 24 hours.
- If your fridge doesn't dispense water, you'll have to first pull the machine out and check the water supply to the back of the fridge.
Causes
If the ice maker isn't working, check the ice maker switch. This switch is usually located behind the ice bucket and frequently gets turned off by accident.
- If the switch is turned on but the ice maker still doesn't work, check the switch for continuity with a multimeter. Replace as needed.

- 10 - 20 minutesModerate

- 5 minutesEasy
As ice is made, it falls to a lower storage tray. In circumstances where the ice doesn't fully freeze or melts and refreezes, it can become a blockage for future ice. In this case, the ice maker will rattle and make noise while no ice is made.
- Check the chute where ice cubes are made and see how large the blockage might be.
- Remove the stuck ice with a chisel, hairdryer, or warm water and rag while making sure not to break the plastic bits.
- Ice may have built up in the ice molds. Remove and pour warm water through the molds so the old ice will melt and new ice can form.
Whenever your ice maker stops working, check the temperature of the freezer. If the freezer temperature is above 10 degrees F (-12 C) the ice maker will not work properly. It functions best when the freezer temperature is set between 0 and 5 degrees F (-18 to -15 C).
- If the freezer temp is too high, make sure the condenser coil is clean and the condenser fan is working to cool the condenser and compressor. These can get covered in hair in grime and can be cleaned with a condenser coil brush.
- Check the evaporator coil for frost—if too much frost builds up, the air can't circulate through the coil and you will need to check the defrost components for a failure.
Another reason why the temperature may be unstable is due to a faulty door seal. Without a good seal, temperatures become unstable with warm air seeping into the fresh food door. When the temperature sensor detects warmer air, the controller keeps the compressor running over time to maintain the correct 37-degree temperature for fresh food. This excessive cooling causes the freezer temperature to fall well below zero, which will freeze the tip of the water tube that provides the ice maker with water.
Keep in mind that for proper door suction and sealing, the doors need to be self-closing so their own weight helps maintain the seal.
- The leveling rollers or legs need to be adjusted to tilt the fridge back slightly. When a proper seal is made, within 24 hours the defrost cycles will thaw the water tube and begin ice production.
- If your seal is cracked or doesn't pass the dollar bill test, consider replacing.

- 30 minutes - 1 hourDifficult
Your ice maker may halt ice production while the water filter is clogged and the replacement light is on. This is a safety and flavor precaution and prevents the machine from making poor-quality ice.
- If it's been more than 6 months since you last replaced your fridge's water filter, replace it now.

- 10 - 15 minutesEasy
If the refrigerator ice maker is not working, the door switch might be defective. When the freezer door is opened, the freezer door switch does two things: it turns on the light in the freezer and turns off the ice maker and dispenser. If the door switch fails, the dispenser will not turn on.
- You can test the switch by opening the freezer and depressing the switch, then testing the ice maker.
- Also, the switch can be checked for continuity with a multimeter. If it doesn’t have continuity, it should be replaced.

- 5 - 15 minutesEasy
- 5 minutesEasy
If the ice maker still doesn’t work, the water pressure in the house might be too low. The water inlet valve which supplies water to the ice maker is designed to work with a minimum of 20 psi of water pressure.
- Move along the line and check pressure at each point. It may help troubleshooting to start in the middle.
- Low water pressure at any point indicates a leak. Follow the pressure.
If the temperature is correct but the ice maker won’t work, the water inlet valve might be defective. The water inlet valve is an electrically-controlled mechanical valve that opens to supply water to the dispenser and ice maker. If the water inlet valve is defective, or if it has insufficient pressure, it won’t allow water to flow through. As a result, the ice maker won’t make ice.
The valve requires at least 20 psi to function properly.
- Make sure that the water pressure to the valve is at least 20 psi. Close the house water outlet valve, and then disconnect the water inlet hose. Hold the hose over a bucket, and open the valve.
If the water pressure is sufficient, use a multimeter to check for continuity to the water inlet valve.
- A water inlet valve should read a resistance value between 500Ω- 1.5kΩ. Outside of this range suggests failure.
If the water inlet valve has sufficient pressure and is getting power, but the ice maker won’t fill with water to make ice, replace the water inlet valve.
- 5 minutesEasy

- 30 - 45 minutesModerate
Flex-tray or twist-try ice makers eject cubes by twisting of the ice tray. As this plastic tray ages, it becomes brittle and stiff, and more likely to crack. This is normally paired with ice all over your freezer compartment.
Interruption in the flow of water through the water line leading to the ice maker can account for no new ice production. This can mean a closed valve, a kink or clog in the line, or a disconnection in the line. The water line may have become frozen as it moved through or near the freezer.
- An initial check is to see if your fridge will dispense water. If it will, then the problem is isolated to the ice maker itself.
- Inspect every valve, line, and connector for leaks. Replace and tighten as you go. Replace cracked plastic parts.
- Consider defrosting your ice maker. This will allow ice to melt in the line or fittings. The fill tube frequently becomes frozen, so a defrost cycle may help to thaw that line.
If the ice maker is not working it could be that the ice maker assembly itself is defective. There are several components in the control module of the ice maker that can fail, and most are not sold separately. Some ice makers have a relatively short lifespan and may not always be worth fixing.
- If other, simpler parts like the water inlet valve or shut-off arm have been ruled out, and the only thing left is the ice maker itself, replace the ice maker assembly.
- 10 - 20 minutesModerate
If the ice maker is not working the ice level control board might be defective. The refrigerator is equipped with an infrared light beam to detect the level of ice in the ice bucket. As the level of ice reaches the top, the beam is interrupted and the ice maker shuts off. As ice is used up and the level of ice drops below the beam, the ice maker starts up again.
- If the ice level control board fails, the ice maker will stop making ice.
- Replace the control board.

- 15 - 30 minutesModerate
If the ice maker is not working, the ice maker mold thermostat might be defective. Inside the control module of the ice maker is a thermostat which monitors the temperature of the ice mold (ice tray). Once the mold reaches the proper temperature, the ice maker starts a harvest cycle by ejecting the ice cubes and refilling with water. If the mold thermostat is defective, the ice maker doesn't advance.
- The thermostat can be checked for continuity. Replace it as needed. The freezer temperature should be between 0-5 degrees for optimum performance.
- 5 minutesEasy
Your machine may have stored error codes preventing further ice.
- If you cleared clogged ice, it may be worth switching your machine on and off. If it's possible to reset the ice maker settings on a control panel, perform the reset.
- If your ice maker isn't responding to these attempts, confirm secure electrical connections to the ice maker, control panel, and outlet.
Regular Maintenance
It's important to perform regular fridge maintenance. Your appliance should last for at least 10-15 years before needing replacement, so keep it running well with these tips.
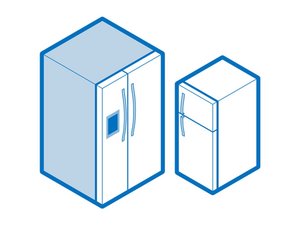
You're seeing solutions for Refrigerator. Select your model to find parts for your device.
Related Problems


23 common problems
View all