
Introduction
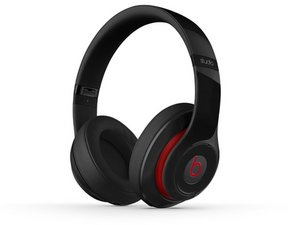
Headphones are a staple of media consumption. Aside from a full theater of sound equipment, there are few things more immersive than having a set of good headphones to enjoy your favorite album. Until you can't get the blasted things to turn on. Take a breath, stop mashing the power button and keep reading—you'll be back to headbanging in no time.
First Steps
Before undertaking any of the more time consuming solutions below, these are a few fundamentals to get you started.
- Try a different power source. This might include a different wall outlet, USB port, USB cable or power brick.
- Reset your Beats. Press and hold the power button and the volume down button for ten seconds. There will be some indication from the LEDs if the reset was successful. LED behavior varies by model, but it’s safe to assume some LED flashing means it worked.
- If your Beats support it, check to see if you get sound in wired mode using a 3.5mm audio cable. This can be used as a workaround while you do further triage, as well as a diagnostic step to confirm overall functionality.
Causes
A device’s firmware is responsible for doling out instructions to the various parts of the system. Even headphones need some level of programming to accomplish all the things we expect of them. Damaged or outdated firmware can lead to any number of problems. Your headphones may be perfectly capable of powering on properly, but lack the correct instructions to do so.
- If you are connecting your Beats to an Apple device, firmware updates should come in automatically, or process alongside updates to the OS. Install any outstanding updates for your connected device, leave your headphones charging nearby and cross your fingers.
- If you use your Beats with an Android device, download the Beats app from the Play Store. See if they are recognized in the app. If so, it may cue for a firmware upgrade. Follow the prompts to process it and retest for power once it has completed.
- There aren’t presently any update tools available for Windows, so if your Beats are truly not powering on, and you’ve never paired them with a mobile device or Mac, sit this one out and skip ahead.
Due to the repeat connect and disconnect nature of the port, it commonly undergoes significant wear. Ports often develop loose connections, bent pins or other failures which prevent power from getting to the components.
- Inspect the port with a flashlight to ensure there are no loose or bent pins. Ports are magnets for lint and other debris which may prevent your charger from making good contact.
- If you see any debris in the charge port, you can remove it with a toothpick or other non conductive material. Be mindful of any pins and avoid using any metal tools to clean the port unless the battery is disconnected.
- If a toothpick is too large, try splitting the tip with a knife. Half a toothpick can usually reach the most recessed crevices of a charge port.
- Ensure the cable seats properly and clicks into place. A loose connection could indicate the charge port is worn and needs to be replaced.
- Gently wiggle the cable inside the port. If it only charges at a specific angle, chances are high your port is faulty.
The charge port is often on its own small board, but connections to other components may be soldered directly to it, so may need basic soldering skills to get the old board out and install a new one.
In over the head models and connected earbuds (as opposed to models like the Powerbeats Pro, with no cable between the left and right earbud), the battery is generally mounted within one ear speaker and circuit boards are within the other. If cables connecting the two are damaged or disconnected, the battery may be unable to transmit power to necessary components.
- Check for pinched or damaged cables. Hinges in the headband on over the head models are prime locations for this kind of failure.
- Gently wiggle cables near points of connection to see if you get power in a certain position.
- In cases where you can use the Beats with an audio cable, but do not power up, this is a strong possibility. Power is necessary for wireless function, but power for wired function may be drawn through the audio cable. Locate any circuit boards within the device housing and be certain any cables are firmly seated.
- Exercise caution when attempting to open earbuds. They are generally held together with easily broken plastic clips and adhesive. Connections are often directly soldered to the circuit board. Consult the relevant Guide or search around for some direction for your specific model before conducting any surgery.
All rechargeable batteries have a shelf life. It’s a matter of science. The electrolyte necessary for repeat use is eventually depleted, preventing further charge from being stored. If the battery reaches a point in its life cycle where it can no longer accept incoming power, the headphones will cease to power on at all.
- This may be the case if you are able to get sound out with an audio cable. Or if you get brief flickers of life when pressing the power button. The battery may not have enough capacity left for wireless function.
- You can test battery charge levels with a multimeter to verify they are outputting adequate voltage.
- Set the meter to DC voltage. Measure voltage between the red wire and the black wire leading from the battery.
- Normal battery voltage is 3.7 volts. If you are getting less, charge for a a few hours and measure again. If the voltage is still less than the battery is rated for, it is likely to be faulty.
- Beats Headphone Batteries and Repair Guides for some models can be found right here at iFixit!
Find compatible replacement parts for your Beats Headphone. All parts and fix kits are backed by the iFixit Quality Guarantee.
Unlike most laptops, or smartphones, most headphones do not have an auto-on function when power is connected. In fact, they are more likely to be unable to power on while charging.
- Verify your power button is depressing, or hitting some point of activation. If it doesn’t seem like it’s clicking, it probably isn’t. It may even be jammed in place altogether.
- Try giving the externals a good cleaning. A damp cloth will remove most gunk from the housing. A toothpick can be used to pick debris out of any crevices around the button which may be interfering with its use.
- If you suspect this is the issue, you may need to tear your unit apart to see if pressing button from the inside gets results.
- Proceed with caution, some models will be difficult to open and are held together largely with plastic clips. iFixit doesn’t have presently have Guides for every model of Beats headphone, but you can likely find a video on YouTube where someone rips apart the exact model you’re working on.
- These buttons are typically part of a circuit board. The external button mechanism aligns with the button mounted to the board.The switch can be replaced if you are competent at soldering. Otherwise the board itself will need replacement.
Headphones are not impervious to the arch enemy of electronics–liquids. Anything from rain to perspiration is liable to get into your headphones, performing nefarious acts of electronic destruction.
- Liquid can damage any of the parts on the inside of your Beats. You can check to see if your device has been affected without opening them, but opening them will help to pinpoint the issue.
- Look for rust or other sorts of corrosion. rusted or shows signs of liquid entry.
- If you see indications of liquid contact, inspect the device internals, if you are able. Replace any components which have been affected.
- Liquid damaged earbuds may be worth replacing altogether. They are considerably less repairable and are unlikely to be reassembled easily.
1 common problem
View all