Introduction
While fruit-based watches have been grabbing headlines, rock-based watches are now in their third iteration. We tore down our first Pebble more than two years ago—so long ago, in fact, that we didn't even know how to score it. So how does the latest Pebble stack up to the pile of wearables released in recent years? Let's open the Pebble Time and find out.
Full disclosure: Pebble provided us with an early Kickstarter backer unit, and let us pick their engineers' brains throughout our teardown. Keep an eye out for some insider tidbits in our analysis.
Are you wild about wearables? Spend some teardown time with us on Instagram, Twitter, and Facebook.
What you need
-
-
The official tech specs don't reveal much, but that's okay because we've got plenty of daylight to finish this teardown. Here's what we do know:
-
Low-power, 1.25-inch, 64-color, LED-backlit e-paper display
-
6-axis inertial measurement unit, compass, ambient light sensor, microphone
-
Bluetooth 4.0
-
Lithium-ion polymer battery with a battery life of up to 7 days between charges
-
Apart from the e-paper display, what sort of technological whizbangery makes for 7-day battery life in a modern smartwatch? We're about to find out.
-
-
-
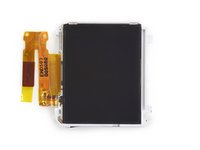
The Pebble Time features a color e-paper display.
-
The back of the smartwatch is adorned with several markings, along with the port for the charging dock.
-
This feels like the first time we've seen a smartwatch that boasts a water resistance of 30 meters. Increased water resistance often means sacrificed repairability. Hopefully, Pebble has taken the time to work repairability into the equation.
-
The Time includes a proprietary USB charging cable with magnetic connectors (silver contact points) coupled with charging contact points (gold contacts).
-
-
-
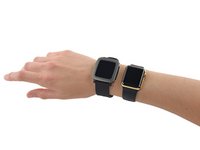
We're all about comparing apples and oranges, so we start off by seeing how the Time relates to another smartwatch we have laying around. This 38 mm Apple Watch Edition will have to suffice.
-
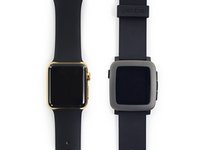
The minimalist, 144 x 168, 64-color, Gorilla Glass-topped e-paper screen on the Pebble stays on all the time—without compromising the battery.
-
On the other hand, the Apple Watch's touch-sensitive, sapphire-covered, 272 x 340 display is pretty, but also power hungry—so it spends most of its time switched off to conserve power.
-
Another immediately noticeable difference is in the weight. At 42.5 grams, the Time clocks in at well under half the heft of the 93-gram Apple Watch Edition.
-
Our hand model also notes that the Pebble's band feels a bit softer and more comfortable. Which is more durable? Only time will tell.
-
-
-
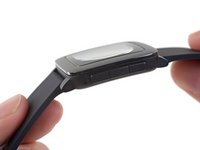
Unlike the current batch of smartwatches on the market, the Pebble Time does not have a capacitive touch display. Instead, it relies on good ol' fashioned buttons (up, down, and select).
-
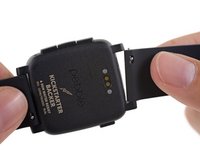
Swapping bands is a breeze; simply pop the metallic pegs off the posts and swap. Pop and swap.
-
Customizers take note: The Time is compatible with a plethora of industry-standard 22 mm watch bands. Go wild.
-
With both bands out of the way, we proceed to remove the display with the help of our iOpener.
-
-
-
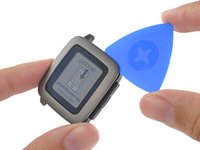
With a minimum amount of heat applied to the front bezel, we use an opening pick to pry along the perimeter of the Pebble Time.
-
Open, uh, sarsaparilla? Uh, open Saskatchewan? Open, septuagenarian? Uh, open, saddle soap? Open, sesame! And with that, the front bezel (includes the glass) surprisingly separates from the Pebble Time.
-
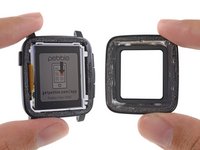
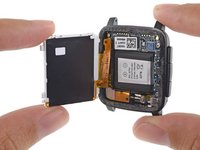
Time after time, we've seen displays fused to a device's front glass—a process that makes for thin displays that are nearly impossible to repair. Good news everyone! The color e-paper display is NOT fused to the front glass.
-
-
-
-
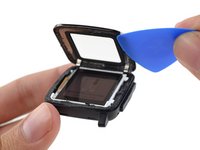
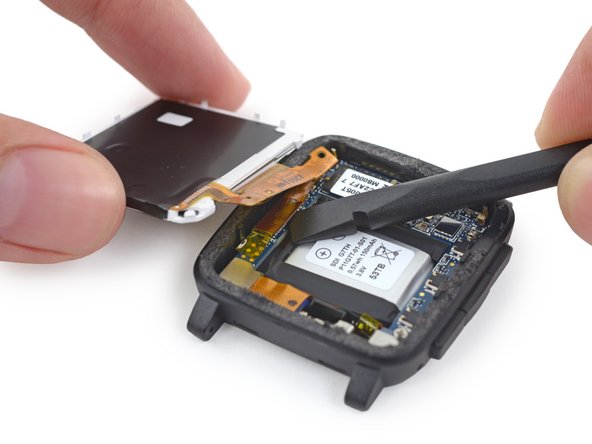
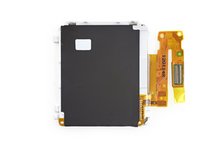
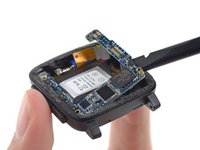
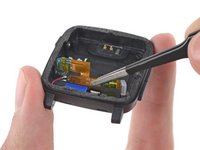
We use a spudger to lift the display from its housing and are momentarily reminded of the cable wrangling that we had to perform in a recent teardown.
-
No time for origami here. We're happy to see that the display cable is only folded in half once. We quickly spudger the display connector from the motherboard and move on to the battery connector. Wait, where is the battery connector?
-
-
-
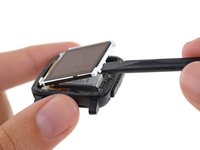
We go in for a closer look at the e-paper display, which in itself does a great job encapsulating the design choices and trade-offs of the Pebble Time.
-
With its comparatively limited color range (64 colors) and brightness, this display doesn't "pop" in the same way as some other smartwatch screens—but it has the distinct advantage of being always on, and of being fully visible in direct sunlight.
-
-
-
We've chipped away at this Pebble—now let's have a look at the motherboard. Front-side ICs include:
-
ST Micro STM32F439ZG 180 MHz ARM Cortex-M4-based MCU
-
Spansion S29VS128R 128 Mb, 65 nm MirrorBit Flash
-
Texas Instruments CC2564B Bluetooth and Dual-Mode Controller
-
Ambient light sensor
-
-
-
More ICs adorning the back side:
-
Lattice LP1K Field Programmable Gate Array
-
+14690B EWXS 9.504 AB Power Management IC; likely Maxim Integrated's MAX14690EWX
-
Linear Tech LT3009 Linear Regulator (Pebble tells us that the LT3009 is included for supplying power to the upcoming Smartstraps)
-
Bosch Sensortec BMI160 (6-axis IMU with acceleroemeter and gyroscope)
-
Freescale Xtrinsic MAG3110 3D Digital Magnetometer
-
Texas Instruments DRV2603 Motor Driver
-
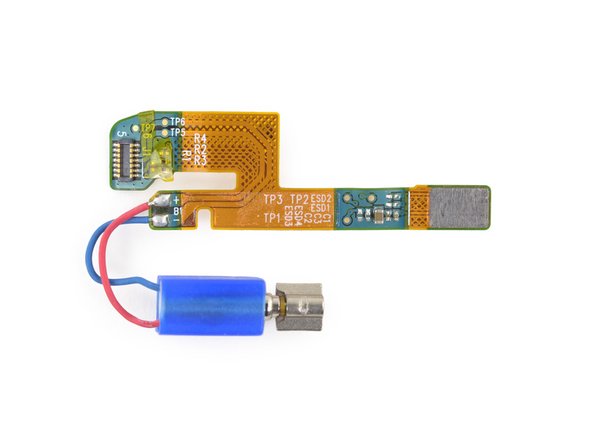
The blue arrow points to the smartstrap data in/out pin; above it in red is the power in/out pin and below it is the smartstrap/charging ground pin. The red arrow points to the positive (+) battery connector and next to it in black is the negative (-) connector.
-
-
-
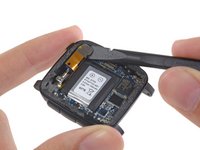
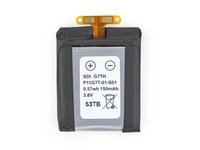
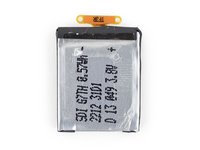
It's about time we got a clear view of the battery.
-
This 150 mAh, 0.57 Wh, 3.8 V battery packs a bit less punch than even the smallish 205 mAh, 0.78 Wh battery we found in the Apple Watch.
-
That's also about half the juice of other recent smartwatches, like the Moto 360 and the Samsung Gear Live—but with its e-paper display, Pebble claims that the Time can last up to seven days between charges.
-
-
-
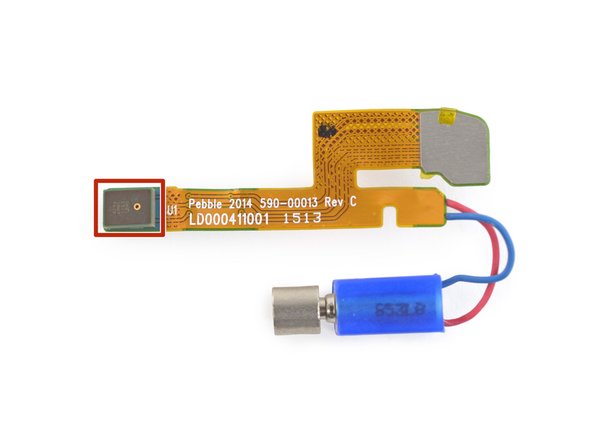
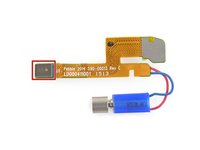
The microphone and vibrator assembly is next to be plucked out of (the) Time.
-
This is a Knowles microphone, waterproofed by a membrane behind the microphone port.
-
We're all abuzz as we find the eccentric rotating mass vibrator soldered to the cable assembly, making replacement a tad bit more difficult.
-
-
Tool used on this step:Tweezers$4.99
-
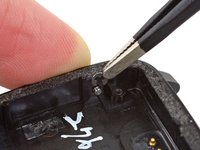
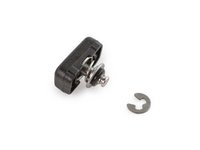
We're running out of things to pull from this Pebble's chassis. Those quality control markings prove difficult to grasp with our tweezers.
-
We manage to seize hold of this small c-clip securing the back button, which obligingly comes free for inspection.
-
-
-
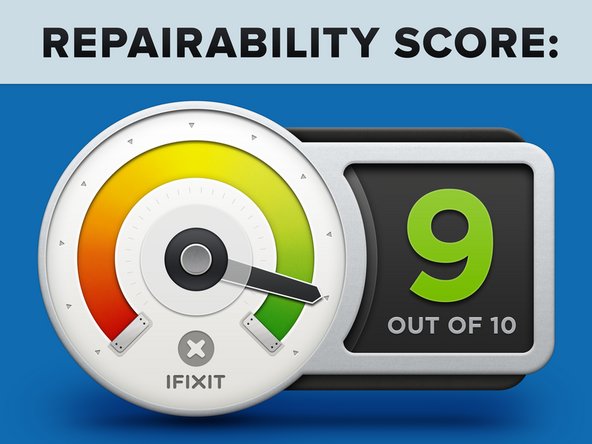
Pebble Time Repairability Score: 9 out of 10
-
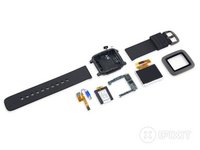
The watch band is an industry standard 22 mm band with a quick release mechanism, meaning replacement bands will be easy to source and install.
-
The Pebble Time uses standard Phillips #00 screws inside, and once you're inside, components are fairly modular and very easy to remove.
-
The front glass and e-paper display are not fused together—the two components can be replaced independently, lowering repair cost.
-
Although the battery is tucked away under the motherboard, it is modular and removable.
-
Removing the front glass requires heat and replacement adhesive.
-


22 Guide Comments
so there is no additional RAM on the PCB? just the 256k of the MCU?
that is on one hand a bummer and on the other hand a great thing
the FPGA is possibly used for motion detection stuff and the display to keep the MCU asleep while processing the data for said devices.
Good catch I missed that it has an FPGA and an ARM M4 on it. Wow. That is a freaking powerful combination!!!
RDustinB -
I would rather say that the M4 is for processing the Motion and handling data etc. and the FPGA is for driving the E-Ink Display. Personally, I dont see there any need for more RAM, as there isnt that much happening. Its rather just a Microcontroller on the board, like the Arduino, but more powerfull.
Thanks for the tear down iFixit dudes!
I feel like Pebble is the master at smartwatch development. This is a perfect culmination of part selection, design and execution. The battery life (even if it is normally only 60% of the maximum 7 days Pebble states) is fantastic and much easier for me to swallow than the "other" guys stating I'd need to charge my watch every single day.
Good job Pebble, you are doing it right.