Introduction
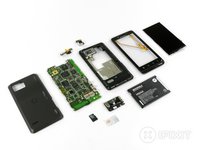
The Motorola Droid Bionic is the first dual-core smartphone operating on Verizon's 4G LTE network. Join us as we take a peek inside this behemoth of a phone.
Follow iFixit on twitter for the latest updates.
What you need
-
-
After nearly 8 months since its revealing at CES 2011, the Droid Bionic is finally here! And it's packing some serious hardware:
-
1 GHz Texas Instruments Dual-Core Processor
-
32 GB storage capacity (16 GB internal, 16 GB external)
-
1 GB RAM
-
4.3" qHD Display with Corning Gorilla Glass
-
8 MP (1080p HD) Rear-Facing Camera
-
Verizon 4G LTE Network Capability
-
-
-
The Bionic features two ports on its left side:
-
micro-USB
-
micro-HDMI
-
Verizon advertises the Bionic as the slimmest 4G LTE phone at 0.43 inches thick.
-
In comparison to the Motorola Droid, the Bionic is definitely thinner and lighter (158 to 169 grams), but also longer and wider.
-
The top side of the Bionic is adorned by the headphone jack and the power button.
-
-
-
The Droid Bionic turns around to give us a peek at its logo-filled back side, including the long-awaited 4G LTE logo.
-
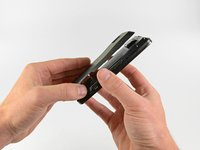
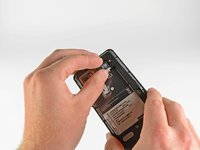
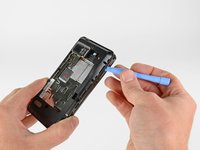
Our eager hands cannot wait to get inside this behemoth bionic-being as we remove the back cover with relative ease. An opening tool comes in handy here, but you can also use your fingers.
-
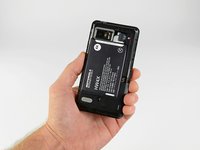
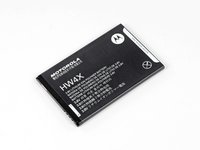
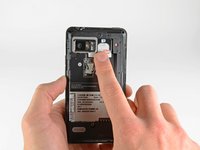
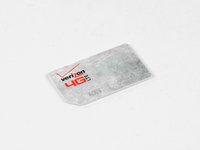
Our first look inside the Bionic gives us a view of the 16 GB microSD card, the 4G LTE SIM card, and the Li-Ion 1735 mAh battery.
-
-
-
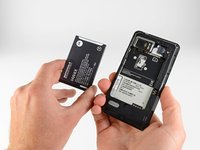
To our pleasure as DIY-ers, the battery is easily removable and therefore replaceable.
-
The Bionic's battery boasts nearly 11 hours of continuous talk time and over 240 hours of standby time.
-
240 hours on standby happens to be the perfect amount of time for respectfully silencing your cellphone and refraining from texting or talking during the showing of Modern Times Forever.
-
-
-
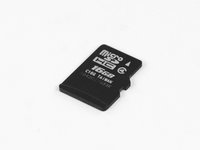
Next, we enjoy the pleasure of removing the 16 GB microSD card generously included with the purchase of a Motorola Droid Bionic.
-
The Bionic comes with 16 GB internal flash memory and a 16 GB microSD card (with the option to swap in a 32 GB microSD) for a grand total of 32 GB of included storage, or 48 GB expanded storage.
-
-
-
-
A sticker, some clips, and a few—ahem, ELEVEN—screws around the perimeter of the Bionic are all that prevent us from peeking inside.
-
Stickers have never stopped us before and a few T5 Torx screws or metal clips are no match for our 54-piece bit driver kits, plastic opening tools, and nimble fingertips.
-
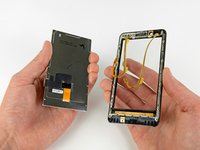
We remove the rear case and are instantly greeted by a forest of EMI shields.
-
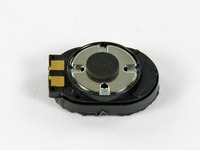
We remove the loudspeaker from the otherwise unexciting rear case, a speaker ideal for proclaiming the characteristic Drooooooiiiiid upon powering on the phone.
-
-
Tool used on this step:Spudger$3.99
-
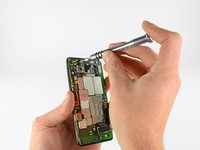
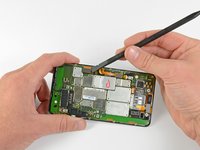
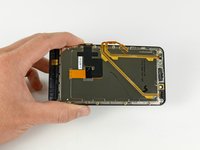
The display ribbon cable connector is in the way. Let's find a way to remove it.
-
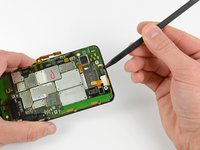
We continue our quest of ridding the Bionic of its connectors with the help of our trusty spudger.
-
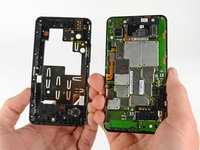
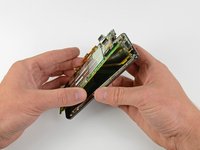
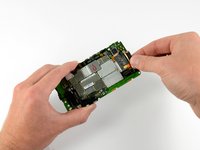
With stickers unstuck, screws unscrewed, and connectors disconnected, we lift the motherboard away from the display assembly.
-
-
-
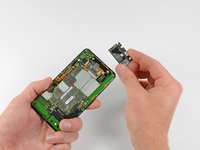
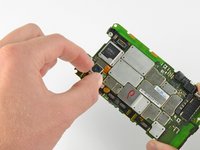
The rear-facing camera simply pops out. Inscription on the component is this wonderful gem: "NCAABA 65161 0100698 2001 SH."
-
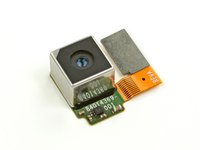
The Bionic sports an 8 MP camera capable of capturing video at a resolution of 1920 x 1080 (1080p) along with a dual-LED flash.
-
The camera measures in at 7.1 mm x 9.3 mm (length x width) and weighs an astonishing 1.2 grams!
-
-
-
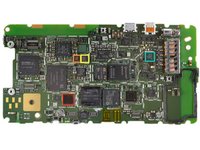
After some slash-and-burn on the EMI shield forest, we found the big players on the motherboard:
-
Elpida B8064B2PB-8D-F 1 GB DRAM and TI OMAP 4430 processor
-
SanDisk SDIN4C2-16G 16GB Flash memory
-
ST Ericsson CPCAP 006556001
-
The Qualcomm PM8028 power management chip works in conjunction with the Qualcomm MDM6600 to provide CDMA connectivity.
-
Hynix H8KCS0SJ0AER and Hynix H8BCS0QG0MMR memory MCP containing Hynix DRAM and STM flash
-
ATMEL MXT224E-CCU Touchscreen Controller
-
Motorola T6VP0XBG-0001, believed to be the (LCM 2.0) LTE baseband processor.
-
-
-
There's tons of chips on the front of the board. Other chips of interest include:
-
Texas Instruments WL1271 chip that supports WiFi (802.11 b/g/n), Bluetooth 2.1, FM and GPS technologies (thanks Chipworks!)
-
Kionix KXTF9 accelerometer
-
ST Micro AGD8 2040 S6NBF gyroscope
-
Avago ACPM-7868 quad-band power amplifier
-
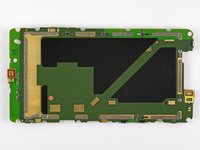
What's this? Did we use Content Aware to remove all of the chips from the back of the motherboard? The answer is no; there just isn't much going on with the backside of the board.
-
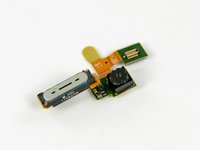
We find a microphone (red), proximity sensor (orange), ambient light sensor (yellow) on the back.
-
-
-
The Bionic features a 4.3-inch 960x540 pixel qHD LCD, the same size found in the Droid X2.
-
The qHD display originally appeared in the Motorola Atrix earlier this year, and we've seen one in every Motorola Android phone since.
-
-
-
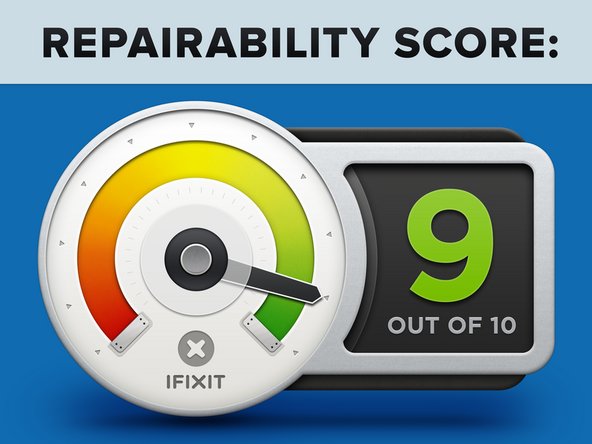
Motorola Droid Bionic Repairability Score: 9 out of 10 (10 is easiest to repair).
-
No tools are necessary for changing the SIM and microSD cards.
-
The battery can be removed in seconds.
-
The phone is held together with a limited number of screws and plastic clips. Adhesive is minimally used in its construction.
-
Many components can be replaced individually, and are not located on large, delicate ribbon cables.
-
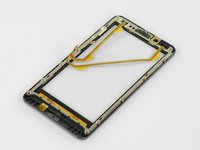
The LCD is separable from the glass front panel, making them independently replaceable.
-
You must disassemble the entire phone to replace the LCD or front panel.
-
Replacing the rear-facing camera requires removing one of the motherboard's EMI shields.
-


6 Guide Comments
I have now spent nearly one year with the Droid Bionic. It has now been replaced 2 times, due to poor functionality.
I have a replacement coming from Verizon but opted to call Motorola to see about getting a different model. I was told that I could not get a different model from the Bionic. The representative acknowledged that the Bionic has had many problems with functionality but still would not offer a different model, only offering to repair the one I have. I have a new replacement coming!
I offered to take an older model, just not a Bionic. The answer was no.
I will now be posting on EVERY website I can find that Motorola does not stand behind their poor models and does not offer customers service.
All I asked for was for the company to stand behind it's product and make amends when it is inferior...even if that meant I got an older model. I paid $250, with a contract, for my phone and it is poorer quality than my work flip phone.
Next time, I will return to the Iphone.
Love my bionic, but hate the fact they are delaying the updates... I really hope I will get a JB update on my Bionic cos I'm using Holo Locker and Launcher and really likeing the Jelly Bean look... http://www.motoask.com/lounge-off-topic-...
Thanks for the teardown, it helped me successfully replace my screen. I did an edit of the section of the teardown noting you have to remove the big sticker under the battery, but it didn't seem to update.
If somebody can point me to a store with online parts for the Motorola Droid Bionic that’d be cool. Because I was seriously thinking of buying this phone until I realized that there are no parts for the Motorola Droid Bionic on iFixit. If you can help then thanks.