
What you need

This teardown is not a repair guide. To repair your Motorola Atrix 4G, use our service manual.

  1. Motorola Atrix 4G Teardown, Motorola Atrix 4G Teardown: step 1, image 1 of 1
    • Currently the most powerful smartphone on the market, the Atrix boasts some impressive technical specs:

    • 1 GHz Cortex-A9 Dual-Core [!] Processor

    • 8 core ULP (ultra-low power) GeForce GPU

    • 4" qHD (Quarter High Definition) Display (960x540) protected by a Gorilla Glass front panel

    • 16 GB onboard memory, with up to 32 GB SD storage

    • 1 GB DDR2 RAM

    • 5 MP Rear-facing camera with 720p video capture and VGA Front-facing camera

  2. Motorola Atrix 4G Teardown: step 2, image 1 of 2 Motorola Atrix 4G Teardown: step 2, image 2 of 2
    • Aside from a sleek carbon fiber finish, the back of the phone reminds you who made the phone, whose network you are calling on, and what quality video you can shoot.

    • Sorry to disappoint, but it is not actually carbon fiber. Instead it is plastic with a carbon fiber pattern. One of these days...

    • One of the most highly touted features of the Atrix is its connectivity. This is accomplished through side-by-side micro USB and micro HDMI ports.

  3. Motorola Atrix 4G Teardown: step 3, image 1 of 2 Motorola Atrix 4G Teardown: step 3, image 2 of 2
    • The Atrix' back cover comes off easily, providing access to the user-serviceable battery and the microSD card slot.

    • There's also instructions on the inside of the back cover showing how to remove the battery and reconnect the cover.

    • We applaud Motorola's drive to help its users with this procedure.

  4. Motorola Atrix 4G Teardown: step 4, image 1 of 2 Motorola Atrix 4G Teardown: step 4, image 2 of 2
    • We liked those directions, so we decided to follow them. Lo and behold, the battery came out very easily!

    • The 34.7 gram, 1930 mAh Li-Ion battery will provide up to 530 minutes of talk time on GSM, and up to 540 minutes on WCDMA.

  5. Motorola Atrix 4G Teardown: step 5, image 1 of 2 Motorola Atrix 4G Teardown: step 5, image 2 of 2
    • Exposing the innards of the phone proves to be a simple process. We are inhibited only by a few T5 Torx screws and some plastic clips.

    • These are obstacles easily surmounted by iFixit's Home Tech Toolkit.

  6. Motorola Atrix 4G Teardown: step 6, image 1 of 1
    • An antenna is mounted in the rear half of the phone and must be disconnected before further disassembly.

    • A word on wireless connectivity: Although the phone is labeled 4G, the phone does not actually run on 4G (hint: it still doesn't exist). Data transfer occurs over HSPA+, a classification of evolved 3G.

  7. Motorola Atrix 4G Teardown: step 7, image 1 of 1
    • This sticker comes off quite easily. Motorola used an adhesive that would allow the sticker to be re-sealed after being taken off. That's great if you have to dig underneath the sticker to fix something!

    • We haven't encountered any VOID stickers or things of that sort while taking apart the Atrix, making it appear to be very repair-friendly.

  8. Motorola Atrix 4G Teardown: step 8, image 1 of 3 Motorola Atrix 4G Teardown: step 8, image 2 of 3 Motorola Atrix 4G Teardown: step 8, image 3 of 3
    • The LED flash unit is held in place by a set of small metal clips.

    • The LED flanks the 5 MP camera (which is capable of shooting 720p HD video). A software update to be released soon will reportedly allow for full 1080p video capture.

    • Disconnecting the last few cables allows us to remove the motherboard from its comfy home...

  9. Motorola Atrix 4G Teardown: step 9, image 1 of 1
    • Big players on the front of the board include:

    • ST Ericsson CPCAP 2.2TC22 DC Power Management (thanks, Chipworks!)

    • Triquint TQM7M5013 Linear Power Amplifier

    • Qualcomm PM8028 RF Power Management IC

    • Toshiba eMMC THGBM2G7D4FBAIE 16GB NAND Flash

    • Kionix KXTF9 MEMS Motion Sensing Accelerometer

    • An ultra high-res version of this picture can be seen here.

  10. Motorola Atrix 4G Teardown: step 10, image 1 of 1
    • The back of the board houses:

    • Qualcomm MDM6200 supporting HSPA+ speeds of up to 14.4 Mbps

    • Hynix H8BCSOQG0MMR 2-chip memory MCP

    • Elpida B8132B1PB. According to Chipworks, the Elpida package contains 1 GB DDR2 RAM, but also covers the Nvidia Tegra 2 CPU/GPU residing underneath the package.

    • Broadcom BCM4329 802.11n Wi-Fi, Bluetooth 2.1, and FM Tuner

    • AKM 8975 Electronic Compass

    • An ultra high-res version of this picture can be seen here.

  11. Motorola Atrix 4G Teardown: step 11, image 1 of 3 Motorola Atrix 4G Teardown: step 11, image 2 of 3 Motorola Atrix 4G Teardown: step 11, image 3 of 3
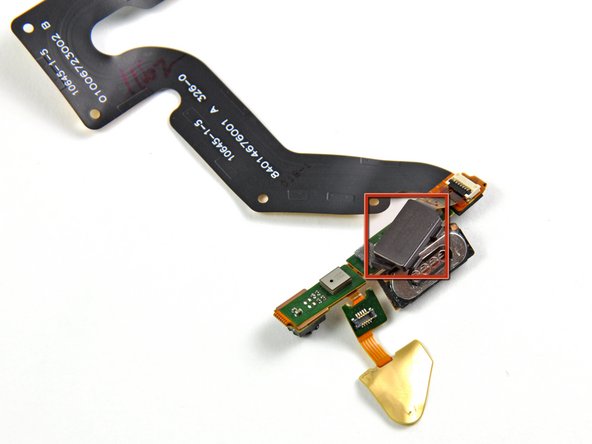
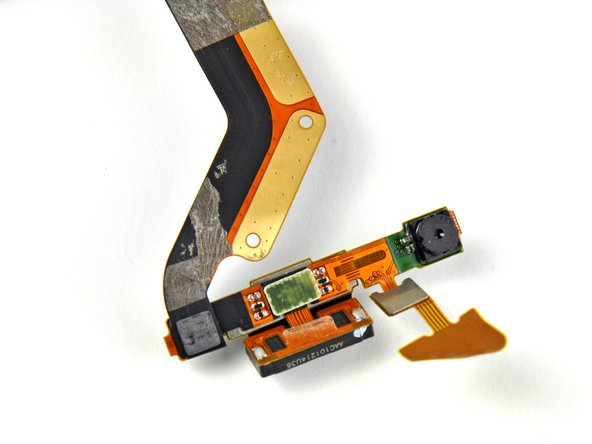
    • Next, the first of the two complex ribbon cables can be peeled off the steel mid-plane.

    • This cable houses the front camera, earpiece speaker, power button assembly, and top microphone. How's that for integration?

    • For enhanced security, the power button has a capacitive fingerprint scanner that can verify your identity from a single swipe of a finger.

  12. Motorola Atrix 4G Teardown: step 12, image 1 of 3 Motorola Atrix 4G Teardown: step 12, image 2 of 3 Motorola Atrix 4G Teardown: step 12, image 3 of 3
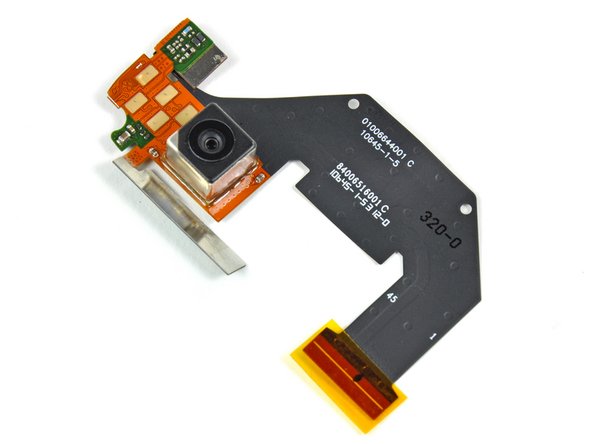
    • We can also remove the rear camera assembly and its cable.

    • One cable to rule them all: the rear camera, proximity sensor, ambient light sensor, pressure contacts for the headphone jack, and side volume buttons all come out as one piece.

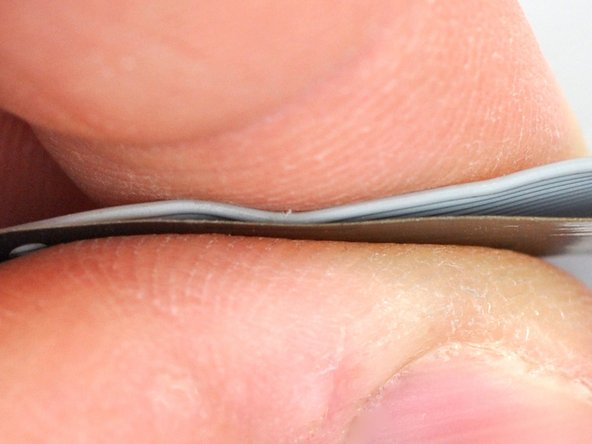
    • What a decade can do for cables. Check out the thickness of a Parallel ATA cable compared to the Atrix camera cable. The PATA cable is 0.66 mm thick, while Atrix' camera cable measures 0.17 mm! And they're routing several components through the same cable!

  13. Motorola Atrix 4G Teardown: step 13, image 1 of 2 Motorola Atrix 4G Teardown: step 13, image 2 of 2
    • To remove the metal plate behind the LCD, simply lift its top edge slightly while pushing it toward the top of the phone.

    • After releasing it from its retaining clips, the LCD is readily accessible.

  14. Motorola Atrix 4G Teardown: step 14, image 1 of 3 Motorola Atrix 4G Teardown: step 14, image 2 of 3 Motorola Atrix 4G Teardown: step 14, image 3 of 3
    • And just like that, the LCD can be lifted from the glass front panel.

    • Huzzah! -- the LCD is not glued to the front panel glass!

    • The roughly 80% (this number is a rough estimate and is a calculation deemed accurate by the iFixit statistical department) of people who drop their Atrix now won't have to spend their money on replacing a fully functional LCD in addition to their broken glass!

    • The 960x480 qHD PenTile LCD is aptly named because it is the size of one quarter of a 1080p panel.

    • The front panel houses an Atmel mXT224 touchscreen controller underneath the LCD connector. It's the same chip we've found on the Samsung Galaxy Tab, Nexus S, and HTC Evo 4G.

  15. Motorola Atrix 4G Teardown: step 15, image 1 of 2 Motorola Atrix 4G Teardown: step 15, image 2 of 2
    • Motorola Atrix 4G Repairability Score: 9 out of 10 (10 is easiest to repair)

    • The LCD is separable from the glass front panel, making them independently replaceable.

    • The phone is held together with a limited number of screws and plastic clips. Adhesive is minimally used in its construction.

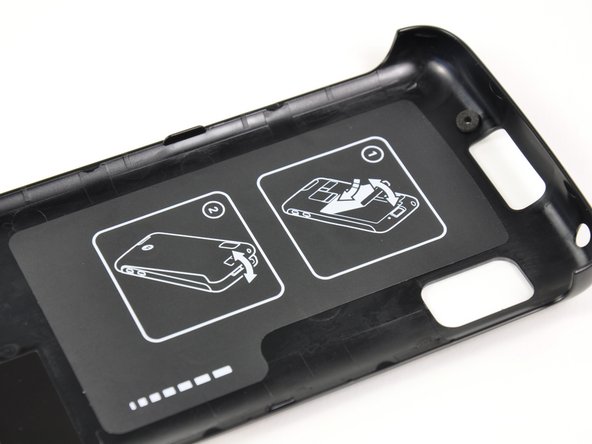
    • The battery can be removed in seconds.

    • No tools necessary for changing the SIM and microSD cards.

    • The phone feels solid in the hand, but the plastic rear panel is a little chintzy (that's right, chintzy).

    • The two main ribbon cables are soldered to many components (cameras, proximity sensors, etc.), making the cables costly to replace.

3 Comments

ST-ERICSSON CPCAP 2.2TC22 is a 4G Modem (the only available on the market today). Qualcomm Modem used in this phone is only to support CDMA (even if it also supports HSDA, it is not used in this way)

John - Reply

Any indication where the liquid detectors are?

I believe there is one on the back of the battery, and there might be one (that white spot) next to the sim card slot.

Taylor - Reply

thanks for info

im from zancko mobile repair training

zancko - Reply

Add Comment

View Statistics:

Past 24 Hours: 1

Past 7 Days: 7

Past 30 Days: 27

All Time: 311,838