Introduction
Fall is a magical time, marked by harvest festivals, warm sweaters, and pumpkin-spiced everything. Apple decided to celebrate by releasing a new trackpad, the Magic Trackpad 2, bringing their Force Touch technology to desktops. We're wondering what's inside the magical new trackpad and if it's repairable. There's only one way to find out—with a teardown!
Looking for the rest of the 2015 Maccessory lineup? Check out the Magic Mouse 2 and Magic Keyboard teardowns!
Want to keep in touch with us? Track us down on Twitter, Instagram, or Facebook for more tech news.
What you need
Video Overview
-
-
The jury's still out on just how magical this Trackpad really is, but here's what we know so far:
-
Dimensions: 0.43" × 6.3" × 4.52"
-
Bluetooth wireless connectivity
-
Internal lithium-ion battery
-
Lightning port (for charging and pairing)
-
Force Touch and Multi-Touch
-
-
-
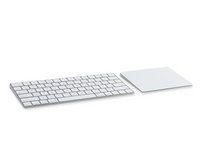
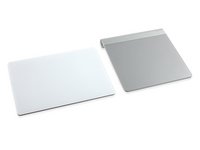
Let's compare notes and see what Apple has thought up for the Magic Trackpad 2.
-
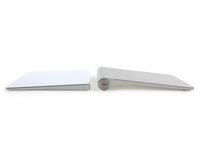
Just like the new Magic Keyboard , the Magic Trackpad 2 takes full advantage of ditching those AAs to slim down the design—and to make the entire top surface trackpad-able.
-
At about an inch wider and a quarter inch deeper, the new device has around 6 square inches of additional tracking surface.
-
-
-
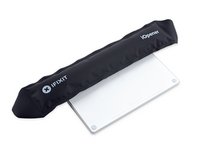
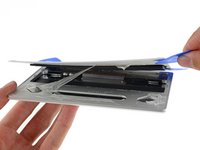
There's no easy way into the Magic Trackpad 2, so we set our iOpener to Stun to weaken the adhesive holding the trackpad together.
-
We know this drill. With our
scimitarrazor blade in hand, we (un)stick it to the intense adhesive holding the rear cover in place. -
We slice, pry, and wiggle our way through the adhesive bit-by-bit.
-
Once we find our way inside, we're greeted with something resembling Shelob's lair—a terrifying, sticky mess.
-
-
-
-
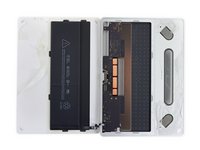
Upon opening, we realize the magic holding this trackpad together is really just oodles of tape doing what could probably be done with screws.
-
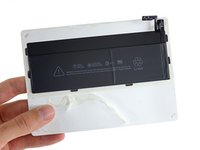
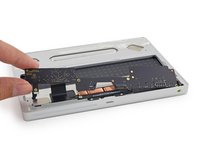
We find what appears to be a big iPhone battery adhered to the rear panel. But weighing in at 3.78 V, 7.65 Whr, this 2024 mAh Lithium-ion polymer battery falls short of the 2750 mAh battery in the 6s Plus.
-
While this is certainly a laudable notion, responsible owners of the Magic Trackpad v1.0 used their own rechargeable AA's—saving waste and making the device more recyclable at the end of its lifespan.
-
-
-
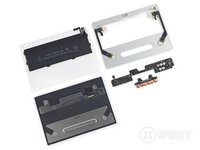
Casting the battery and rear panel aside, we turn our attention to the front panel and all of its goodies.
-
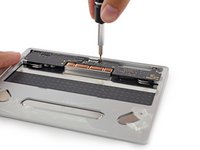
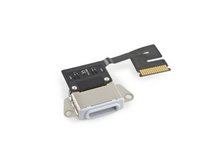
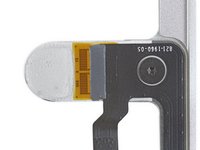
Be still, our hearts—this Lighting connector cable looks suspiciously unsoldered and removable.
-
Sure enough, we flip the ZIF latch, remove the T3 screws, and voilà—the Lightning connector springs free!
-
-
-
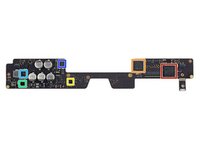
We pluck out the slender logic board to get a better view of its silicon. Here's what we find:
-
Broadcom BCM20733 Enhanced Data Rate Bluetooth 3.0 Single-Chip Solution
-
ST Microelectronics STM32F103VB 72 MHz 32-bit RISC ARM Cortex-M3
-
NXP 1608A1 Charging IC
-
Texas Instruments BQ24250C Single Input I2C/Standalone Switch-Mode Li-Ion Battery Charger
-
Intersil ISL656A Two-Phase PWM Controller
-
International Rectifier IRFH3702 Single N-Channel HEXFET Power MOSFET
-
-
-
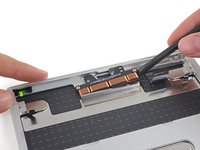
Prying out the Taptic Engine, we're disappointed that the only haptic feedback we get is the force of our spudger on the aluminum frame of the trackpad.
-
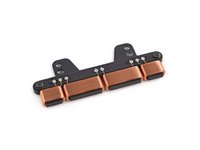
Resembling the Taptic Engines in both the Retina MacBook and MacBook Pro, this new Taptic Engine should bring a similar Force Touch experience to the Magic Trackpad 2.
-
-
-
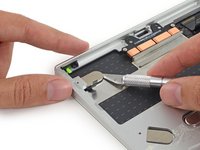
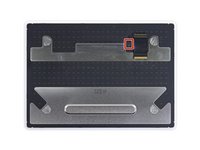
Just like other Force Touch implementations we've seen, the trackpad rests on four springy metal tabs, secured with clear adhesive pads.
-
The only way to separate the trackpad and get a closer look is to cut through the adhesive. Unfortunately, that's also the only way to replace a damaged trackpad surface.
-
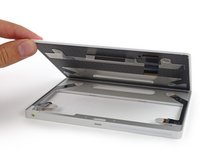
With the glue cut, let's get a look at what was hiding between the aluminum trackpad frame and the trackpad surface.
-
-
-
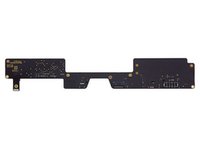
A single, elegant chip resides on the touchpad.
-
Broadcom BCM5976 Touch Controller (part of the same series of Broadcom touch controller chips used in many Apple devices)
-
The strain gauges, mounted on each of the four spring tabs, are used to measure the force applied to the trackpad surface.
-
-
-
The Magic Trackpad 2 Repairability Score: 3 out of 10 (10 is easiest to repair)
-
The Lightning port and battery can be replaced independently of the logic board—if you can get the device open.
-
Replacing a damaged trackpad surface means cutting and reapplying the adhesive on the spring tabs.
-
Excessive use of strong adhesive makes it very difficult to remove the rear panel, hindering access to every internal component.
-
Without a service manual, it is difficult to open the trackpad without damaging internal components such as the battery and Taptic Engine.
-


25 Guide Comments
Will it work at all with my mid 2010 iMac?
iMacs had BT 4.0 since the Late 2012 model. Mac mini and MacBook Air: Mid 2011. MacBook Pro (incl. rMBP): Mid 2012.
I love the design - much more elegant... but it would have been nicer if it could use the apple pencil and be used similar to a wacom tablet device
It’s designed to use with fingers, it has many cool gestures that require multiple fingers. It’s not a tool for artists.
Surgie -