This translation may not reflect the most recent updates from the source guide. Help update the translation or view the source guide.
Introduction
一个小问题的难度较为复杂的修复方法。学习怎样移除屏幕和相机来把相机保护罩环取出,并且放入新的镜片和环。
What you need
-
-
-
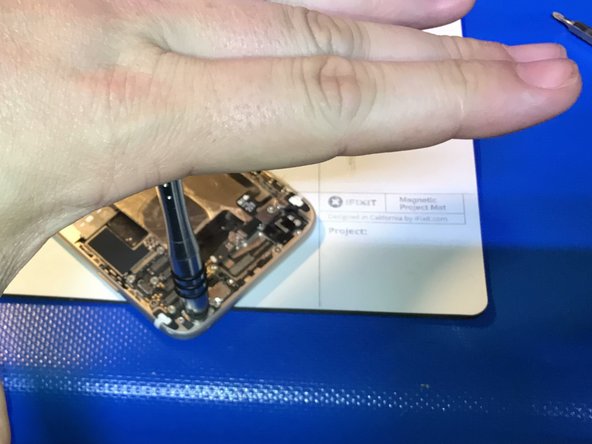
卸下电池排线固定架上的2颗十字 #00 螺丝。
-
1颗2.9 mm螺丝
-
1颗2.2 mm螺丝
-


要重新组装你的手机,请按此教程的相反顺序操作。
要重新组装你的手机,请按此教程的相反顺序操作。
Cancel: I did not complete this guide.
43 other people completed this guide.
Special thanks to these translators:
63%
These translators are helping us fix the world! Want to contribute?
Start translating ›

5 Comments
sometimes it becomes a pain to remove old ring, some devices has rolled ring so it much harder to remove carefully
I bent the frame and distorted the back panel where it started to come out trying to “pop-out” the lens ring. The lens ring was attached to an inner piece that holds the camera by a metal piece, this wasn’t described in these instructions.
Be careful of this!
You’re right! I used a previous guide that shows up until the camera is removed, then my own starts after I’ve already removed this flexible metal bracket. This bracket is used as a alignment guide and stabilizer for the camera so hard hits don’t rattle the sensitive internal magnets that stabilize the camera lenses. With a fine screwdriver, pop the 4 points that this is welded to the lens up then remove the bracket. It may get mangled a bit but it can usually be straightened back out to re-use upon camera reinstall.
The only way to get the ring out for me without damage or strain other components ,board or case was to take a 7.5mm drill and drill out the ring from the back and when the inner bracket came lose you know you are deep enough .
A little dot of CA applied with a toothpick to glue the lens inplace and a little glue on the inside to fix that bracket.
Tip: if just the lens glass piece is broken and there is no damage to the ring try to source and buy the glass lens without the ring alot easier to
repair ,you don’t have to take the screen and camera if no glass made it to the camera.
Just make sure that the ring and the rim where the glass is seated is clean and free of glass splinters and glue .
Again add a little CA with a toothpick pop in the lens and done.
Few minutes of work and no risk of breaking somthing in the proces.
first iPhone repair for me… I was trembling when I switched it back on. I was worried I didn’t put the screen and front camera connectors in place properly (it’s hard). But it went all well! Thanks for the guide, but I think it’d be really good to add the steps about the square metal thingy between the camera and the ring.