What you need
-
-
-
Use a hair dryer or an iOpener to heat the black plastic battery buffer until it's warm to the touch.
 Ask FixBot
-
-
-
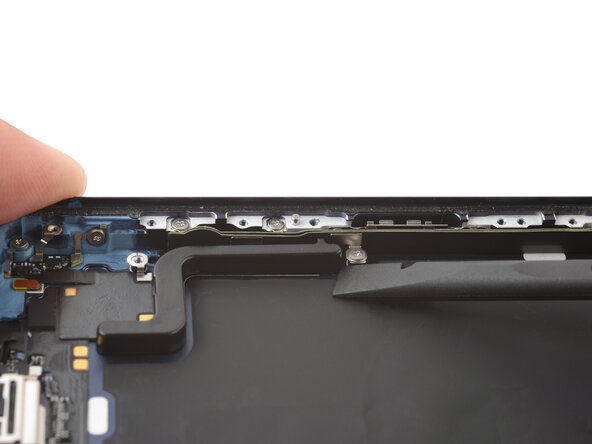
Use the flat end of your spudger to pry up one end of the battery buffer.
-
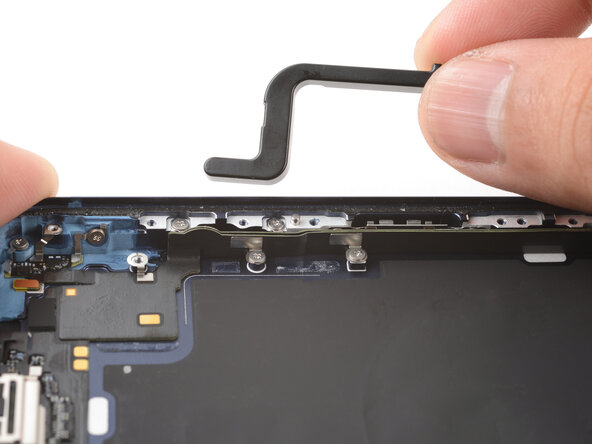
Grab the buffer with your fingers and slowly lift and remove it.
-
-
-
Use the point of a spudger to pry up and disconnect the two USB-C press connectors (one's underneath the other) from the bottom-left corner of the logic board.
-
-
-
Use a JIS 00 screwdriver to remove the two 1.8 mm‑long screws securing the left logic board buffer.
-
-
-
-
Remove the nine screws securing the USB-C port assembly:
-
Six 1.5 mm‑long JIS 00 screws
-
One 1.3 mm‑long JIS 00 screw
-
Two 1.2 mm‑long Y000 screws
-
-
-
Use a JIS 00 screwdriver to remove the 1.2 mm‑long screw securing the USB-C port assembly to the bottom left corner of the frame.
-
-
-
Use a JIS 00 screwdriver to remove the two 2.8 mm‑long screws securing the USB-C port to the bottom edge of the frame.
-
-
-
Use the point of a spudger to pry and separate the buffer strip covering the screw in the bottom right corner of the frame.
-
-
-
Use a JIS 00 screwdriver to remove the 1.2 mm‑long screw securing the USB-C port assembly to the right edge of the frame.
-
-
-
Use a hair dryer or an iOpener to heat the entire USB-C port assembly until it's warm to the touch.
-
-
-
Slide the point of an opening pick between the microphone module (left of the USB-C port) and the bottom edge of the frame.
-
Pry gently to separate the microphone from the frame.
-
-
-
Slide the opening pick under the USB-C port assembly, near the center.
-
Slide the pick towards the right edge of the frame to separate the adhesive holding the assembly.
-
-
-
Grab the USB-C port assembly with your fingers and slowly pull it away from the frame to remove it.
-
-



To reassemble your device, follow these instructions in reverse order.

