
iPad mini 4 LTE Battery Connector Replacement

Prerequisite Only
This guide is only intended to be used as a prerequisite for other guides. It's incomplete by itself.

What you need

  1. iPad mini 4 LTE Battery Connector Replacement, Battery Connector: step 1, image 1 of 1
    • To avoid stressing any cables, hold the display assembly perpendicular to the body of the iPad until it is disconnected.

    • Remove the four 1.2 mm Phillips screws over the battery/display connector bracket.

  2. iPad mini 4 LTE Battery Connector Replacement: step 2, image 1 of 1
    • Remove the battery/display cable bracket.

  3. iPad mini 4 LTE Battery Connector Replacement: step 3, image 1 of 2 iPad mini 4 LTE Battery Connector Replacement: step 3, image 2 of 2
    • When disconnecting any press connectors from the logic board, be sure to lift the connector straight up to avoid ripping the socket off the board.

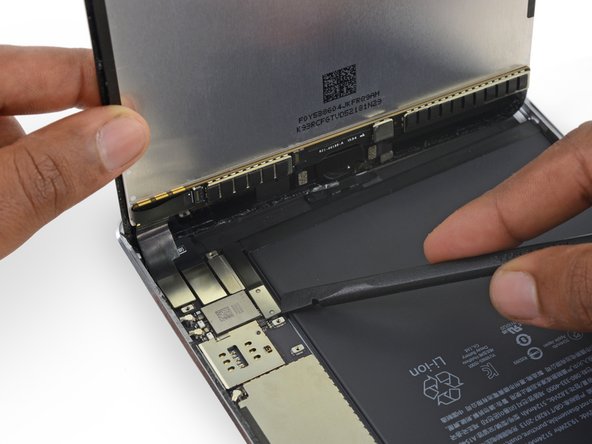
    • Use the flat tip of a spudger to disconnect the battery connector from its socket on the logic board.

    • Bend the battery connector ribbon cable up slightly to prevent it from making contact and powering on the iPad.

Evan Noronha

Member since: 02/05/15

223,520 Reputation

168 Guides authored

View Statistics:

Past 24 Hours: 2

Past 7 Days: 10

Past 30 Days: 12

All Time: 213