
ZTE Maven Midframe Replacement

Kristen Gismondi and 3 other contributors
Last updated on Jul 3, 2025
Views: 634
View statistics:
- Past 24 Hours:
- 0
- Past 7 Days:
- 15
- Past 30 Days:
- 70
- All Time:
- 634
Comments: 0
No one has left comments on this guide. Will you be first?
Go to guide commentsCompleted: 1 2
1 person has marked this guide "completed." Will you be next?
2 people have marked this guide "completed." Including you — great job!
Favorites: 0 1
No one has favorited (and subscribed to) this guide. Will you be the first?
1 person has favorited (and subscribed to) this guide — and that's you!
Introduction
Go to step 1 ↓If your ZTE Maven smartphone (released in 2015) has a damaged or cracked midframe that’s affecting the device’s structural integrity, this guide will walk you through how to replace it and extend the phone’s usability.
The midframe serves as a central support for internal components and helps maintain the shape and durability of the phone. A compromised midframe can lead to poor fitment of parts, screen lifting, or long-term wear on internal hardware.
Before starting this repair, inspect the phone for signs of warping, cracks, or loose components that may indicate the midframe needs replacing. If the device still functions properly otherwise, replacing just the midframe can be a cost-effective and sustainable alternative to upgrading.
Before you begin this repair, power off your phone and make sure it is disconnected from the charger.
What you need
Parts
Tools


-
-
-
Tool used on this step:Tweezers$4.99
-
Remove the SIM card from the right side of the device using a pair of tweezers.
-
-
-
-
-
-
Remove the seven 2mm Phillips #00 screws from the midframe of the device.
-
-
-
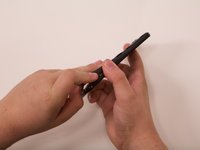
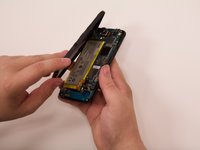
Use an opening tool or fingers to separate the midframe covering the rest of the device starting at the top corner.
-
-


 Ask FixBot



To reassemble your device, follow these instructions in reverse order. Take your e-waste to an R2 or e-Stewards certified recycler.
Cancel: I did not complete this guide.
One other person completed this guide.


