Free Shipping on Domestic Orders $75+

Sony Xperia Z3 Display Prereq

Prerequisite Only
This is a prerequisite-only guide! This guide is part of another procedure and isn’t meant to be used alone.

What you need

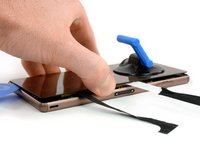
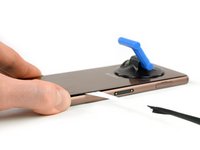
    1. Sony Xperia Z3 Display Prereq, Back Cover: step 1, image 1 of 3 Sony Xperia Z3 Display Prereq, Back Cover: step 1, image 2 of 3 Sony Xperia Z3 Display Prereq, Back Cover: step 1, image 3 of 3
      • Heat the back cover of your Xperia Z3 to loosen the adhesive underneath.

      • If you use an iOpener, follow these instructions for use.

      • Lift up the back cover with a suction handle and put an opening pick in the gap.

      • Move the pick carefully around the edges to loosen the adhesive on every side of the phone.

      • Don't put the pick in too deep under the back cover to not damage any parts inside the phone.

      Ask FixBot

      Add Comment

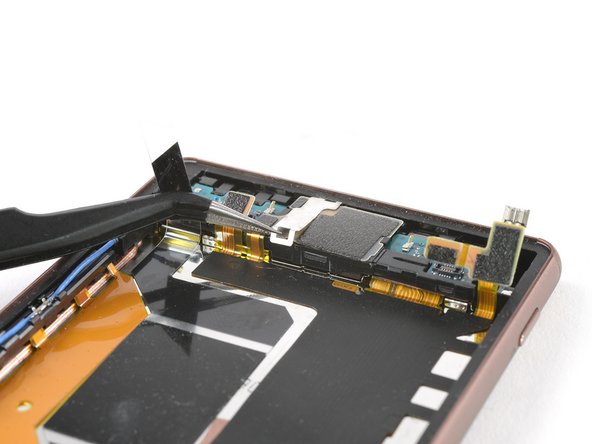
    2. Sony Xperia Z3 Display Prereq: step 2, image 1 of 2 Sony Xperia Z3 Display Prereq: step 2, image 2 of 2
      Tool used on this step:
      Tweezers
      $4.99
      Buy
      • There are two adhesive strips in the center of the phone connecting the rear case to the battery, you'll need to remove them to open the phone.

      • When the edges of the cover are free from adhesive, tilt it to allow access to the battery tabs.

      • Use tweezers to pull the two black adhesive strips out of the phone but don't pull just yet.

      Ask FixBot

      Add Comment

    3. Sony Xperia Z3 Display Prereq: step 3, image 1 of 2 Sony Xperia Z3 Display Prereq: step 3, image 2 of 2
      Tool used on this step:
      Plastic Cards
      $2.99
      Buy
      • Gently pull out both of the adhesive tabs out of the phone, parallel to the rear cover.

      • If the adhesive tabs break, try to use a thin flat plastic tool such as a plastic card to remove the last of the adhesive. If the adhesive is stubborn, heat it with an iOpener or hair dryer and pry again.

      Ask FixBot

      Add Comment

    4. Sony Xperia Z3 Display Prereq: step 4, image 1 of 2 Sony Xperia Z3 Display Prereq: step 4, image 2 of 2
      • After pulling out the adhesive tabs, you can lift the back cover and remove it.

      Ask FixBot

      Add Comment

    1. Sony Xperia Z3 Display Prereq, Battery: step 5, image 1 of 2 Sony Xperia Z3 Display Prereq, Battery: step 5, image 2 of 2
      • Unplug the battery flex connector.

      • Use a tweezer to gently pull off the adhesive strip on the bottom part of the battery.

      Ask FixBot

      Add Comment

    2. Sony Xperia Z3 Display Prereq: step 6, image 1 of 2 Sony Xperia Z3 Display Prereq: step 6, image 2 of 2
      • Use a spudger on the left side of the frame to lever out the battery.

      • Be careful with the spudger - there are cables beneath the battery!

      • Remove the battery.

      Ask FixBot

      Add Comment

    1. Sony Xperia Z3 Display Prereq, Display Prereq: step 7, image 1 of 1
      • Unscrew the two Phillips #00 screws.

      Ask FixBot

      Add Comment

    2. Sony Xperia Z3 Display Prereq: step 8, image 1 of 3 Sony Xperia Z3 Display Prereq: step 8, image 2 of 3 Sony Xperia Z3 Display Prereq: step 8, image 3 of 3
      • Unplug the antenna cable with a tweezer.

      • Use a Spudger to unplug the main flex connector and the flex connector of the vibration motor.

      Ask FixBot

      Add Comment

    3. Sony Xperia Z3 Display Prereq: step 9, image 1 of 3 Sony Xperia Z3 Display Prereq: step 9, image 2 of 3 Sony Xperia Z3 Display Prereq: step 9, image 3 of 3
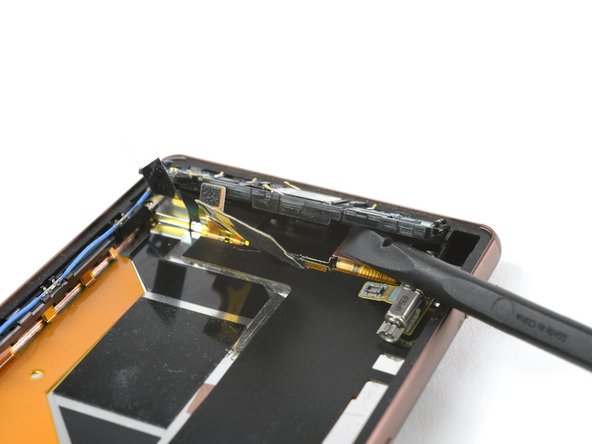
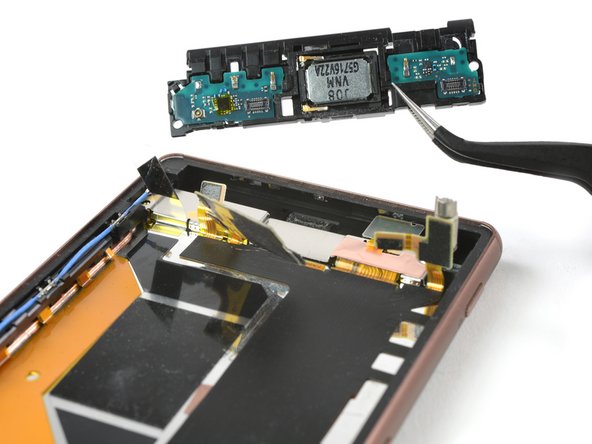
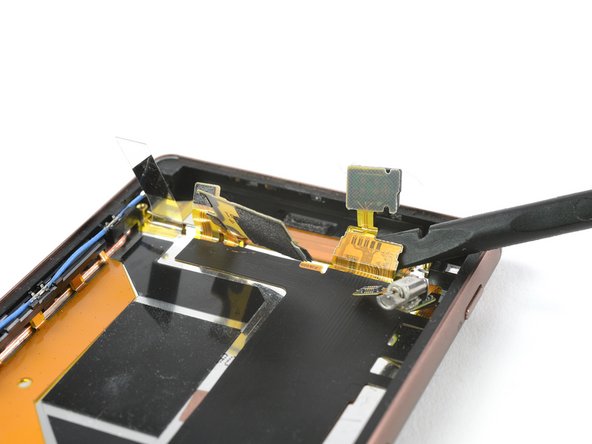
      • Remove the cover on top of the loudspeaker assembly.

      • Use a spudger to pull out the vibration motor and remove its rubber gasket with a tweezer.

      Ask FixBot

      Add Comment

    4. Sony Xperia Z3 Display Prereq: step 10, image 1 of 3 Sony Xperia Z3 Display Prereq: step 10, image 2 of 3 Sony Xperia Z3 Display Prereq: step 10, image 3 of 3
      • Use a tweezer to remove the adhesive strip of the loudspeaker assembly.

      • Pull up the metal clamp at the upper end of the loudspeaker assembly by using a tweezer and remove it.

      Ask FixBot

      Add Comment

    5. Sony Xperia Z3 Display Prereq: step 11, image 1 of 3 Sony Xperia Z3 Display Prereq: step 11, image 2 of 3 Sony Xperia Z3 Display Prereq: step 11, image 3 of 3
      • Lift up the main flex cable covering the loudspeaker assembly with a Spudger

      • Take care to not damage the loudspeaker. The flex cable is attached to the assembly with adhesive and is a little bit sticky.

      • Lift up the whole loudspeaker assembly with a spudger and remove it.

      Ask FixBot

      Add Comment

    6. Sony Xperia Z3 Display Prereq: step 12, image 1 of 2 Sony Xperia Z3 Display Prereq: step 12, image 2 of 2
      • Use a spudger to lift up the end of the main flex.

      • Remove the bronze foil covering the connector of the main flex with a tweezer.

      Ask FixBot

      Add Comment

    7. Sony Xperia Z3 Display Prereq: step 13, image 1 of 3 Sony Xperia Z3 Display Prereq: step 13, image 2 of 3 Sony Xperia Z3 Display Prereq: step 13, image 3 of 3
      • Lift up the metal plate which is placed beneath the loudspeaker assembly and remove it.

      • Unplug the main flex cable.

      • Use a tweezer to remove the yellow adhesive foil covering the display flex cable.

      Ask FixBot

      Add Comment

Conclusion

To reassemble your device, follow these instructions in reverse order.

Cancel: I did not complete this guide.

Dominik Schnabelrauch

Member since: 11/23/16

263,458 Reputation

682 Guides authored

Team

iFixit Member of iFixit

Staff

123 Members

84,436 Guides authored

0 Guide Comments

Add Comment

View Statistics:

Past 24 Hours: 0

Past 7 Days: 5

Past 30 Days: 24

All Time: 206