Free Shipping on Domestic Orders $75+

Siemens Surpresso - Bosch Benvenuto revise drain valve

What you need

    1. Siemens Surpresso - Bosch Benvenuto revise drain valve, brewing unit: step 1, image 1 of 3 Siemens Surpresso - Bosch Benvenuto revise drain valve, brewing unit: step 1, image 2 of 3 Siemens Surpresso - Bosch Benvenuto revise drain valve, brewing unit: step 1, image 3 of 3
      • Never forget: Pull the power plug!

      • Remove all attachments such as water reservoir, coffee compartment lid, trester drawer.

      • Remove all coffee beans from the bean hopper.

      • Open the side flap.

      Ask FixBot

      Add Comment

    2. Siemens Surpresso - Bosch Benvenuto revise drain valve: step 2, image 1 of 3 Siemens Surpresso - Bosch Benvenuto revise drain valve: step 2, image 2 of 3 Siemens Surpresso - Bosch Benvenuto revise drain valve: step 2, image 3 of 3
      • Loosen the three rubber caps on the brew group.

      • Using a strong flat-blade screwdriver, adjust the three plastic slots underneath so that the "unlocked" position is indicated.

      • Note: with the newer version of the brew group, only one lever needs to be flipped.

      • Pull out the brew group. If it is stuck, pull firmly and evenly, but with feeling, preferably at the bottom right.

      Ask FixBot

      Add Comment

    1. Siemens Surpresso - Bosch Benvenuto revise drain valve, remove back panel: step 3, image 1 of 2 Siemens Surpresso - Bosch Benvenuto revise drain valve, remove back panel: step 3, image 2 of 2
      • Remove the seven Torx T10 screws on the rear panel.

      • Do not remove the back panel completely yet, the power switch is still connected.

      • Lift the back panel away.

      • Remove the two flat plugs from the inside of the power switch.

      Ask FixBot

      Add Comment

    1. Siemens Surpresso - Bosch Benvenuto revise drain valve, top cover removal: step 4, image 1 of 3 Siemens Surpresso - Bosch Benvenuto revise drain valve, top cover removal: step 4, image 2 of 3 Siemens Surpresso - Bosch Benvenuto revise drain valve, top cover removal: step 4, image 3 of 3
      • The top cover is engaged with bayonets in several places. It must first be pushed back about 1 cm and then lifted away upwards.

      • Grasp the powder compartment cover firmly and pull it upwards out of its hinges. Otherwise it will be in the way of the top cover.

      • Pull the top cover back about 1 cm. If it sticks in front, you can help a little with plastic levers.

      • Lift the top cover away from the top.

      Ask FixBot

      Add Comment

    1. Siemens Surpresso - Bosch Benvenuto revise drain valve, left side panel: step 5, image 1 of 2 Siemens Surpresso - Bosch Benvenuto revise drain valve, left side panel: step 5, image 2 of 2
      • The side panel is attached to the front edge with three bayonets. It must therefore be lifted out upward.

      • Grasp the side panel firmly at the rear edge and pull it backward and upward at the same time. It should come off quite easily.

      • When reassembling, make sure that the bayonets on the front edge engage properly.

      Ask FixBot

      Add Comment

    1. Siemens Surpresso - Bosch Benvenuto revise drain valve, right side panel: step 6, image 1 of 1
      • The side panel is attached to the front edge with three bayonets. It must therefore be lifted out upward.

      • Grasp the side panel firmly at the rear edge and pull it backward and upward at the same time. It should come off quite easily.

      • When reassembling, make sure that the bayonets on the front edge engage properly.

      Ask FixBot

      Add Comment

    1. Siemens Surpresso - Bosch Benvenuto revise drain valve, Drain valve: step 7, image 1 of 2 Siemens Surpresso - Bosch Benvenuto revise drain valve, Drain valve: step 7, image 2 of 2
      • In order to access the drain valve, you must first loosen some cables, as well as the electronics box and the supply hose.

      • Remove the two Torx T10 screws at the top and bottom of the electronics box.

      • Pull the box out a little.

      Ask FixBot

      Add Comment

    2. Siemens Surpresso - Bosch Benvenuto revise drain valve: step 8, image 1 of 3 Siemens Surpresso - Bosch Benvenuto revise drain valve: step 8, image 2 of 3 Siemens Surpresso - Bosch Benvenuto revise drain valve: step 8, image 3 of 3
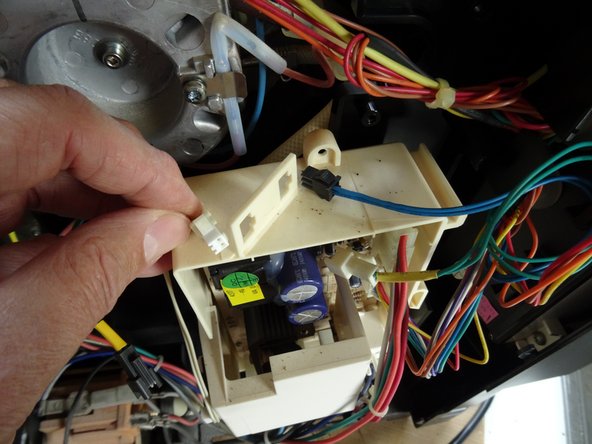
      • Two connectors are attached to the top. First press in the release on both connectors and pull the connectors out.

      • Press in the catches on the side of the two sockets and pull the sockets out of the electronics box.

      • No other cables need to be disconnected, lay the box on its side.

      • Insert translation here

      Ask FixBot

      Add Comment

    3. Siemens Surpresso - Bosch Benvenuto revise drain valve: step 9, image 1 of 1
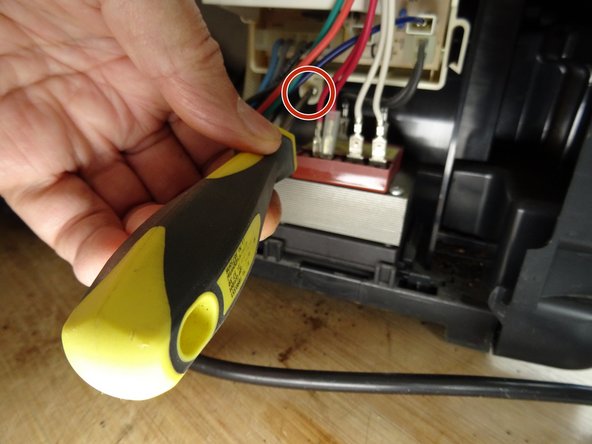
      • Remove the Torx T20 screw of the green/yellow grounding cable on the flow heater.

      • Push the green/yellow grounding cable to the side.

      • Pull off the two flat connectors with the yellow cables on the microswitch of the gearbox.

      Ask FixBot

      Add Comment

    4. Siemens Surpresso - Bosch Benvenuto revise drain valve: step 10, image 1 of 3 Siemens Surpresso - Bosch Benvenuto revise drain valve: step 10, image 2 of 3 Siemens Surpresso - Bosch Benvenuto revise drain valve: step 10, image 3 of 3
      • Turn the machine around.

      • Remove the six Torx T10 screws that secure the gearbox to the metal partition.

      • Push the gearbox away from you by the black plastic pins and drive so that it comes off.

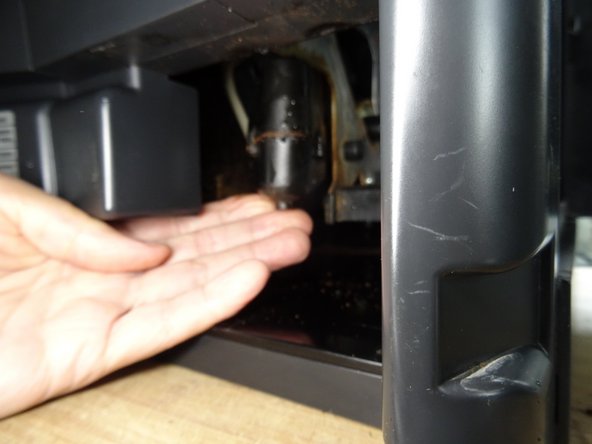
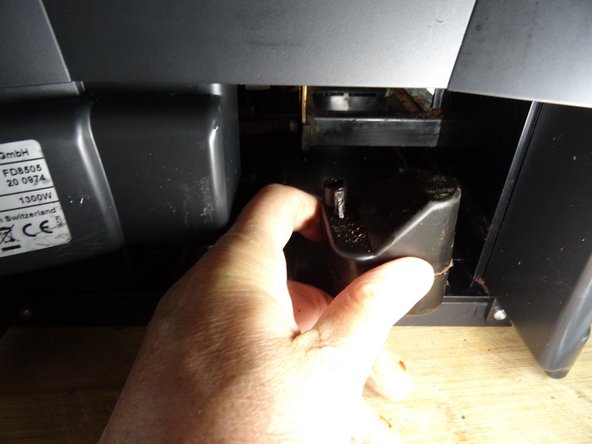
      • Reach into the machine from the front and find the triangular expansion tank. Turn it counterclockwise about 60° and pull it off downward

      Ask FixBot

      Add Comment

    5. Siemens Surpresso - Bosch Benvenuto revise drain valve: step 11, image 1 of 2 Siemens Surpresso - Bosch Benvenuto revise drain valve: step 11, image 2 of 2
      • Turn the machine around again.

      • Now you can pull out the gearbox as far as possible. It is a bit tricky and you have to be very careful. Turn it so that you can already see the drain valve.

      • The drain valve is still connected to the water hose. Pull out the clamp on the water hose with a small screwdriver. This is really tedious and of course when reassembling. But with patience it works.

      • Then pull out the pressure hose. At its end is an O-ring it gets stuck either on the end or in the connector. Replace it - if possible - during reassembly.

      Ask FixBot

      Add Comment

    6. Siemens Surpresso - Bosch Benvenuto revise drain valve: step 12, image 1 of 2 Siemens Surpresso - Bosch Benvenuto revise drain valve: step 12, image 2 of 2
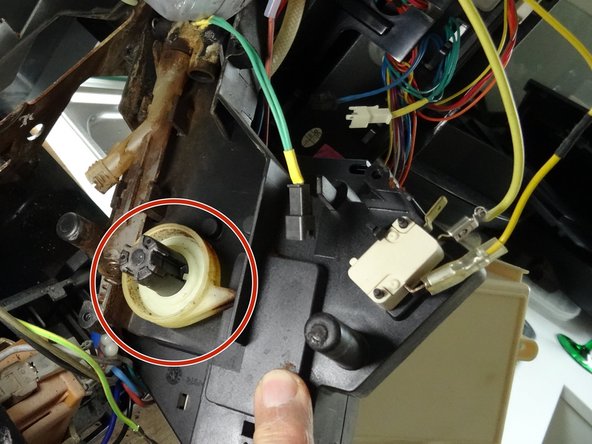
      • Now the gearbox can be carefully lifted out and the drain valve becomes visible.

      • Lift out the white driver. Pay attention to the correct orientation when reassembling.

      Ask FixBot

      Add Comment

    7. Siemens Surpresso - Bosch Benvenuto revise drain valve: step 13, image 1 of 3 Siemens Surpresso - Bosch Benvenuto revise drain valve: step 13, image 2 of 3 Siemens Surpresso - Bosch Benvenuto revise drain valve: step 13, image 3 of 3
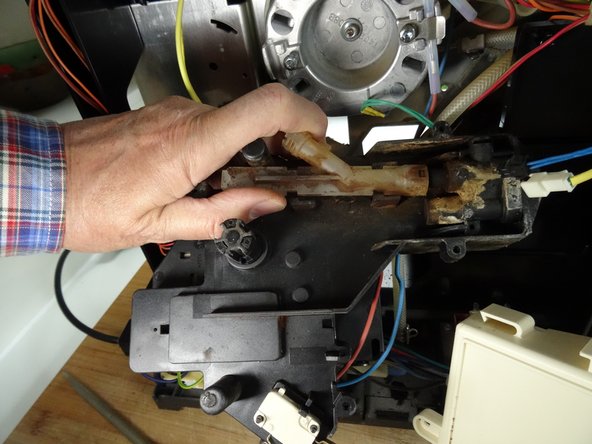
      • First lift away the spring at the bottom of the drain valve, you can use a small screwdriver for this.

      • Pull the light part of the valve down so that the four notches on the edge fit into the corresponding openings.

      • Lift the complete drainage valve upwards. You can use a small screwdriver to pry the upper gray part free.

      Ask FixBot

      Add Comment

    8. Siemens Surpresso - Bosch Benvenuto revise drain valve: step 14, image 1 of 3 Siemens Surpresso - Bosch Benvenuto revise drain valve: step 14, image 2 of 3 Siemens Surpresso - Bosch Benvenuto revise drain valve: step 14, image 3 of 3
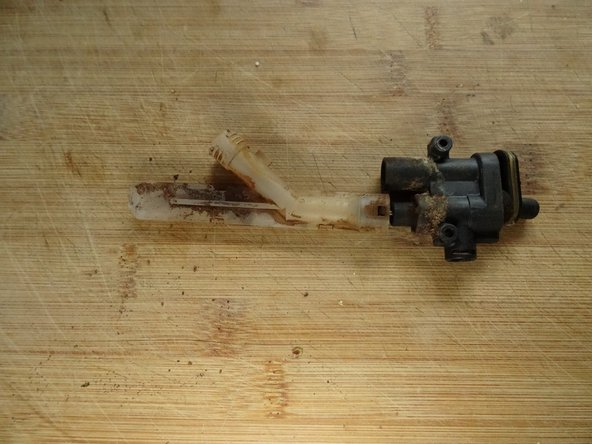
      • The drain valve is free.

      • Note: this is the older version, but the newer one fits just as well.

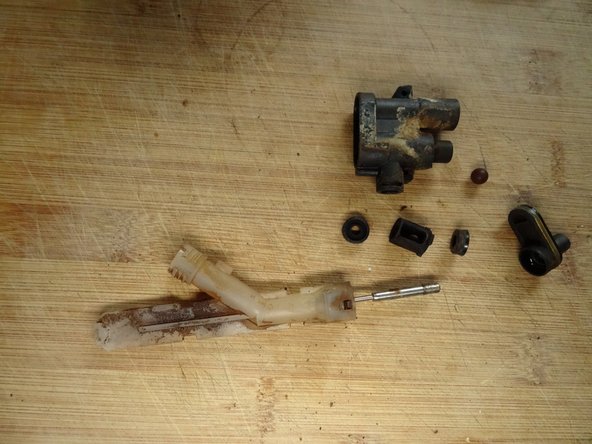
      • The third picture shows the older version in disassembled condition. You can now replace the seals or the whole valve....

      Ask FixBot

      Add Comment

    1. Siemens Surpresso - Bosch Benvenuto revise drain valve, Drainage valve gaskets: step 15, image 1 of 1
      • There are different versions of this valve. The tappet can be different, the valve stem can only be a ball, one or two seals are used. However, all valves function in the same way.

      • Pull the cap of the grey upper valve body. Use pliers, if it is stuck.

      • There are two gaskets, the flat side pointing outwards.

      • Newer valves have only one gasket

      • Plunger and downholder

      • Piston and spring

      • Replace the gaskets and reassemble the valve.

      Ask FixBot

      Add Comment

Conclusion

Follow the steps in reverse order to reassemble your device

Cancel: I did not complete this guide.

One other person completed this guide.

Special thanks to these translators:

de en

100%

These translators are helping us fix the world! Want to contribute?
Start translating ›

VauWeh

Member since: 10/19/15

339,386 Reputation

311 Guides authored

0 Guide Comments

Add Comment

View Statistics:

Past 24 Hours: 0

Past 7 Days: 12

Past 30 Days: 49

All Time: 1,721