Free Shipping on Domestic Orders $75+

SYNOLOGY DS218 +: a complete disassembly in rules

What you need

    1. SYNOLOGY DS218 +: a complete disassembly in rules, Presentation: the different faces of the case: step 1, image 1 of 3 SYNOLOGY DS218 +: a complete disassembly in rules, Presentation: the different faces of the case: step 1, image 2 of 3 SYNOLOGY DS218 +: a complete disassembly in rules, Presentation: the different faces of the case: step 1, image 3 of 3
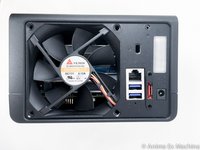
      • Here are the different interesting faces of the case: front (bay disks), rear (connectors and fan).

      • This NAS DS218 + is equiped with 2 GB of RAM (6 GB max.), An INTEL Celeron J3355 64-bit Dual core processor, two bays for SATA drives.

      • 1 x RJ45 Gb port.

      • Kensington security incision (K-lock)

      • 1 x port for power supply

      • 3 x USB 3 ports (1 in front and 2 behind)

      • 1 x eSATA port

      Ask FixBot

      Add Comment

    2. SYNOLOGY DS218 +: a complete disassembly in rules, Teardown : remove disk media: step 2, image 1 of 3 SYNOLOGY DS218 +: a complete disassembly in rules, Teardown : remove disk media: step 2, image 2 of 3 SYNOLOGY DS218 +: a complete disassembly in rules, Teardown : remove disk media: step 2, image 3 of 3
      • nothing very hard … remove the disk media by pressing "push" buton.

      Ask FixBot

      Add Comment

    3. SYNOLOGY DS218 +: a complete disassembly in rules, Backplane and memory slot access: step 3, image 1 of 2 SYNOLOGY DS218 +: a complete disassembly in rules, Backplane and memory slot access: step 3, image 2 of 2
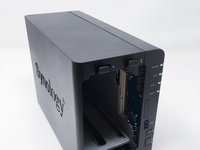
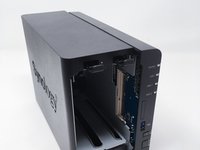
      • 2 x SATA port

      • Only the empty memory slot is reachable.

      • The one used (memory slot) is not reachable. The case must be unmounted integraly to access to this memory slot (see step 13).

      Ask FixBot

      Add Comment

    4. SYNOLOGY DS218 +: a complete disassembly in rules, Case: removing the cover 1/2: step 4, image 1 of 2 SYNOLOGY DS218 +: a complete disassembly in rules, Case: removing the cover 1/2: step 4, image 2 of 2
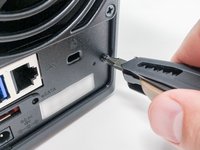
      • Remove the screw on the back of the case next to Kensington incision.

      • Fan screws removal is not needed …

      Ask FixBot

      Add Comment

    5. SYNOLOGY DS218 +: a complete disassembly in rules, Housing: cover removal 2/2: step 5, image 1 of 3 SYNOLOGY DS218 +: a complete disassembly in rules, Housing: cover removal 2/2: step 5, image 2 of 3 SYNOLOGY DS218 +: a complete disassembly in rules, Housing: cover removal 2/2: step 5, image 3 of 3
      • Once rear screws removed …

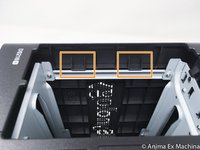
      • there are two lock lugs (front panel left side) to unlock.

      • Use a flat screwdriver to pry. Be careful not to twist the metal bar.

      • Then slide the NAS in the direction of the length as in the photos.

      Ask FixBot

      Add Comment

    6. SYNOLOGY DS218 +: a complete disassembly in rules, Teardown: internal parts: step 6, image 1 of 3 SYNOLOGY DS218 +: a complete disassembly in rules, Teardown: internal parts: step 6, image 2 of 3 SYNOLOGY DS218 +: a complete disassembly in rules, Teardown: internal parts: step 6, image 3 of 3
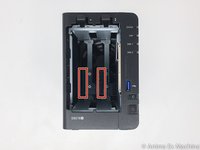
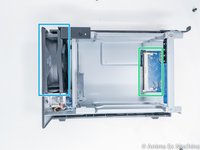
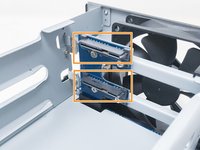
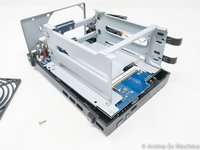
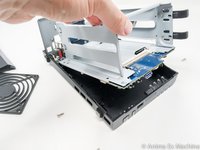
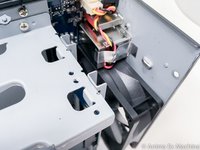
      • in orange: internal SATA ports

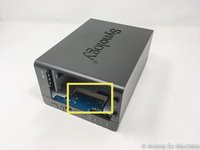
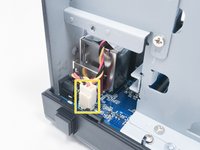
      • in yellow: fan connector

      • in blu: fan

      • in green: free (empty) memory slot

      Ask FixBot

      Add Comment

    7. SYNOLOGY DS218 +: a complete disassembly in rules, Teardown: spacer holding cage and case: step 7, image 1 of 3 SYNOLOGY DS218 +: a complete disassembly in rules, Teardown: spacer holding cage and case: step 7, image 2 of 3 SYNOLOGY DS218 +: a complete disassembly in rules, Teardown: spacer holding cage and case: step 7, image 3 of 3
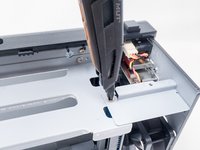
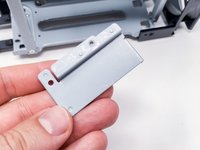
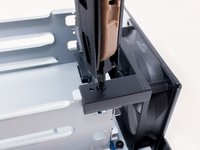
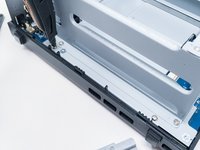
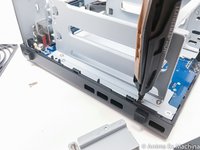
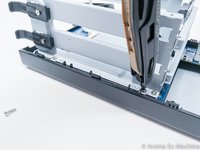
      • simply unscrew the screw to remove the spacer.

      • you will notice the guides (keying) to position the spacer.

      Ask FixBot

      Add Comment

    8. SYNOLOGY DS218 +: a complete disassembly in rules, Disassembly: spacer holding fan: step 8, image 1 of 2 SYNOLOGY DS218 +: a complete disassembly in rules, Disassembly: spacer holding fan: step 8, image 2 of 2
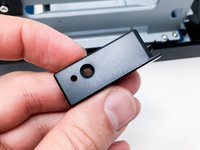
      • same as before ... unscrew the screw to remove the plastic spacer

      • you will also notice the keysters ...

      Ask FixBot

      Add Comment

    9. SYNOLOGY DS218 +: a complete disassembly in rules, Teardown: removal of the fan: step 9, image 1 of 2 SYNOLOGY DS218 +: a complete disassembly in rules, Teardown: removal of the fan: step 9, image 2 of 2
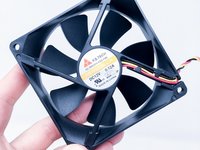
      • the fan has been removed for the tutorial. This is not mandatory ... but better to have a little more room!

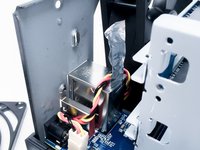
      • Only the connector must be removed for disassembly

      • beware of the tape to take off before!

      Ask FixBot

      Add Comment

    10. SYNOLOGY DS218 +: a complete disassembly in rules, Teardown: removal of the motherboard 1/2: step 10, image 1 of 3 SYNOLOGY DS218 +: a complete disassembly in rules, Teardown: removal of the motherboard 1/2: step 10, image 2 of 3 SYNOLOGY DS218 +: a complete disassembly in rules, Teardown: removal of the motherboard 1/2: step 10, image 3 of 3
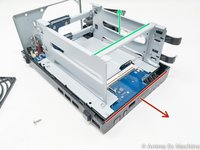
      • to remove the motherboard from the box, unscrew the 4 screws as below ...

      Ask FixBot

      Add Comment

    11. SYNOLOGY DS218 +: a complete disassembly in rules, Teardown: removal of the motherboard 2/2: step 11, image 1 of 3 SYNOLOGY DS218 +: a complete disassembly in rules, Teardown: removal of the motherboard 2/2: step 11, image 2 of 3 SYNOLOGY DS218 +: a complete disassembly in rules, Teardown: removal of the motherboard 2/2: step 11, image 3 of 3
      • once the screws are removed, pull the front slightly outwards ...

      • This allows the front panel connectors to pass through.

      • … then lift up the motherboard by holding the disk cage.

      Ask FixBot

      Add Comment

    12. SYNOLOGY DS218 +: a complete disassembly in rules, Teardown: removal of the disk bay: step 12, image 1 of 2 SYNOLOGY DS218 +: a complete disassembly in rules, Teardown: removal of the disk bay: step 12, image 2 of 2
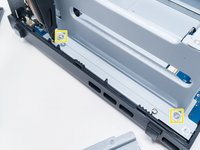
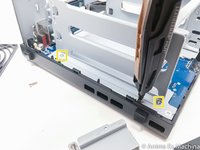
      • remove the screws marked in yellow (x4)

      • no specific photographs ... nothing very complex!

      Ask FixBot

      Add Comment

    13. SYNOLOGY DS218 +: a complete disassembly in rules, Internal parts: case, motherboard: step 13, image 1 of 3 SYNOLOGY DS218 +: a complete disassembly in rules, Internal parts: case, motherboard: step 13, image 2 of 3 SYNOLOGY DS218 +: a complete disassembly in rules, Internal parts: case, motherboard: step 13, image 3 of 3
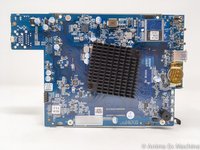
      • 1 - motherboard (processor side)
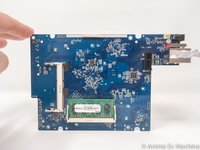
      • 2 - motherboard (memory side)

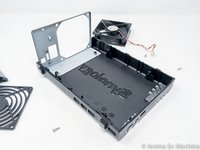
      • 3 - empty case

      Ask FixBot

      Add Comment

    14. SYNOLOGY DS218 +: a complete disassembly in rules, Many thanks!: step 14, image 1 of 1
      • photograph showing one of the phases of the NAS teardown.

      Ask FixBot

      Add Comment

Conclusion

To reassemble your device, follow the instructions in reverse order.

Cancel: I did not complete this guide.

27 other people completed this guide.

Special thanks to these translators:

fr en

100%

Sébastien is helping us fix the world! Want to contribute?
Start translating ›

Sébastien

Member since: 12/14/15

4,739 Reputation

6 Guides authored

Team

AEM (ANIMA EX MACHINA) Member of AEM (ANIMA EX MACHINA)

Business

1 Member

16 Guides authored

9 Guide Comments

Merci, c’est super sympa. Au top tes photos. Ca m’a permis de voir qu’il n’y a pas de ventilateur sur la carte mère.

Je viens d’en acheter un et j’hésite à changer le ventilateur car il est trop bruyant à mon goût, j’ai deux ssd dedans, donc pas de risque de ventilation trop faible. A voir la compatibilité des ventilos maintenant.

Avec ton tuto, je serai bien guidé pour le démontage !

Tanguy Westelynck - Reply Share

super tuto qui me serra très utile car je dois changer mon ventilateur ! Merci !

Francesco DE PALMA - Reply Share

Muchas gracias. Es igualmente valido para el modelo DS220+. El motivo fue acceder a la pila de la BIOS que había quedado suelta, se encuentra en la parte inferior de la placa, junto a los conectores traseros.

En el paso 4, si recomendaría retirar los tornillos del ventilador.

Amado Gonzalez-Bedoya - Reply Share

Many thanks for this article. It is very helpful. Would anybody have a photo of the motherboard (processor side) in a higher resolution?

One IC on my NAS burnt and I am unable to read its value so I can replace it.

Many thanks

Rick - Reply Share

Hi Rick,

It's like me ? https://we.tl/t-6yCq1mSDH7

[deleted] - Reply Share

Add Comment

View Statistics:

Past 24 Hours: 8

Past 7 Days: 74

Past 30 Days: 332

All Time: 37,819