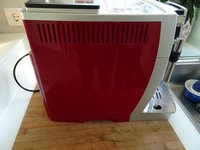
Replace lower solenoid valve on Ecam 350.55

What you need

  1. Replace lower solenoid valve on Ecam 350.55, DeLonghi ECAM back panel removal: step 1, image 1 of 1
    • Unplug the power cord!

    • Remove all attachments such as water tank, pulp drawer, brew group.

    • Turn the machine with the back facing you.

    • Remove five Torx T20 security screws.

    • A small hurdle: These screws have a pin in the middle, so the screwdriver must have a hole.

  2. Replace lower solenoid valve on Ecam 350.55: step 2, image 1 of 2 Replace lower solenoid valve on Ecam 350.55: step 2, image 2 of 2
    • Lift out the back.

    • The following components are immediately visible:

    • grinder

    • pump

    • flowmeter

  3. Replace lower solenoid valve on Ecam 350.55, DeLonghi ECAM Series left side panel: step 3, image 1 of 3 Replace lower solenoid valve on Ecam 350.55, DeLonghi ECAM Series left side panel: step 3, image 2 of 3 Replace lower solenoid valve on Ecam 350.55, DeLonghi ECAM Series left side panel: step 3, image 3 of 3
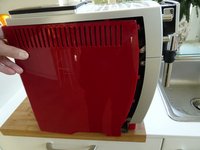
    • Push the side panel back about 1.5 cm.

    • Lift off the panel.

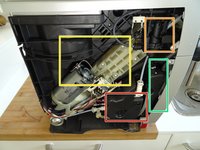
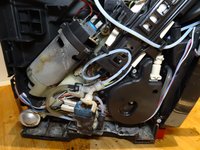
    • The following compononents are exposed:

    • Heater

    • Expansion chamber

    • Gear drive

    • Steam valve

  4. Replace lower solenoid valve on Ecam 350.55, Ecam 350.55 lower solenoid valve: step 4, image 1 of 2 Replace lower solenoid valve on Ecam 350.55, Ecam 350.55 lower solenoid valve: step 4, image 2 of 2
    • The lower solenoid valve is located on the lower left side of the device.

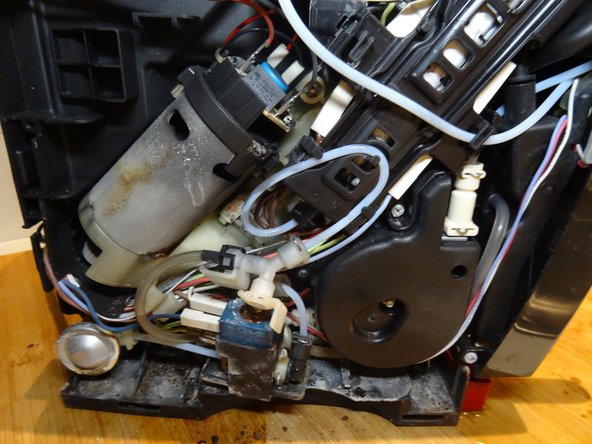
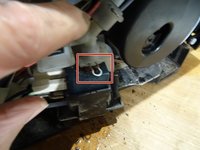
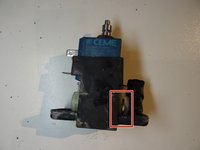
    • Pull out the clip between the solenoid valve and the pressure relief valve.

    • Lift the pressure relief valve upwards.

    • There is a seal between them. It will probably get stuck in the pressure relief valve. Remove it and replace it with a new one.

  5. Replace lower solenoid valve on Ecam 350.55: step 5, image 1 of 2 Replace lower solenoid valve on Ecam 350.55: step 5, image 2 of 2
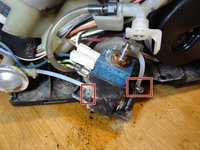
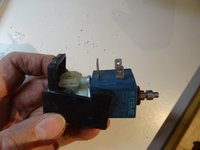
    • Pull the valve together with the rubber sleeve away from the machine toward you.

    • Note how the cables are connected and remove all the blade terminals.

    • Remove the clamps and take out the hoses.

    • There is a seal ring between them. It will probably remain stuck in the solenoid valve. Remove it and replace it with a new one.

  6. Replace lower solenoid valve on Ecam 350.55: step 6, image 1 of 2 Replace lower solenoid valve on Ecam 350.55: step 6, image 2 of 2
    • Remove the valve from the rubber housing.

    • There is a black angle fitting on the right side of the valve. Pull out the clip and remove the angle fitting. The clip is slightly larger then the others. There is also a seal between them, which you should replace later

    • You can try to open the valve, clean it, and make it work. If the valve coil has a resistance of about 2 kOhm, it may work again. But you will probably have to replace it.

    • When installing a new valve, pay attention to the direction of flow; the flow points toward the black mark or is indicated by an arrow. If you install it incorrectly, the machine will not work.

Conclusion

Follow the steps in reverse order to reassemble your device.

2 other people completed this guide.

Special thanks to these translators:

de en

100%

oldturkey03 is helping us fix the world! Want to contribute?
Start translating ›

VauWeh

Member since: 10/19/15

296,268 Reputation

303 Guides authored

Team

Repair is War on Entropy Member of Repair is War on Entropy

Community

32 Members

1,571 Guides authored

1 Guide Comment

Herzlichen Dank; hat alles sehr gut geklappt - ohne die Anleitung hätte ich das nicht geschafft und mir auch nicht getraut.

Tilo Köhn - Reply

Add Comment

View Statistics:

Past 24 Hours: 11

Past 7 Days: 65

Past 30 Days: 234

All Time: 2,929