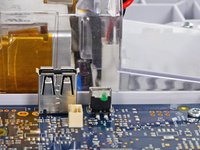
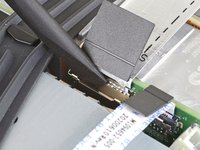
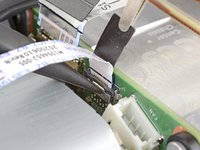
Recognizing & Disconnecting Cable Connectors

What you need

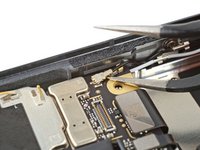
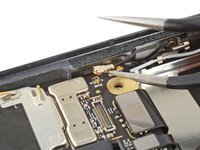
  1. Recognizing & Disconnecting Cable Connectors, ZIF Connectors: step 1, image 1 of 3 Recognizing & Disconnecting Cable Connectors, ZIF Connectors: step 1, image 2 of 3 Recognizing & Disconnecting Cable Connectors, ZIF Connectors: step 1, image 3 of 3
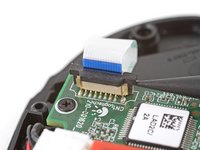
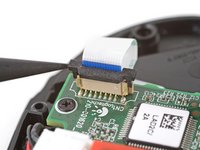
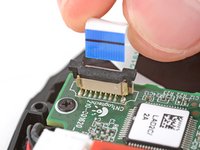
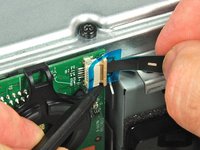
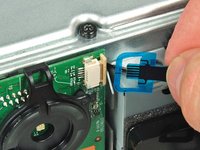
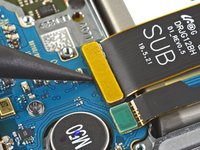
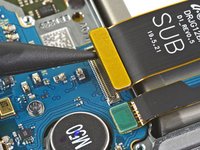
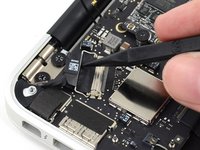
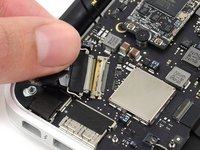
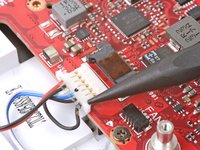
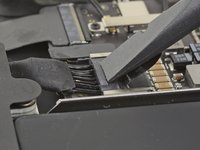
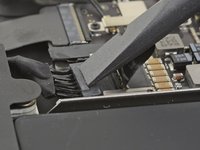
    • The zero insertion force (ZIF) connector often causes trouble for beginners. ZIF connectors are used to secure delicate ribbon cables, such as FFC (flat flex cables) or FPC (flexible printed circuit) cables.

    • As the name implies, no force is needed to plug in or remove the cable.

    • To disconnect the cable, use the tip of a spudger or your fingernail to flip up the small locking flap. Then, you can safely pull the cable out.

    • Be sure to pry up on the hinged flap, not the connector socket.

    • The white line on this ribbon cable marks the edge of the connection area. To reinstall, insert the cable into the connector up to this line, and then close the locking flap. If the cable doesn’t insert easily up to (or very near to) this line, it’s probably misaligned and needs to be gently removed and repositioned.

  2. Recognizing & Disconnecting Cable Connectors, No-Fuss Ribbon Cable Connectors: step 2, image 1 of 1
    • Sometimes you'll find a ribbon cable that simply pulls out of its socket, with no locking flap. The ribbon is normally sturdier than those used with ZIF connectors and the end is often reinforced with a stiff plastic film.

    • These connectors are often found on larger items such as printers, projectors and games consoles, such as this PS3 control board.

    • Before attempting to disconnect the ribbon, make quite sure this isn't a ZIF connector (previous step) with a release mechanism, otherwise you may damage the connector or the ribbon in forcibly removing it, and you won't be able to reinsert it.

    • To disconnect the cable, pull it straight out of the connector.

    • To reinstall the cable, hold it near the end and push it straight into the connector, being careful not to kink the cable. If you can, apply the force to the plastic reinforcement rather than the cable itself.

  3. Recognizing & Disconnecting Cable Connectors, Flat-Topped (Low Profile) Connectors: step 3, image 1 of 2 Recognizing & Disconnecting Cable Connectors, Flat-Topped (Low Profile) Connectors: step 3, image 2 of 2
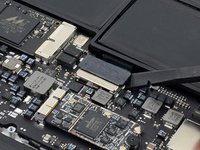
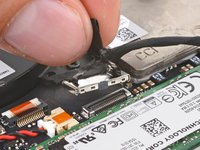
    • To disconnect flat connectors like this one, use a spudger to pry up each side. Then, lift the connector straight up from its socket.

    • To reinstall, carefully position the connector, and then press it straight down until it snaps into its socket. Finger pressure is all that is required. If it won't snap home it'll be because it isn't correctly positioned. Sometimes it can take a little patience to find exactly the right position.

  4. Recognizing & Disconnecting Cable Connectors, Press Connectors: step 4, image 1 of 2 Recognizing & Disconnecting Cable Connectors, Press Connectors: step 4, image 2 of 2
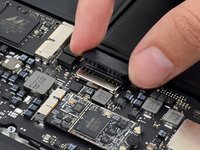
    • Smaller press-fit (or "pop") connectors may require a simple flick with a plastic opening tool, spudger, or fingernail.

    • Place the tip of your tool under the edge of the connector, and pry the connector straight up from its socket.

    • Be very careful to pry only under the edge of the connector, and not under the socket itself. If you pry under the socket, you will separate it from the circuit board, which requires specialized microsoldering skills and equipment to repair.

    • To reconnect, align the connector carefully over its socket and press down with your fingertip—first at one side, then the other—until it clicks into place.

    • Do not press down on the middle of wider connectors until they're fully seated—if misaligned, the connector or the pins underneath can bend or break, causing permanent damage.

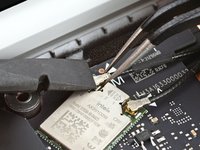
  5. Recognizing & Disconnecting Cable Connectors, Coaxial Connectors: step 5, image 1 of 3 Recognizing & Disconnecting Cable Connectors, Coaxial Connectors: step 5, image 2 of 3 Recognizing & Disconnecting Cable Connectors, Coaxial Connectors: step 5, image 3 of 3
    • For small coaxial connectors, like these U.FL antenna cable connectors, slide a thin, ESD-safe pry tool or tweezers under the wire until it's snug against the connector, and pry straight up from the board.

    • To reinstall, hold the connectors in place and gently press them straight down. The connectors “snap” into their sockets much like the metal snaps on a jacket.

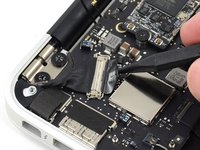
  6. Recognizing & Disconnecting Cable Connectors, Display Cable Connectors: step 6, image 1 of 3 Recognizing & Disconnecting Cable Connectors, Display Cable Connectors: step 6, image 2 of 3 Recognizing & Disconnecting Cable Connectors, Display Cable Connectors: step 6, image 3 of 3
    • Display and camera cable connectors like this one sometimes have a small metal clip running around the back of the socket to lock them in place.

    • To separate the connector, gently push the tip of a spudger under the clip. Then, swing the clip over to the other side of the socket, so that it lays flat against the cable.

    • Holding the clip and cable together, gently pull in the direction of the cable to remove the connector from its socket.

  7. Recognizing & Disconnecting Cable Connectors, Other Ribbon Cable Connectors: step 7, image 1 of 3 Recognizing & Disconnecting Cable Connectors, Other Ribbon Cable Connectors: step 7, image 2 of 3 Recognizing & Disconnecting Cable Connectors, Other Ribbon Cable Connectors: step 7, image 3 of 3
    • Here's another type of ribbon connector, commonly found on Xbox gaming consoles.

    • To remove it, use a spudger or fingernail to lift the clear blue tab away from the connector.

    • Next, use the tip of the spudger to push open the plastic locking tab.

    • The locking tab will only move about 2 mm.

    • Pull the ribbon cable out of the connector in the direction of the cable.

  8. Recognizing & Disconnecting Cable Connectors, Sliding Connectors: step 8, image 1 of 2 Recognizing & Disconnecting Cable Connectors, Sliding Connectors: step 8, image 2 of 2
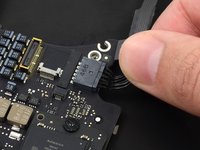
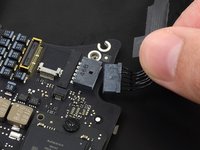
    • Some connectors require a little coaxing before they’ll give up their cables. This tiny iSight camera cable connector has no convenient place to pry or pull.

    • Always pull cables by their connectors and not the wires themselves.

    • To disconnect it safely, use the pointed tip of a spudger to carefully push on each side of the connector.

    • Alternating from one side to the other, gently “walk” the connector out of its socket.

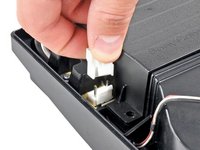
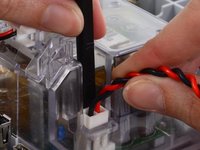
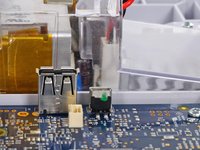
  9. Recognizing & Disconnecting Cable Connectors, Power Cable Connectors: step 9, image 1 of 2 Recognizing & Disconnecting Cable Connectors, Power Cable Connectors: step 9, image 2 of 2
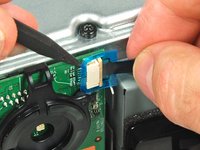
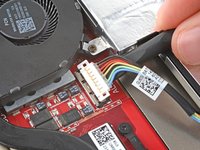
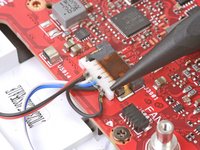
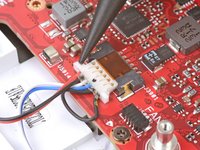
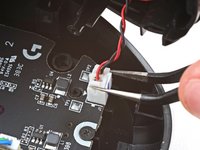
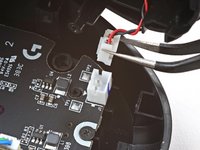
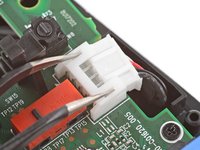
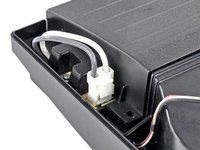
    • Power cable connectors like this one have a small tab on the side that locks them in place.

    • To separate the connector from its socket, squeeze the tab against the connector, and pull the connector straight up from the socket.

    • JST connectors are similar but don't have the locking tab. There are a few other similar types, with or without the tab, and having 2 or 3, sometimes up to half a dozen or more wires. These may be found connecting a microphone or speaker in a camera, or interconnecting the circuit boards in a radio.

    • Some variants are very small. If you try to disconnect them by pulling on the wires they may break. Ideally, pull on the body of the plug with a pair of tweezers, rocking it from side to side to ease it if necessary.

  10. Recognizing & Disconnecting Cable Connectors, Bundled Cable Connectors: step 10, image 1 of 2 Recognizing & Disconnecting Cable Connectors, Bundled Cable Connectors: step 10, image 2 of 2
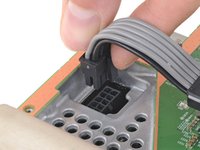
    • If you see a cable made up of lots of individually wrapped wires leading into a single connector, pulling on the cable itself may be the best method.

    • Pull the cable away from the connector in the same direction as the individual wires are running.

    • Pull evenly on the full width of the cable so that no individual wires are overly strained.

  11. Recognizing & Disconnecting Cable Connectors, Glued-Down Cables: step 11, image 1 of 2 Recognizing & Disconnecting Cable Connectors, Glued-Down Cables: step 11, image 2 of 2
    Tool used on this step:
    iOpener
    $19.99
    Buy
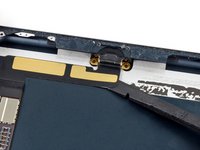
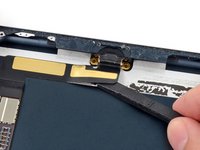
    • Sometimes removing the connector from its socket isn’t enough; an additional step or two is required to free up the cable. Here we have a Lightning port ribbon cable that is lightly glued into place.

    • To remove it, carefully slide a spudger or guitar pick underneath the cable, freeing it from the adhesive.

    • For particularly delicate or stubborn cables, a little heat from a heat gun, hair dryer, or our handy iOpener will help soften the adhesive.

  12. Recognizing & Disconnecting Cable Connectors, SATA Cables: step 12, image 1 of 1
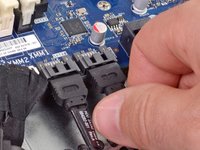
    • Some common internal power and data cables, like these SATA cables, work much like the regular audio/video cables you already have around the house.

    • To remove them, just pull in the direction of the cable.

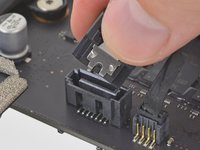
    • Some variants of the SATA cable have a small release tab or button on the side.

    • Hold the tab down with your finger, and then pull to remove the cable.

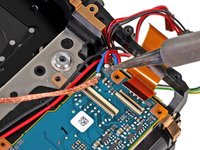
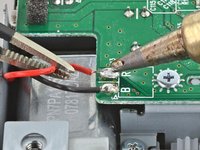
  13. Recognizing & Disconnecting Cable Connectors, Soldered Connections: step 13, image 1 of 1
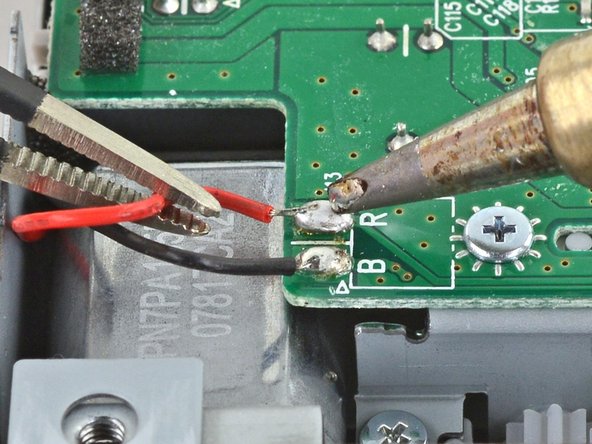
    • You'll also encounter wires that weren’t designed to be removed at all, and are in fact soldered into place.

    • Not to worry—a soldering iron and some soldering wick makes quick work of these little guys.

    • If soldering isn’t yet your thing, head on over to our soldering technique guide and learn a new skill!

  14. Recognizing & Disconnecting Cable Connectors, Elastomeric (ZEBRA) connectors: step 14, image 1 of 1
    • These are often found in pocket calculators, DECT phones, and other devices with a simple monochrome 7-segment or low-resolution display. They are used to connect the conductive tracks on the glass of an LCD to a set of pads on a circuit board below. (These displays sometimes suffer from dead segments or rows of pixels.)

    • Screws or twisted metal tabs commonly secure a metal frame, which compresses the elastomeric strip between the LCD and the circuit board. Release these to separate the LCD and the elastomeric strip.

    • In the photo, bright light reveals the conductive traces on the glass of the LCD. Beneath this is the elastomeric strip, and hidden beneath that are the tracks on the circuit board—in the same patterns as the ones on the glass.

    • The elastomeric strip consists of conductive and non-conductive layers which alternate along its length. There are several for every connection to the LCD, eliminating the need for precise alignment.

  15. Recognizing & Disconnecting Cable Connectors, Rare & Exotic Connectors: step 15, image 1 of 3 Recognizing & Disconnecting Cable Connectors, Rare & Exotic Connectors: step 15, image 2 of 3 Recognizing & Disconnecting Cable Connectors, Rare & Exotic Connectors: step 15, image 3 of 3
    • Eventually, you're bound to come across a connector that you've never seen anywhere else.

    • Inspect the connector carefully, and try to determine how it comes apart.

    • Work slowly, using lots of gentle wiggling. If your first attempt doesn't seem to be working, don't force it. Try another approach or see if a different tool gives a better result.

    • If you're still having trouble, search for guides for similar devices to see if they provide any clues, or ask for help in our Answers forum.

Finish Line

351 other people completed this guide.

Jeff Suovanen

Member since: 08/06/13

426,578 Reputation

259 Guides authored

Team

iFixit Member of iFixit

Staff

135 Members

16,476 Guides authored

20 Comments

Beautiful work. However, my modern LCD flat screen TV set uses the "No-Fuss Ribbon Cable Connectors" and I think they are fairly common in this application.

"Step 2 — No-Fuss Ribbon Cable Connectors

Occasionally, you'll find a ribbon cable that simply pulls out of its socket, with no retaining flap.

<snip>

These kinds of connectors are fairly rare, so check carefully for a way to release the connector before you resort to pulling on the ribbon cable."

Tom - Reply

This was great! thanks for the detailed pictures. I have a question though on a very specific port used on apple tv 1.

here's the link to my post

What is the 4prong black port next the the IR plug?

Manny O - Reply

It's important to note that ZIF connectors often do require force to insert, for example the digitizer ribbon cable on the Nexus 6, which has a bit of negative tension from being curved. It has to be pushed in using the little raised portion with a fingernail, and held so the line on the cable matches the line on the PCB before closing the retention bracket or else it will not connect properly.

Benjamin Columbus - Reply

I have a visio T-con board that has two flat ribbon connectors the one to the screen as a flip open latch you can do with your finger nail the other has a thin metal strip that over hangs the end on both sides. And ideas on how this one opens up? Rowland

rowlandstevens - Reply

Great post!

Would be great if Jeff or someone could help me with my question, doesn't look as though that connector type is covered in the the post above. Its listed here - Need help with these Connector latches

TIA,

Norm

Norm - Reply

Add Comment

View Statistics:

Past 24 Hours: 250

Past 7 Days: 1,834

Past 30 Days: 7,964

All Time: 582,852