Free Shipping on Domestic Orders $75+

OnePlus 9 Pro Bottom Loudspeaker Replacement

What you need

    1. OnePlus 9 Pro Bottom Loudspeaker Replacement, Rear Glass: step 1, image 1 of 1
      • For your safety, discharge your battery below 25% before disassembling your phone. This reduces the risk of a dangerous thermal event if the battery is accidentally damaged during the repair. If your battery is swollen, take appropriate precautions.

      • Unplug any chargers/peripheries and power off your phone.

      Ask FixBot

      Add Comment

    2. OnePlus 9 Pro Bottom Loudspeaker Replacement: step 2, image 1 of 1
      Ask FixBot

      Add Comment

    3. OnePlus 9 Pro Bottom Loudspeaker Replacement: step 3, image 1 of 2 OnePlus 9 Pro Bottom Loudspeaker Replacement: step 3, image 2 of 2
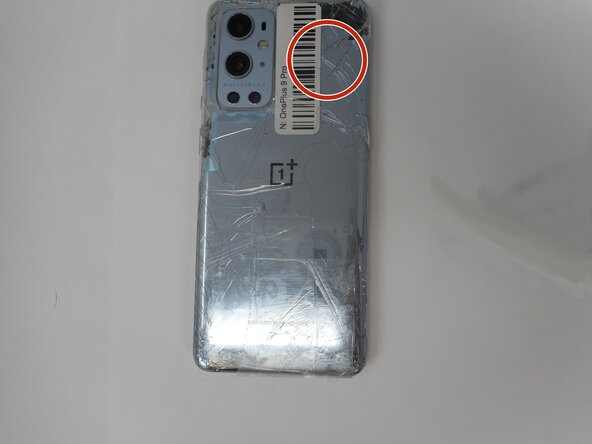
      • Use a hair dryer to lightly heat the perimeter of the rear glass.

      • Additionally, heat the top-right corner, as there is adhesive further inside of phone in that one spot.

      • Do not hold the hair dryer in one spot on the phone for too long to prevent damage to internal parts of the phone.

      Ask FixBot

      Add Comment

    4. OnePlus 9 Pro Bottom Loudspeaker Replacement: step 4, image 1 of 1
      • Apply a suction handle as close to the bottom edge as possible.

      • Pull up on the suction handle with strong, steady force to create a gap between the glass and the frame.

      • If you have trouble creating a gap, apply more heat to further soften the adhesive.

      • Insert an opening pick into the gap.

      Ask FixBot

      Add Comment

    5. OnePlus 9 Pro Bottom Loudspeaker Replacement: step 5, image 1 of 1
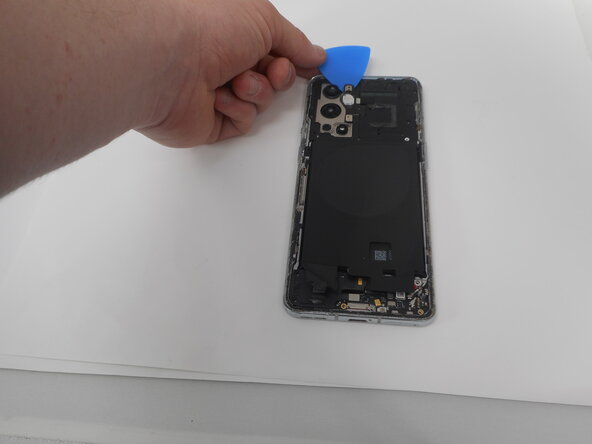
      • Slide the opening pick around the perimeter of the rear glass to slice the adhesive.

      • Insert additional opening picks as you slice the adhesive to prevent the adhesive from resealing.

      • If the adhesive becomes hard to cut, it has most likely cooled down. Use your hair dryer to reheat it.

      Ask FixBot

      Add Comment

    6. OnePlus 9 Pro Bottom Loudspeaker Replacement: step 6, image 1 of 2 OnePlus 9 Pro Bottom Loudspeaker Replacement: step 6, image 2 of 2
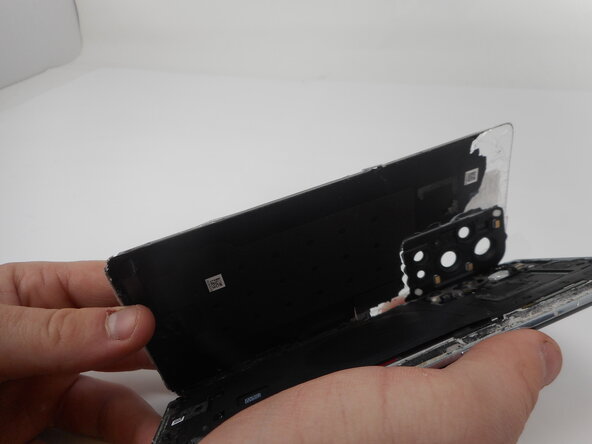
      • Carefully lift the rear glass up and off of the phone.

      • During reassembly secure the rear glass with pre-cut adhesive or double-sided adhesive tape. After installing the rear glass, apply strong, steady pressure to your phone for several minutes to help the adhesive form a good bond—a stack of heavy books works well.

      Ask FixBot

      Add Comment

    1. OnePlus 9 Pro Bottom Loudspeaker Replacement, Bottom Loudspeaker: step 7, image 1 of 2 OnePlus 9 Pro Bottom Loudspeaker Replacement, Bottom Loudspeaker: step 7, image 2 of 2
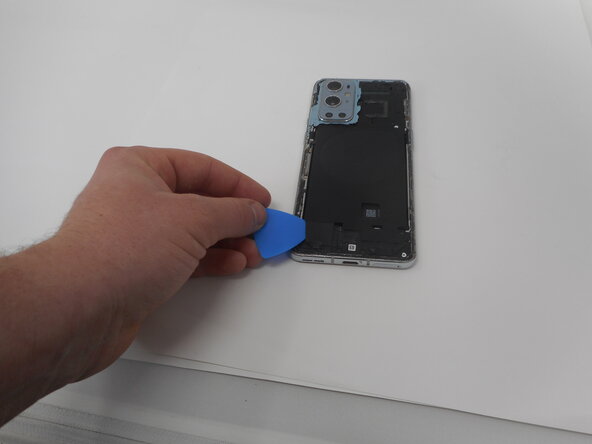
      • Use one of the opening picks to remove the adhesive on the lower part of the wireless charging cable

      Ask FixBot

      Add Comment

    2. OnePlus 9 Pro Bottom Loudspeaker Replacement: step 8, image 1 of 3 OnePlus 9 Pro Bottom Loudspeaker Replacement: step 8, image 2 of 3 OnePlus 9 Pro Bottom Loudspeaker Replacement: step 8, image 3 of 3
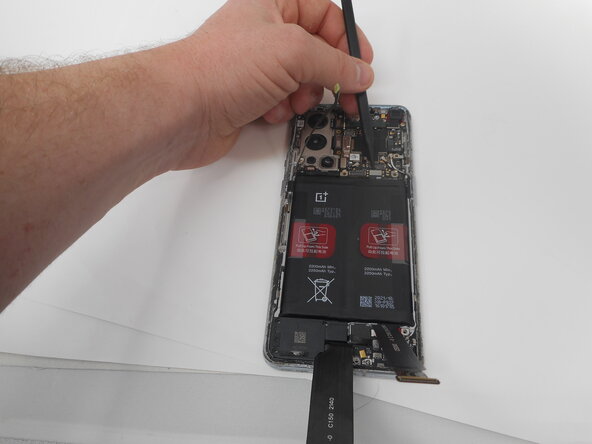
      • Unplug the press connector ribbon cable attached to the flash module by inserting a spudger under the bottom edge and prying straight up.

      • Use an opening pick to remove the flash module by the camera.

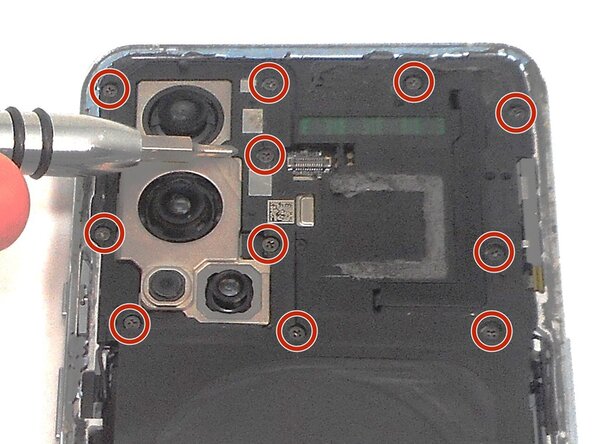
      • Use a Phillips #000 screwdriver to remove the eleven 4.9 mm-long screws holding the motherboard cover to the phone.

      • Use an opening pick to pry off the motherboard cover.

      Ask FixBot

      Add Comment

    3. OnePlus 9 Pro Bottom Loudspeaker Replacement: step 9, image 1 of 1
      • Use a Phillips #000 screwdriver to remove five screws that secure the lower daughterboard cover.

      • Two of the screws have a white head and are 4.8 mm-long. They go in the bottom right corner of the daughter and mother board.

      • The other three screws are black and are also 4.8 mm-long.

      Ask FixBot

      Add Comment

    4. OnePlus 9 Pro Bottom Loudspeaker Replacement: step 10, image 1 of 2 OnePlus 9 Pro Bottom Loudspeaker Replacement: step 10, image 2 of 2
      • Disconnect the two interconnect cables by inserting a spudger under each lip and prying straight up.

      Ask FixBot

      Add Comment

    5. OnePlus 9 Pro Bottom Loudspeaker Replacement: step 11, image 1 of 1
      • Remove the three screws from the loudspeaker using a Phillips #000 screwdriver.

      Ask FixBot

      Add Comment

    6. OnePlus 9 Pro Bottom Loudspeaker Replacement: step 12, image 1 of 1
      • Use the spudger to pry up and remove the loudspeaker.

      Ask FixBot

      Add Comment

Conclusion

To reassemble your device, follow the above steps in reverse order.
Take your e-waste to an R2 or e-Stewards certified recycler.
Repair didn’t go as planned? Try some basic troubleshooting or ask our Answers community for help.

Cancel: I did not complete this guide.

0 Guide Comments

Add Comment

View Statistics:

Past 24 Hours: 0

Past 7 Days: 3

Past 30 Days: 35

All Time: 586