
OnePlus 8 Daughterboard Replacement

What you need

  1. OnePlus 8 Daughterboard Replacement, Heat the rear glass: step 1, image 1 of 1
    • Power off your phone and unplug any cables.

    • Heat an iOpener and apply it to the rear glass for two minutes.

    • You can also use a hair dryer, heat gun, or hot plate—but extreme heat can damage the display and internal battery, so proceed with care.

  2. OnePlus 8 Daughterboard Replacement, Insert an opening pick: step 2, image 1 of 3 OnePlus 8 Daughterboard Replacement, Insert an opening pick: step 2, image 2 of 3 OnePlus 8 Daughterboard Replacement, Insert an opening pick: step 2, image 3 of 3
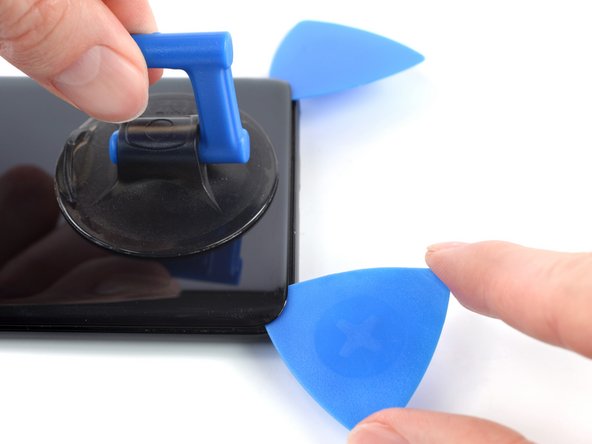
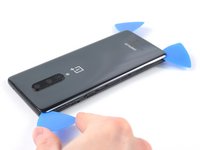
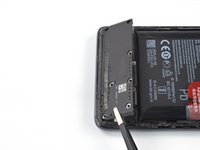
    • Apply a suction handle to the center of the bottom edge of the rear glass, as close to the edge as possible.

    • If your display is badly cracked, cover it with a layer of clear packing tape to help the suction cup adhere. Alternatively, you can pull using very strong tape instead of a suction cup. If all else fails, try supergluing the suction cup to the broken screen.

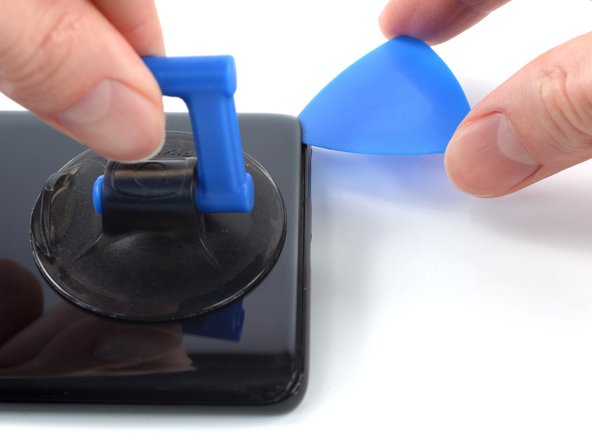
    • Pull up on the suction handle with strong, steady force to create a gap between the rear glass and frame.

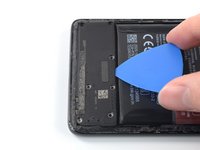
    • Insert an opening pick into the gap.

  3. OnePlus 8 Daughterboard Replacement, Slice the bottom edge adhesive: step 3, image 1 of 3 OnePlus 8 Daughterboard Replacement, Slice the bottom edge adhesive: step 3, image 2 of 3 OnePlus 8 Daughterboard Replacement, Slice the bottom edge adhesive: step 3, image 3 of 3
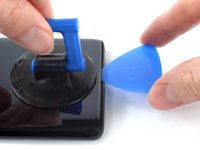
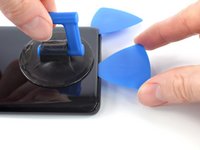
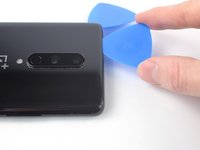
    • Slide the opening pick to the bottom right corner to slice the adhesive securing the rear glass.

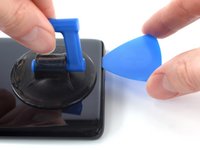
    • Leave the opening pick in the bottom right corner to prevent the adhesive from resealing.

  4. OnePlus 8 Daughterboard Replacement: step 4, image 1 of 3 OnePlus 8 Daughterboard Replacement: step 4, image 2 of 3 OnePlus 8 Daughterboard Replacement: step 4, image 3 of 3
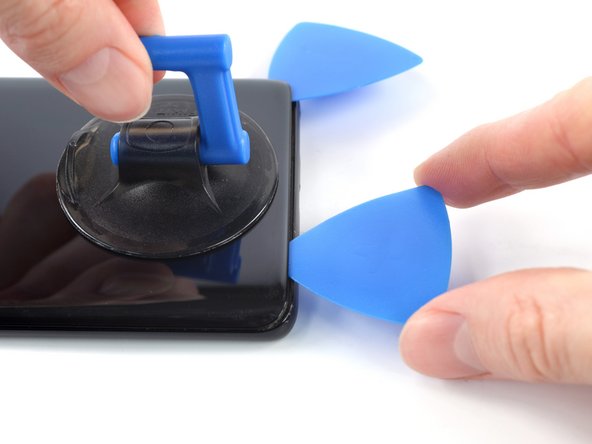
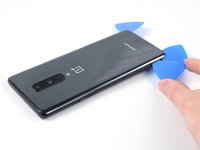
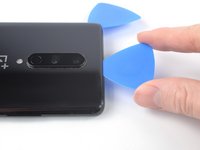
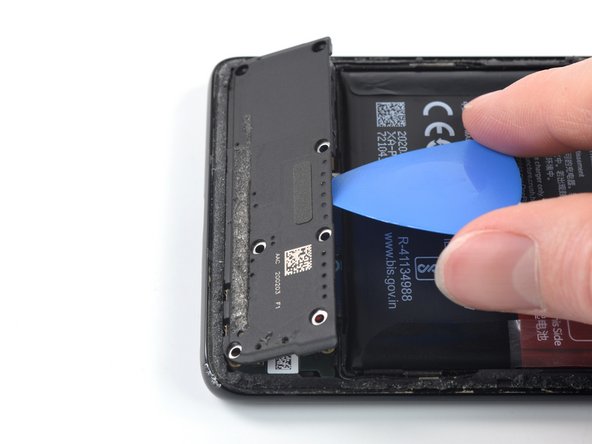
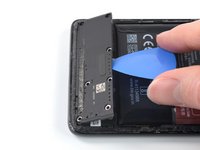
    • Insert a second opening pick under the bottom edge of the rear glass, into the gap you just created.

    • Slide the opening pick to the bottom left corner to slice the adhesive.

    • Leave the opening pick in the bottom left corner to prevent the adhesive from resealing.

  5. OnePlus 8 Daughterboard Replacement, Slice the left edge adhesive: step 5, image 1 of 3 OnePlus 8 Daughterboard Replacement, Slice the left edge adhesive: step 5, image 2 of 3 OnePlus 8 Daughterboard Replacement, Slice the left edge adhesive: step 5, image 3 of 3
    • If you have trouble slicing, reheat the iOpener and apply it to the edge for two minutes to soften the adhesive.

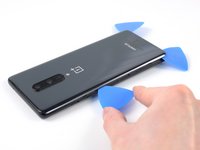
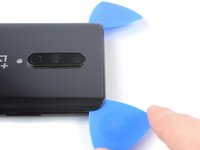
    • Insert a third opening pick under the bottom left corner of the rear glass.

    • Slide the opening pick up the left edge to slice the adhesive.

    • Leave the opening pick in the top left corner to prevent the adhesive from resealing.

  6. OnePlus 8 Daughterboard Replacement, Slice the top edge adhesive: step 6, image 1 of 3 OnePlus 8 Daughterboard Replacement, Slice the top edge adhesive: step 6, image 2 of 3 OnePlus 8 Daughterboard Replacement, Slice the top edge adhesive: step 6, image 3 of 3
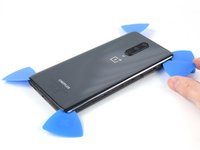
    • Insert a fourth opening pick under the top left corner of the rear glass.

    • Slide the opening pick along the top edge to slice the adhesive.

    • Leave the opening pick in the top right corner to prevent the adhesive from resealing.

  7. OnePlus 8 Daughterboard Replacement, Slice the right edge adhesive: step 7, image 1 of 3 OnePlus 8 Daughterboard Replacement, Slice the right edge adhesive: step 7, image 2 of 3 OnePlus 8 Daughterboard Replacement, Slice the right edge adhesive: step 7, image 3 of 3
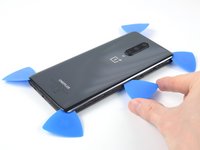
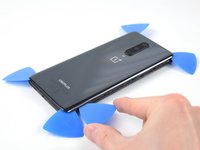
    • Insert a fifth opening pick under the top right corner of the rear glass.

    • Slide the opening pick down the right edge to slice the remaining adhesive.

  8. OnePlus 8 Daughterboard Replacement, Remove the rear glass: step 8, image 1 of 3 OnePlus 8 Daughterboard Replacement, Remove the rear glass: step 8, image 2 of 3 OnePlus 8 Daughterboard Replacement, Remove the rear glass: step 8, image 3 of 3
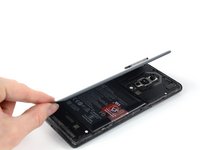
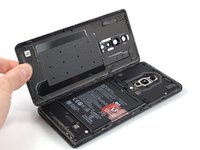
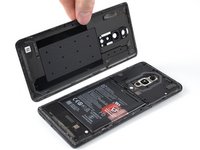
    • Remove the rear glass.

    • If the rear glass still feels stuck to the frame, slide an opening pick around the entire perimeter until the rear glass separates completely.

    • During reassembly:

    • Secure the rear glass with pre-cut adhesive or double-sided adhesive tape.

    • After installing the rear glass, apply strong, steady pressure to your phone for several minutes to help the adhesive form a good bond.

  9. OnePlus 8 Daughterboard Replacement, Unfasten the motherboard cover: step 9, image 1 of 1
    • A white sticker may cover a screw on the right edge of the motherboard cover. Pierce through it with the tip of your screwdriver or use tweezers to remove it.

    • Use a Phillips screwdriver to remove the eleven 3.3 mm-long screws securing the motherboard cover.

  10. OnePlus 8 Daughterboard Replacement, Pry up the motherboard cover: step 10, image 1 of 3 OnePlus 8 Daughterboard Replacement, Pry up the motherboard cover: step 10, image 2 of 3 OnePlus 8 Daughterboard Replacement, Pry up the motherboard cover: step 10, image 3 of 3
    • The motherboard cover is secured by tight clips.

    • Insert the flat end of a spudger under the center of the motherboard cover's bottom edge.

    • Twist the spudger to release the clips.

    • Lever the motherboard cover up until you can grip it with your fingers.

  11. OnePlus 8 Daughterboard Replacement, Remove the motherboard cover: step 11, image 1 of 2 OnePlus 8 Daughterboard Replacement, Remove the motherboard cover: step 11, image 2 of 2
    • Remove the motherboard cover.

  12. OnePlus 8 Daughterboard Replacement, Disconnect the battery cable: step 12, image 1 of 2 OnePlus 8 Daughterboard Replacement, Disconnect the battery cable: step 12, image 2 of 2
    • Use a spudger to disconnect the battery cable by prying the connector straight up from its socket on the bottom left corner of the motherboard.

    • To re-attach press connectors like this one, carefully align and press down on one side until it clicks into place, then repeat on the other side. Don't press down in the middle. If the connector is misaligned, the pins can bend and cause permanent damage.

  13. OnePlus 8 Daughterboard Replacement, Unfasten the loudspeaker: step 13, image 1 of 1
    • A white sticker may coversa screw on the top right corner of the loudspeaker. Pierce through it with the tip of your screwdriver or use tweezers to remove it.

    • Use a Phillips driver to remove the seven 3.3 mm-long screws securing the loudspeaker.

  14. OnePlus 8 Daughterboard Replacement, Pry up the loudspeaker: step 14, image 1 of 2 OnePlus 8 Daughterboard Replacement, Pry up the loudspeaker: step 14, image 2 of 2
    • The loudspeaker is secured with plastic clips.

    • Insert an opening pick underneath the center of the loudspeaker's top edge.

    • Pry up to release the clips securing the loudspeaker, levering it up until you can grip it with your fingers.

  15. OnePlus 8 Daughterboard Replacement, Remove the loudspeaker: step 15, image 1 of 2 OnePlus 8 Daughterboard Replacement, Remove the loudspeaker: step 15, image 2 of 2
    • Remove the loudspeaker.

  16. OnePlus 8 Daughterboard Replacement, Eject the SIM card tray: step 16, image 1 of 3 OnePlus 8 Daughterboard Replacement, Eject the SIM card tray: step 16, image 2 of 3 OnePlus 8 Daughterboard Replacement, Eject the SIM card tray: step 16, image 3 of 3
    • Insert a SIM eject tool, bit, or straightened paper clip into the SIM card tray hole on the bottom edge of the phone.

    • Press firmly to eject the tray.

  17. OnePlus 8 Daughterboard Replacement, Remove the SIM card tray: step 17, image 1 of 2 OnePlus 8 Daughterboard Replacement, Remove the SIM card tray: step 17, image 2 of 2
    • Remove the SIM card tray from the phone.

    • A thin rubber gasket provides water and dust protection. If this gasket is damaged or missing, replace the gasket (or the entire tray) to maintain water resistance and protect your phone's internal components.

    • When inserting a SIM card into the tray, make sure it's oriented properly within the tray before reinserting the tray into the phone.

  18. OnePlus 8 Daughterboard Replacement, Disconnect the antenna board cable: step 18, image 1 of 2 OnePlus 8 Daughterboard Replacement, Disconnect the antenna board cable: step 18, image 2 of 2
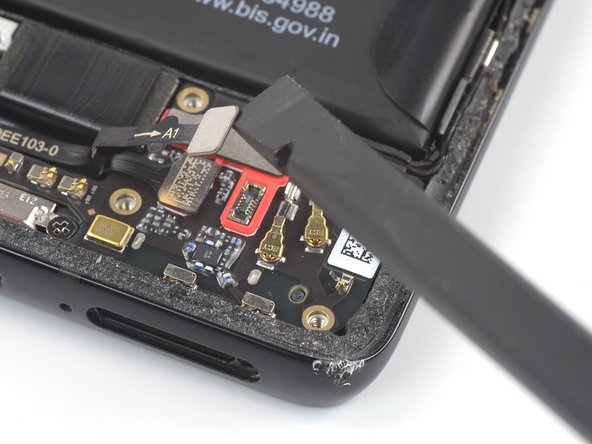
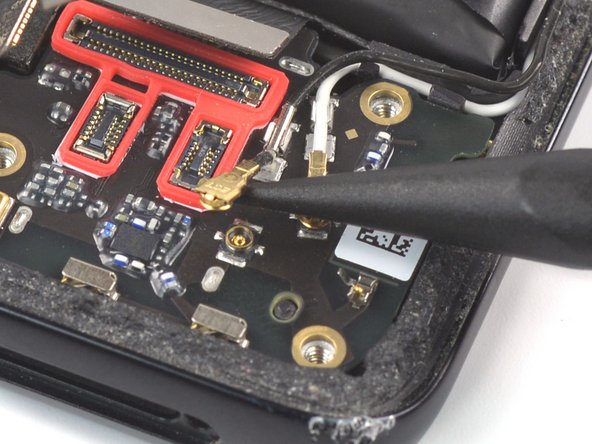
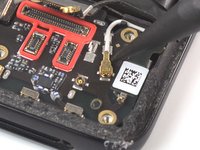
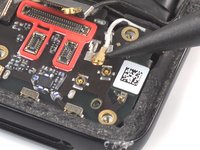
    • Use a spudger to disconnect the antenna board cable from the daughterboard by prying the connector straight up from its socket.

  19. OnePlus 8 Daughterboard Replacement, Disconnect the fingerprint reader cable: step 19, image 1 of 2 OnePlus 8 Daughterboard Replacement, Disconnect the fingerprint reader cable: step 19, image 2 of 2
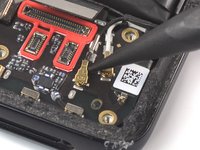
    • Use a spudger to disconnect the fingerprint reader cable from the daughterboard by prying the connector straight up from its socket.

  20. OnePlus 8 Daughterboard Replacement, Disconnect the interconnect cable: step 20, image 1 of 2 OnePlus 8 Daughterboard Replacement, Disconnect the interconnect cable: step 20, image 2 of 2
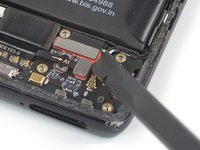
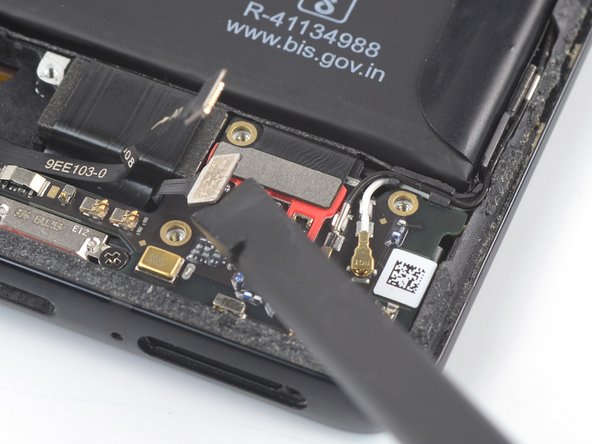
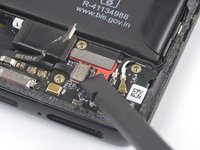
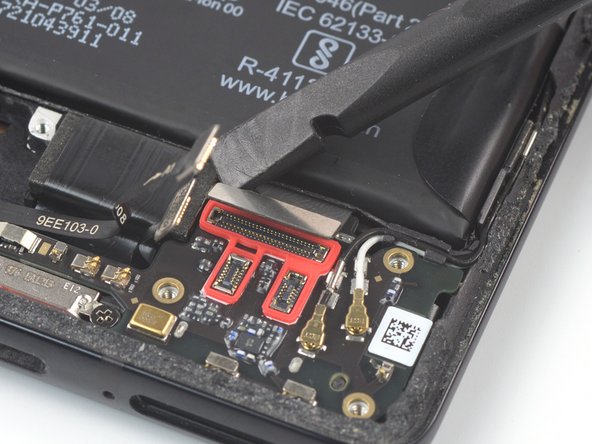
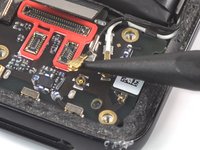
    • Use a spudger to disconnect the interconnect cable from the daughterboard by prying the connector straight up from its socket.

  21. OnePlus 8 Daughterboard Replacement, Disconnect the black antenna cable: step 21, image 1 of 2 OnePlus 8 Daughterboard Replacement, Disconnect the black antenna cable: step 21, image 2 of 2
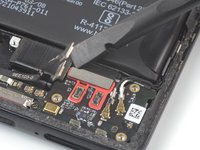
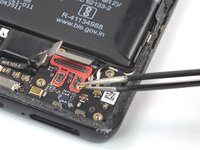
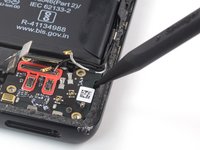
    • Use the pointed end of a spudger to disconnect the black antenna cable by prying the connector straight up from its socket on the motherboard.

    • Pry only on the metal heads of the connectors. Avoid prying on the cables themselves.

    • To reconnect antenna cables, hold each one in place over its socket and press down with the flat end of your spudger. The connector will snap into place.

  22. OnePlus 8 Daughterboard Replacement, Unclip the black antenna cable: step 22, image 1 of 2 OnePlus 8 Daughterboard Replacement, Unclip the black antenna cable: step 22, image 2 of 2
    • Use a pair of tweezers or your fingers to lift the black antenna cable out of its clip on the daughterboard.

  23. OnePlus 8 Daughterboard Replacement, Disconnect and unclip the white antenna cable: step 23, image 1 of 3 OnePlus 8 Daughterboard Replacement, Disconnect and unclip the white antenna cable: step 23, image 2 of 3 OnePlus 8 Daughterboard Replacement, Disconnect and unclip the white antenna cable: step 23, image 3 of 3
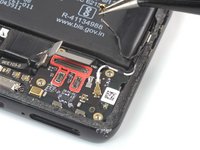
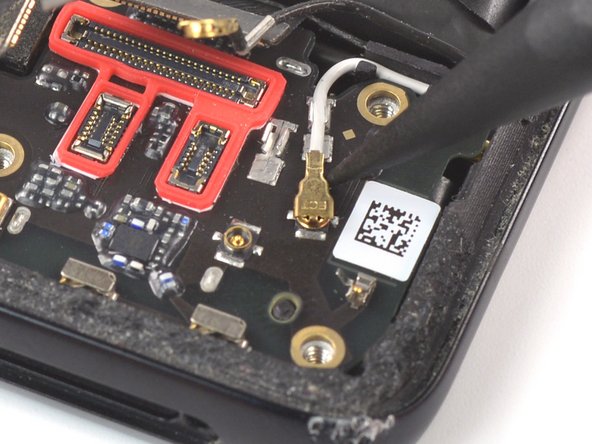
    • Use the pointed end of a spudger to disconnect the white antenna cable by prying the connector straight up from its socket on the motherboard.

    • Use a pair of tweezers or your fingers to lift the white antenna cable out of its clip on the daughterboard.

    • During reassembly, make sure the antenna cables are pushed into their channels on the right edge of the phone before pressing them into their respective clips.

  24. OnePlus 8 Daughterboard Replacement, Unfasten the daughterboard: step 24, image 1 of 1
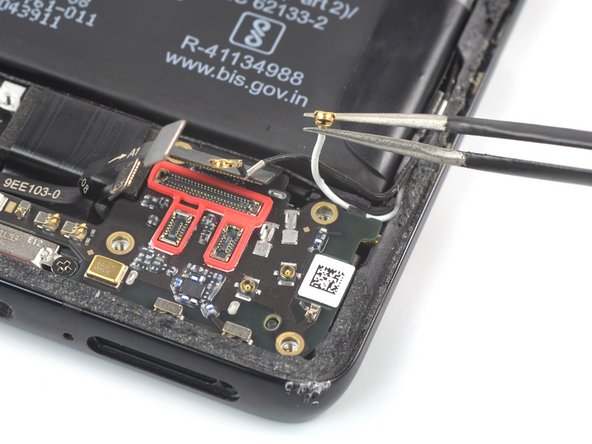
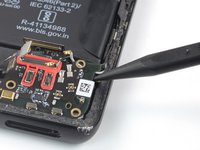
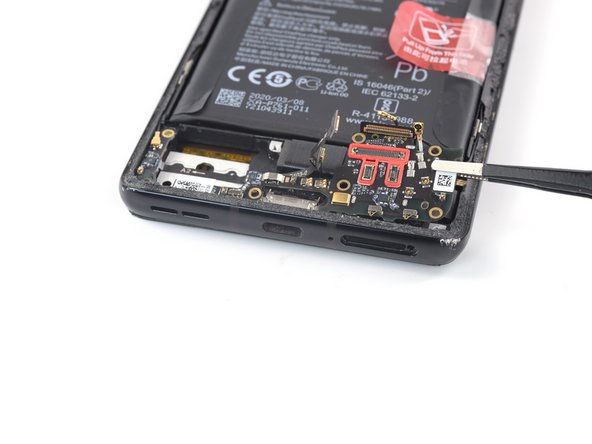
    • Use a Phillips driver to remove the single 3.3 mm-long screw securing the daughterboard.

  25. OnePlus 8 Daughterboard Replacement, Pry up the daughterboard: step 25, image 1 of 2 OnePlus 8 Daughterboard Replacement, Pry up the daughterboard: step 25, image 2 of 2
    • Insert the point of a spudger under the top right corner of the daughterboard.

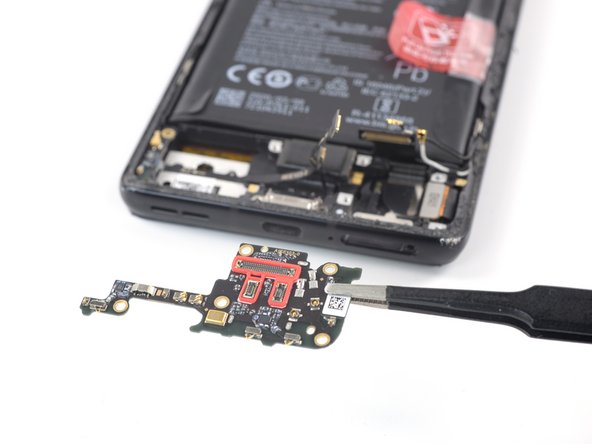
    • Pry up the daughterboard.

  26. OnePlus 8 Daughterboard Replacement, Remove the daughterboard: step 26, image 1 of 3 OnePlus 8 Daughterboard Replacement, Remove the daughterboard: step 26, image 2 of 3 OnePlus 8 Daughterboard Replacement, Remove the daughterboard: step 26, image 3 of 3
    • Use a pair of tweezers or your fingers to remove the daughterboard.

    • Before reinstalling the daughterboard, make sure all cables that connect to it are out of the way.

Conclusion

To reassemble your device, follow these instructions in reverse order.

Take your e-waste to an R2 or e-Stewards certified recycler.

Repair didn’t go as planned? Try some basic troubleshooting, or ask our Answers community for help.

Manuel Haeussermann

Member since: 07/13/22

15,487 Reputation

71 Guides authored

Team

iFixit Member of iFixit

Staff

135 Members

16,817 Guides authored

0 Comments

Add Comment

View Statistics:

Past 24 Hours: 0

Past 7 Days: 5

Past 30 Days: 32

All Time: 467