Introduction
Only getting half of your 3DS gaming experience? Replace the lower LCD to get the full view.
What you need
-
Tool used on this step:Phillips #00 Screwdriver$5.49
-
Use a Phillips PH00 screwdriver to loosen the four screws along the top of the back cover.
 Ask FixBot
-
-
-
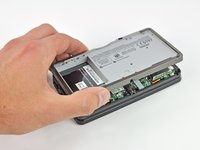
Grab the top edge of the back cover with your opposite hand so that the cover does not fall back into place.
-
Pull the back cover up and away from the rest of the device to remove it.
-
-
-
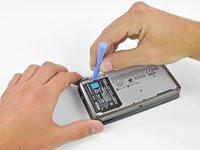
Insert a plastic opening tool into the notch in the lower case above the battery.
-
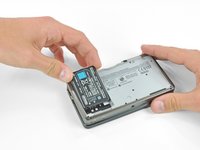
Pry the battery up with the plastic opening tool.
-
Grab the top edge of the battery and lift it out of the lower case.
-
-
-
Use a JIS #00 screwdriver to remove the nine 6.3 mm black screws from the lower case.
-
Use a JIS #00 screwdriver to remove the 2.4 mm silver screw above the game cartridge slot.
-
-
-
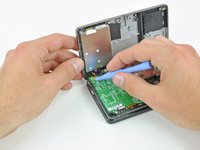
Lift the bottom edge of the lower case off the rest of the 3DS.
-
Use a plastic opening tool to pry the shoulder button ribbon cables off their sockets on the motherboard.
-
Remove the lower case from the device.
-
-
-
Remove the two 7.7 mm Phillips screws securing the back of the Circle Pad to the motherboard.
-
-
-
Use the flat end of a spudger to pry the back of the Circle Pad off the motherboard.
-
Lift the Circle Pad joystick off the motherboard and lay it on its back so that the ribbon cable connector is accessible.
-
-
-
Use the flat end of a spudger or your fingernail to flip up the retaining flap on the Circle Pad ribbon cable ZIF socket.
-
Lift the Circle Pad joystick off the motherboard.
-
-
-
Use a spudger or screwdriver to lift the pads up and remove them from the device.
-
-
-
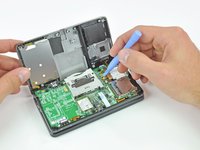
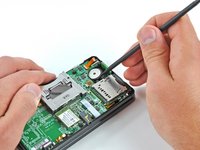
Remove the two 4.5 mm Phillips screws securing the SD board to the motherboard.
-
-
-
-
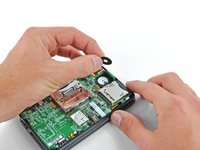
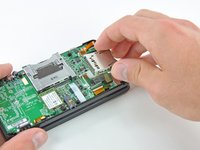
Use the flat end of a spudger to pry the SD board ribbon cable connector off its socket on the motherboard.
-
-
-
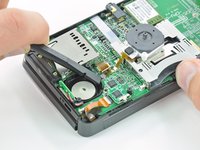
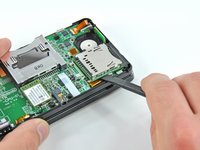
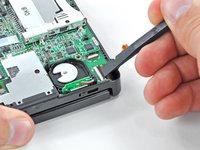
Insert the flat end of a spudger between the SD board and the motherboard.
-
Pry up slowly to loosen the SD board from the RF shield underneath it. If you pry too quickly, you may tear the shield or break its solder points.
-
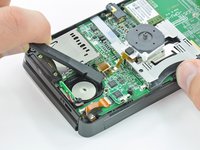
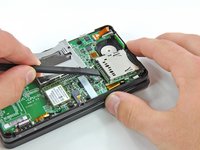
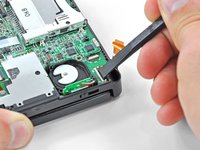
Run the spudger along the sides of the SD board to free it from the adhesive holding it in place.
-
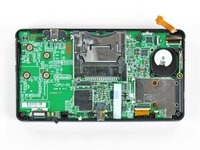
Once completely freed, lift the SD board straight off the motherboard.
-
-
-
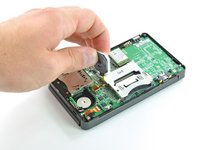
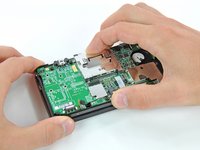
Slide the flat end of a spudger under the corner of the Wi-Fi board, and lift it away from the motherboard.
-
-
-
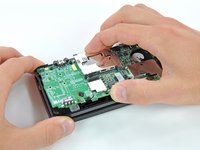
Use the flat end of a spudger to pry the Wi-Fi antenna cable connector off its socket on the Wi-Fi board.
-
Remove the Wi-Fi board from the device.
-
-
Tool used on this step:Tweezers$4.99
-
Grasp the microphone ribbon cable near the microphone with a pair of tweezers.
-
Pull the microphone straight up out of the upper case.
-
-
-
Use the flat end of a spudger or your fingernail to flip up the retaining flap on the speaker assembly ribbon cable ZIF socket.
-
Disconnect the speaker assembly ribbon cable with a pair of tweezers.
-
-
-
Use the flat end of a spudger or your fingernail to flip up the retaining flap on the camera ribbon cable ZIF socket.
-
-
-
Remove seven Phillips screws securing the motherboard to the upper case:
-
Four 2.5 mm gold screws
-
Two 3.5 mm black screws
-
One 2.5 mm silver screw
-
Lift the side of the motherboard that sits along the bottom edge of the 3DS.
-
-
-
Use the flat end of a spudger or your fingernail to flip up the retaining flap on the LCD ribbon cable ZIF socket.
-
-
-
Use the tip of a spudger or your fingers to peel back the white tape covering the touchscreen ribbon cable connector.
-
-
-
Use the flat end of a spudger or your fingernail to flip up the retaining flap on the touchscreen ribbon cable ZIF socket.
-
-
Tool used on this step:Tweezers$4.99
-
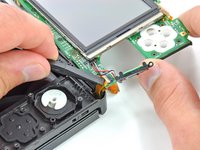
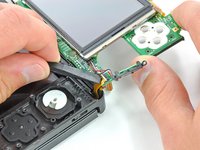
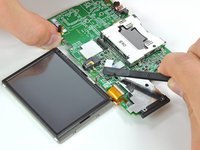
Use the flat end of a spudger or your fingernail to flip up the retaining flap on the lower LCD power ribbon cable ZIF socket.
-
Pull the ribbon cable out of the connector with a pair of tweezers.
-
-
-
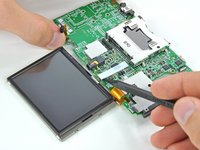
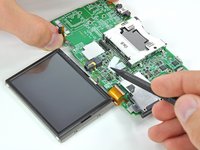
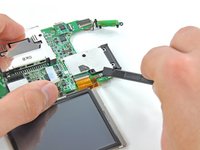
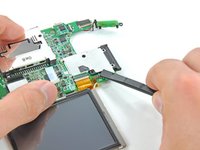
Use the flat end of a spudger or your fingernail to flip up the retaining flap on the lower LCD data ribbon cable ZIF socket.
-
-
-
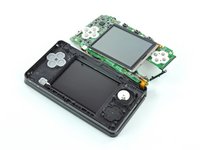
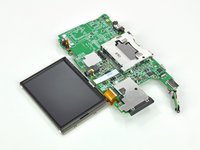
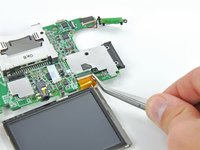
Grasp the lower display assembly and pull it directly away from the motherboard.
-
-
-
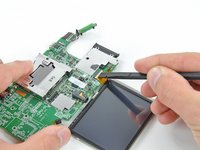
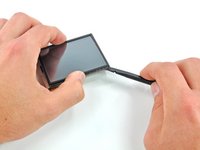
Starting at the bottom right corner, insert the flat end of a spudger between the touchscreen and LCD frame and gently pry the touchscreen off the LCD.
-
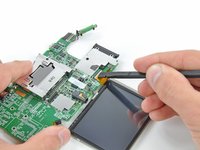
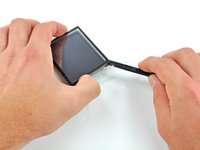
Insert the spudger into the top right corner between the two pieces and pry the touchscreen off the LCD frame.
-
-
-
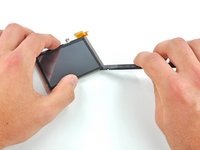
Repeat the above procedure for the remaining two corners to pry the touchscreen off the LCD frame.
-
-
-
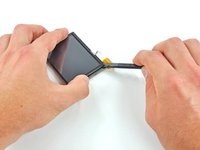
Gently lift the touchscreen up to completely separate it from the lower LCD.
-


To reassemble your device, follow these instructions in reverse order.
Cancel: I did not complete this guide.
16 other people completed this guide.

2 Guide Comments
Is this the same screen for the standard New Nintendo 3ds also?
No, the New Nintendo 3DS or 3DS/2DS line up of systems after the original Nintendo 3DS do not use the same screen.