Free Shipping on Domestic Orders $75+

Motherboard Removal

Views: 193

View statistics:

Past 24 Hours:
1
Past 7 Days:
6
Past 30 Days:
19
All Time:
193
Comments: 0

No one has left comments on this guide. Will you be first?

Go to guide comments
Completed: 0

No one has marked this guide "completed." Will you be the first?

Favorites: 0

No one has favorited (and subscribed to) this guide. Will you be the first?

Time Required: No estimate
Difficulty: Moderate
Motherboard Removal
Prerequisite Only This is a prerequisite-only guide! This guide is part of another procedure and isn’t meant to be used alone.

Introduction

Go to step 1 ↓

This is a prerequisite-only guide! This guide is part of another procedure and isn't meant to be used alone.

What you need

Parts

Tools

    1. Motherboard Removal, Remove the SIM card tray: step 1, image 1 of 3 Motherboard Removal, Remove the SIM card tray: step 1, image 2 of 3 Motherboard Removal, Remove the SIM card tray: step 1, image 3 of 3
      • Insert a SIM eject tool, bit, or straightened paperclip into the SIM card tray hole on the left edge of the phone.

      • Push the SIM eject tool into the hole to eject the SIM card tray.

      • Remove the SIM card tray.

      Ask FixBot

      Add Comment

    1. Motherboard Removal, Heat the right edge: step 2, image 1 of 1
      • Heat an iOpener and apply it to the back cover's right edge for two minutes.

      • A hair dryer, heat gun, or hot plate may also be used, but be careful not to overheat the phone—the display and internal battery are both susceptible to heat damage.

      Ask FixBot

      Add Comment

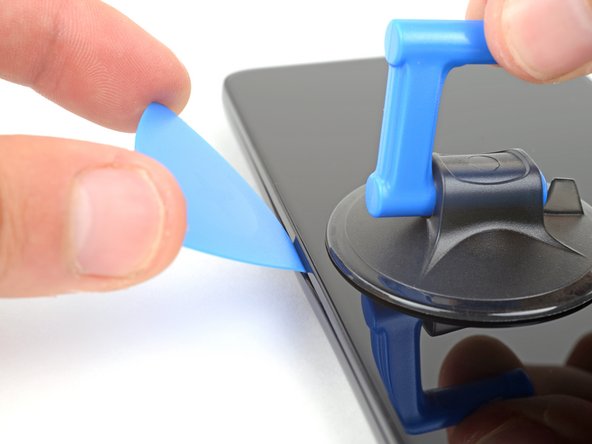
    2. Motherboard Removal, Insert an opening pick: step 3, image 1 of 2 Motherboard Removal, Insert an opening pick: step 3, image 2 of 2
      • Flip your phone over so the display is facing up.

      • Apply a suction handle to the middle of the display's left edge, as close to the edge as possible.

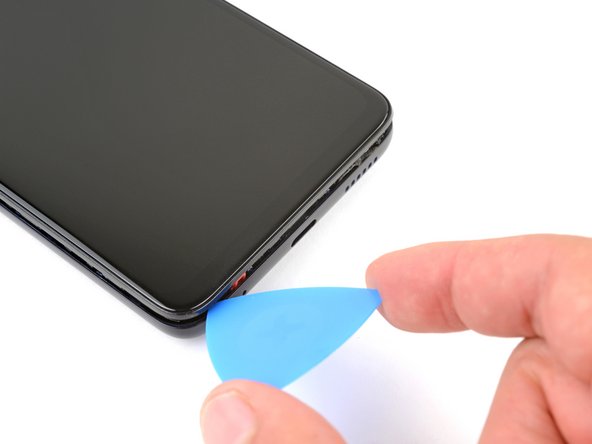
      • Place the tip of an opening pick in the small gap between the back cover and the display.

      • Pull up on the suction cup with a strong, steady force and push the opening pick down at a 45 degree angle until it slides into the gap between the back cover and the display.

      • If you're having a hard time inserting the pick, reheat the adhesive with an iOpener and try again.

      Ask FixBot

      Add Comment

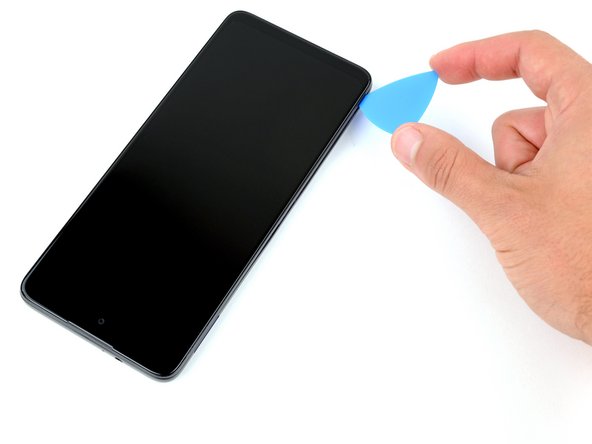
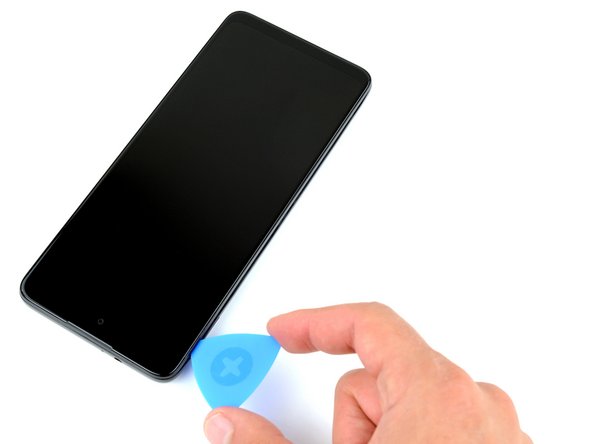
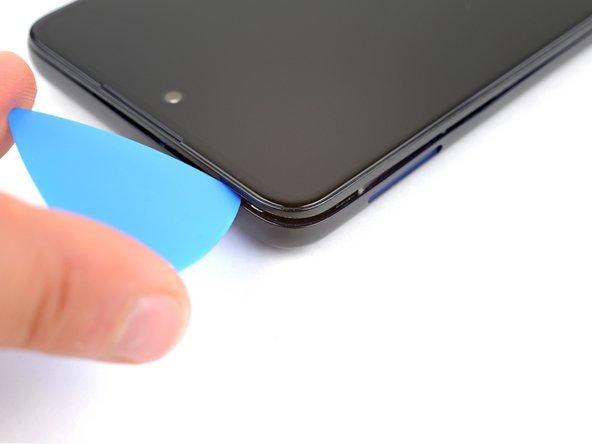
    3. Motherboard Removal, Slice the left adhesive: step 4, image 1 of 3 Motherboard Removal, Slice the left adhesive: step 4, image 2 of 3 Motherboard Removal, Slice the left adhesive: step 4, image 3 of 3
      • Both adhesive and clips secure the back cover.

      • During steps that involve sliding the opening pick, keep it angled down at a 45 degree angle.

      • Slide the pick along the left edge down to the bottom left corner, and then up to the top left corner, to release the clips and slice the adhesive.

      • Leave the pick inserted in the top left corner to prevent the adhesive from resealing.

      Ask FixBot

      Add Comment

    4. Motherboard Removal, Heat the top edge: step 5, image 1 of 1
      • Flip your phone over and apply a heated iOpener to the back cover's top edge for two minutes.

      Ask FixBot

      Add Comment

    5. Motherboard Removal: step 6, image 1 of 2 Motherboard Removal: step 6, image 2 of 2
      • Flip your phone over and rotate the pick around the top left corner.

      Ask FixBot

      Add Comment

    6. Motherboard Removal: step 7, image 1 of 2 Motherboard Removal: step 7, image 2 of 2
      • Slide the pick along the top edge to release the clips and slice the adhesive.

      • Leave the pick inserted in the top right corner.

      Ask FixBot

      Add Comment

    7. Motherboard Removal: step 8, image 1 of 1
      • Flip your phone over and apply a heated iOpener to the back cover's left edge for two minutes.

      Ask FixBot

      Add Comment

    8. Motherboard Removal: step 9, image 1 of 2 Motherboard Removal: step 9, image 2 of 2
      • Flip your phone over and rotate the pick around the top right corner.

      Ask FixBot

      Add Comment

    9. Motherboard Removal: step 10, image 1 of 2 Motherboard Removal: step 10, image 2 of 2
      • Slide the pick along the right edge to release the clips and slice the adhesive.

      • Leave the pick inserted in the bottom right corner to prevent the adhesive from resealing.

      Ask FixBot

      Add Comment

    10. Motherboard Removal: step 11, image 1 of 1
      • Flip your phone over and apply a heated iOpener to the back cover's bottom edge for two minutes.

      Ask FixBot

      Add Comment

    11. Motherboard Removal: step 12, image 1 of 2 Motherboard Removal: step 12, image 2 of 2
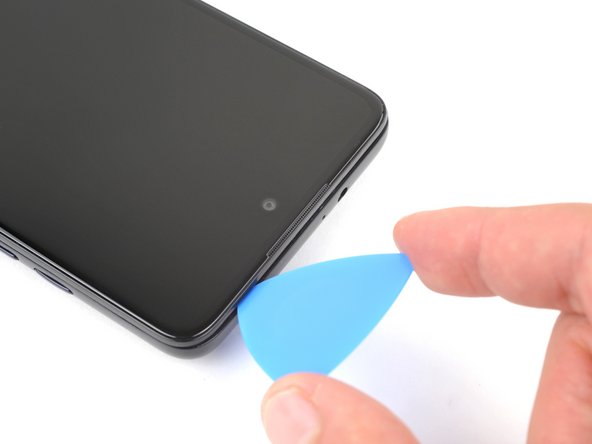
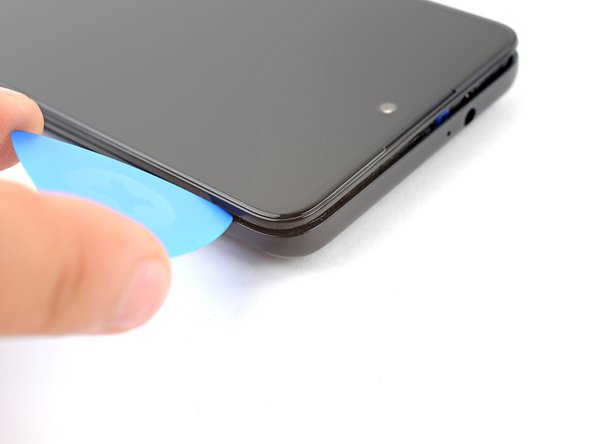
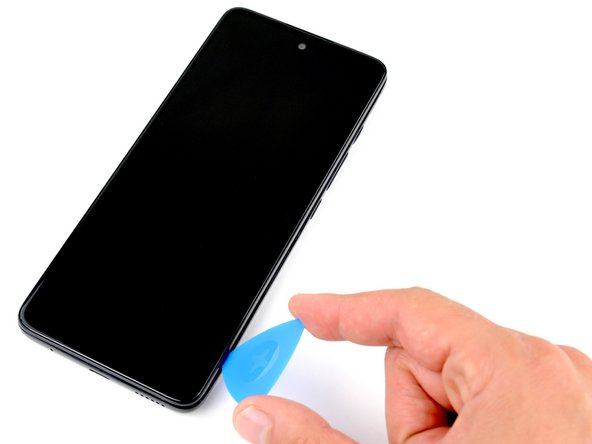
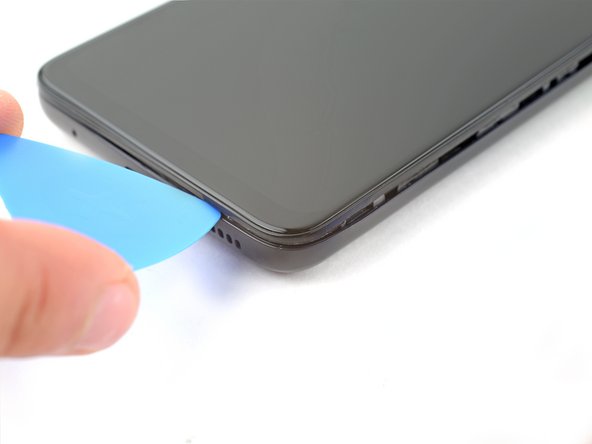
      • Flip your phone over and rotate the pick around the bottom right corner.

      Ask FixBot

      Add Comment

    12. Motherboard Removal: step 13, image 1 of 2 Motherboard Removal: step 13, image 2 of 2
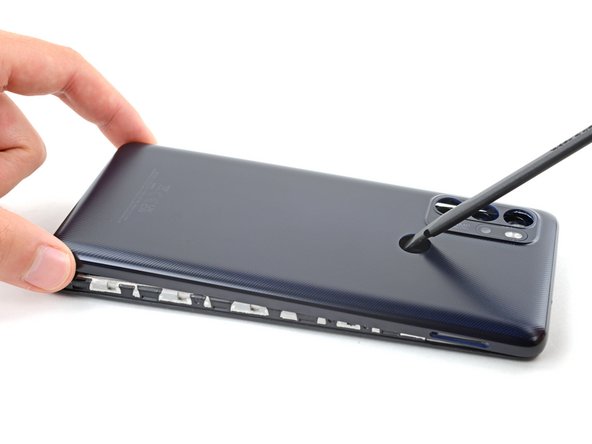
      • Slide the opening pick along the bottom edge to release the clips and slice the adhesive.

      Ask FixBot

      Add Comment

    13. Motherboard Removal: step 14, image 1 of 2 Motherboard Removal: step 14, image 2 of 2
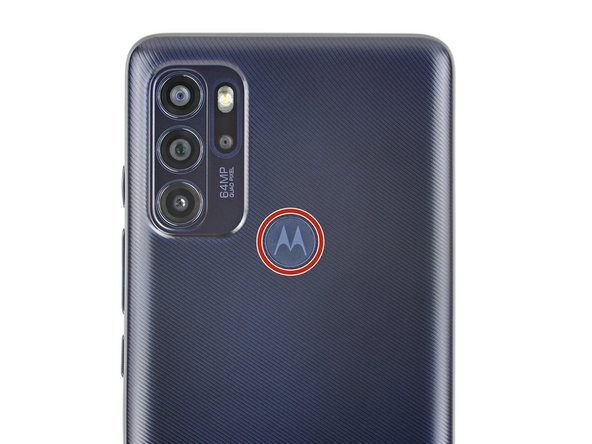
      • Flip your phone over and apply a heated iOpener to the fingerprint sensor on the back cover for two minutes.

      Ask FixBot

      Add Comment

    14. Motherboard Removal, Detach the fingerprint sensor: step 15, image 1 of 3 Motherboard Removal, Detach the fingerprint sensor: step 15, image 2 of 3 Motherboard Removal, Detach the fingerprint sensor: step 15, image 3 of 3
      • Adhesive secures the fingerprint sensor to the back case.

      • A fragile cable secures the fingerprint sensor to the motherboard. Be very careful during this step to avoid damaging the cable.

      • Press down on the fingerprint sensor with the flat end of a spudger or your finger.

      • While pressing down on the fingerprint sensor, gently pull up the bottom edge of the back cover until the sensor detaches.

      Ask FixBot

      Add Comment

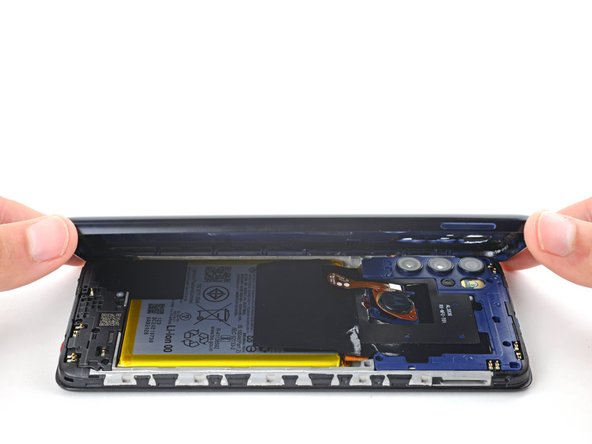
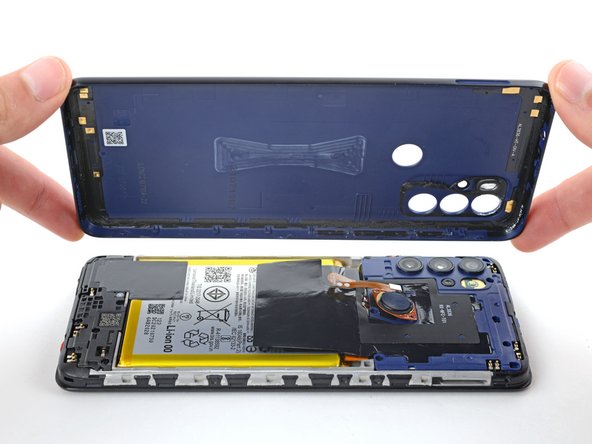
    15. Motherboard Removal, Remove the back cover: step 16, image 1 of 3 Motherboard Removal, Remove the back cover: step 16, image 2 of 3 Motherboard Removal, Remove the back cover: step 16, image 3 of 3
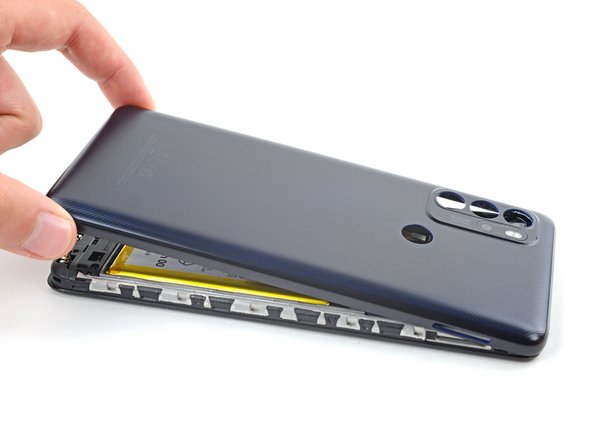
      • Lift the back cover up and remove it.

      • If the back cover is still stuck to the frame, slide an opening pick around the entire perimeter until the cover separates completely.

      • During reassembly:

      • This is a good point to test your phone's functionality before sealing it up. Use this guide to run a hardware test. Be sure to power your phone back down completely before you continue working.

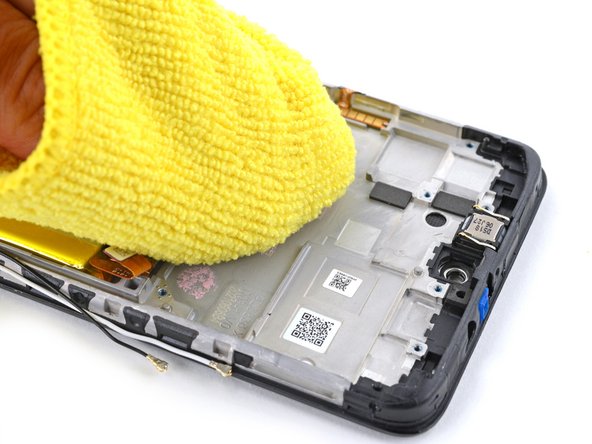
      • Apply new adhesive to the perimeter of the underside of the back cover after cleaning the relevant areas with isopropyl alcohol (>90%) and a micro-fiber cloth.

      Ask FixBot

      Add Comment

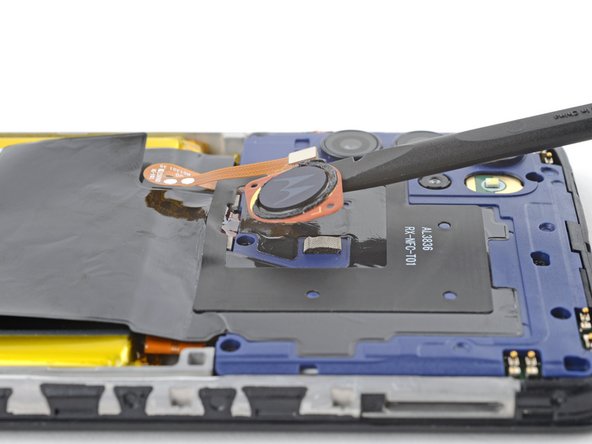
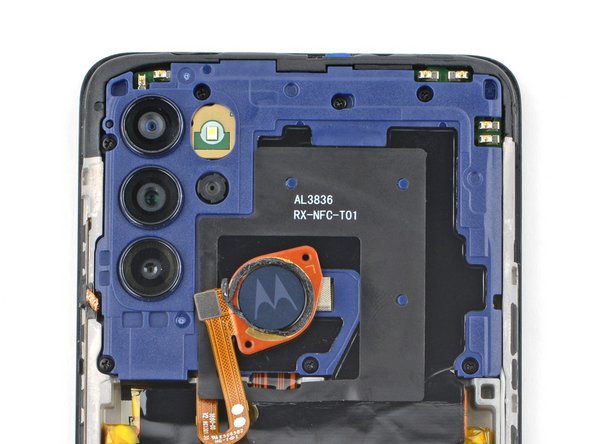
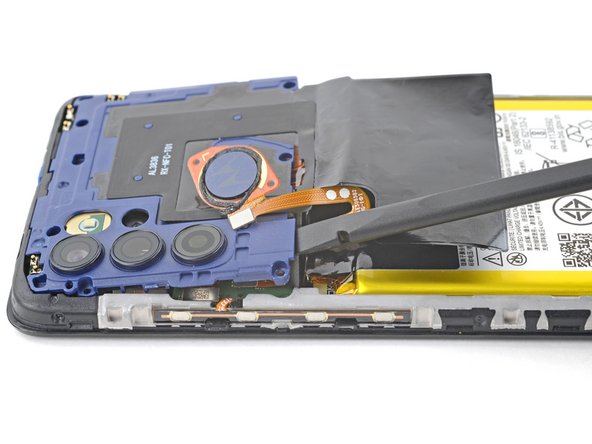
    1. Motherboard Removal, Detach the fingerprint sensor: step 17, image 1 of 2 Motherboard Removal, Detach the fingerprint sensor: step 17, image 2 of 2
      • The fingerprint reader is secured to the motherboard cover with light adhesive.

      • Insert the flat end of a spudger under the fingerprint sensor.

      • Gently pry up and detach the fingerprint sensor from the motherboard cover.

      • Don't try to remove the fingerprint sensor yet, as it's still attached to the motherboard by a delicate ribbon cable.

      Ask FixBot

      Add Comment

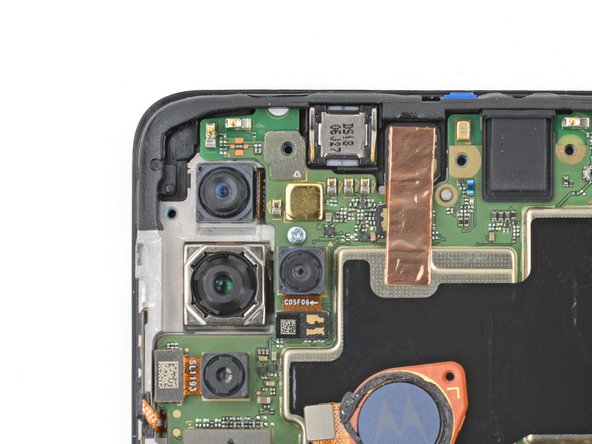
    2. Motherboard Removal, Unfasten the motherboard cover: step 18, image 1 of 2 Motherboard Removal, Unfasten the motherboard cover: step 18, image 2 of 2
      • Use a Phillips screwdriver to remove the seven 3.9 mm screws securing the motherboard cover.

      Ask FixBot

      Add Comment

    3. Motherboard Removal, Unclip the motherboard cover: step 19, image 1 of 2 Motherboard Removal, Unclip the motherboard cover: step 19, image 2 of 2
      • The motherboard cover is secured with tight clips.

      • Insert the flat end of a spudger in the gap between the frame and the bottom left corner of the motherboard cover.

      • Lift straight up with the spudger to release the clips securing the motherboard.

      • Don't pry against the battery, as this could damage it.

      • This may take take a few attempts. It you're having trouble, try gripping the spudger closer to the flat end.

      • During reassembly, press down around the perimeter of the motherboard cover to engage the clips.

      Ask FixBot

      Add Comment

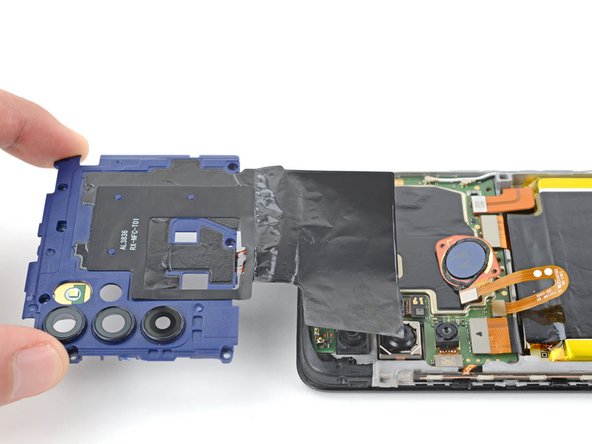
    4. Motherboard Removal, Remove the motherboard cover: step 20, image 1 of 2 Motherboard Removal, Remove the motherboard cover: step 20, image 2 of 2
      • Pull the motherboard cover towards the top of the phone to remove it.

      • Make sure to avoid the fingerprint sensor cable when removing the cover, as it can easily rip.

      Ask FixBot

      Add Comment

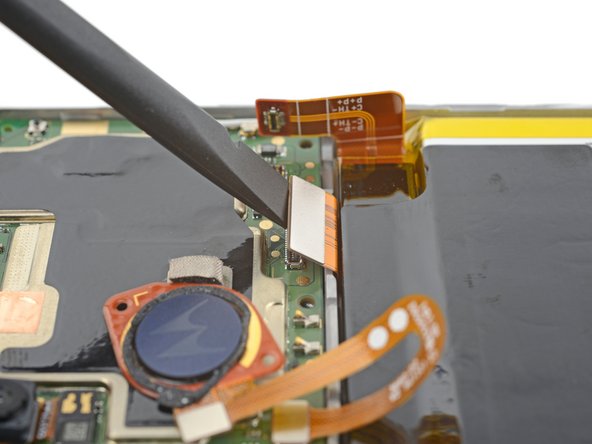
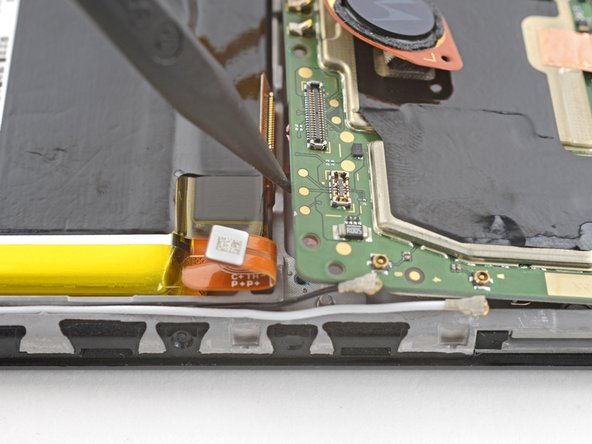
    1. Motherboard Removal, Disconnect the battery: step 21, image 1 of 2 Motherboard Removal, Disconnect the battery: step 21, image 2 of 2
      • Use the flat end of a spudger to pry up and disconnect the battery cable's press connector.

      • To re-attach press connectors like this one, carefully align and press down on one side until it clicks into place, then repeat on the other side. Don't press down on the middle. If the connector is misaligned, the pins can bend and cause permanent damage.

      Ask FixBot

      Add Comment

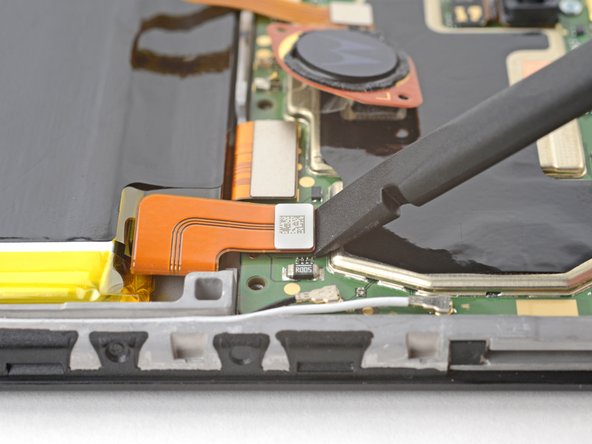
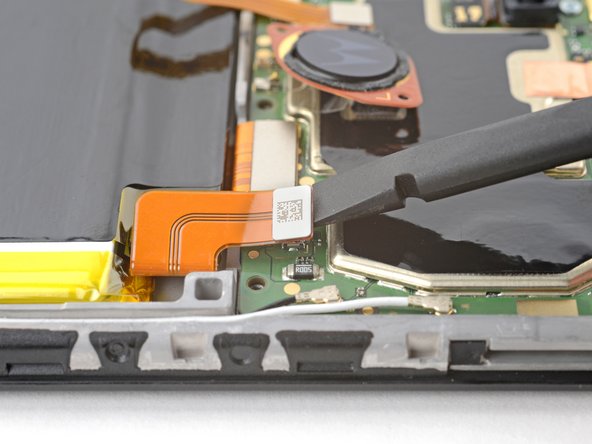
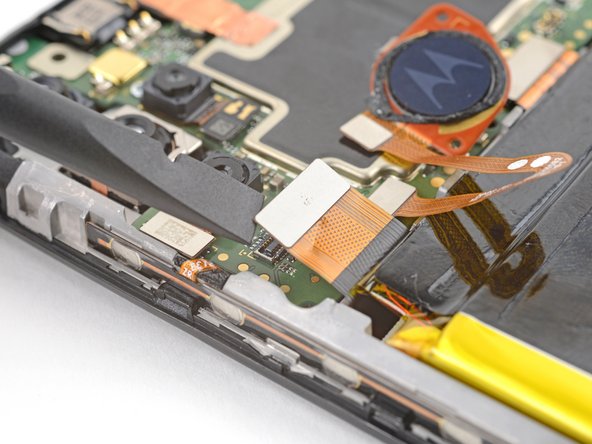
    1. Motherboard Removal, Disconnect the interconnect cable: step 22, image 1 of 2 Motherboard Removal, Disconnect the interconnect cable: step 22, image 2 of 2
      • Use the flat end of a spudger to pry up and disconnect the interconnect cable's press connector from the motherboard.

      Ask FixBot

      Add Comment

    2. Motherboard Removal, Disconnect the display cable: step 23, image 1 of 2 Motherboard Removal, Disconnect the display cable: step 23, image 2 of 2
      • Use the flat end of a spudger to lift up and disconnect the display cable's press connector.

      • Pry on the corner of the press connector closest to the left edge of the phone to avoid damaging the depth camera.

      Ask FixBot

      Add Comment

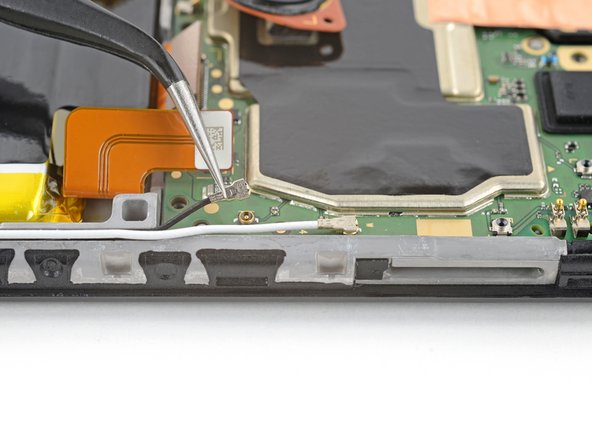
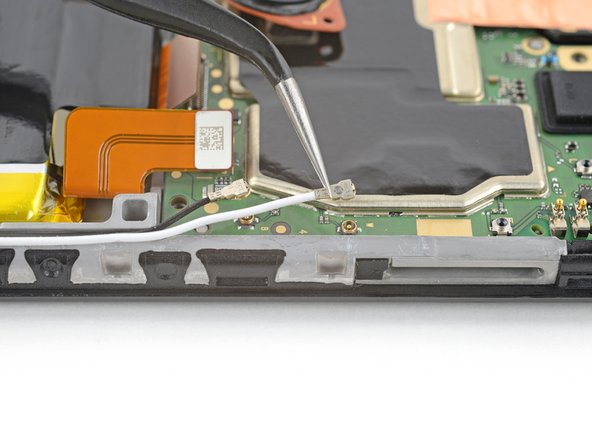
    3. Motherboard Removal, Disconnect the antenna cables: step 24, image 1 of 3 Motherboard Removal, Disconnect the antenna cables: step 24, image 2 of 3 Motherboard Removal, Disconnect the antenna cables: step 24, image 3 of 3
      Tool used on this step:
      Tweezers
      $3.99
      Buy
      • Use angled tweezers to grip the antenna's black coaxial connector, as close to the connector head as possible.

      • Gently lift straight up to disconnect the cable.

      • Be gentle when disconnecting the cable, as it's very easy to tear the socket from the motherboard.

      • Repeat the disconnection procedure on the white antenna cable.

      • To reattach coaxial connectors like these, align the connector over its socket and press down with the flat end of a spudger. The connector should snap into place. This can be tricky and may take a few tries.

      • During reassembly, make sure the antenna cables are in their groove on the edge of the phone.

      Ask FixBot

      Add Comment

    4. Motherboard Removal: step 25, image 1 of 2 Motherboard Removal: step 25, image 2 of 2
      • Use a Phillips screwdriver to remove the 3 mm screw securing the motherboard.

      Ask FixBot

      Add Comment

    5. Motherboard Removal, Pry up the motherboard: step 26, image 1 of 2 Motherboard Removal, Pry up the motherboard: step 26, image 2 of 2
      • Insert the pointed end of a spudger in the gap between the frame and the bottom right corner of the motherboard.

      • Gently lift the motherboard up until you are able to grab its edges with your fingers.

      • Don't pry against the battery, as this could damage it.

      Ask FixBot

      Add Comment

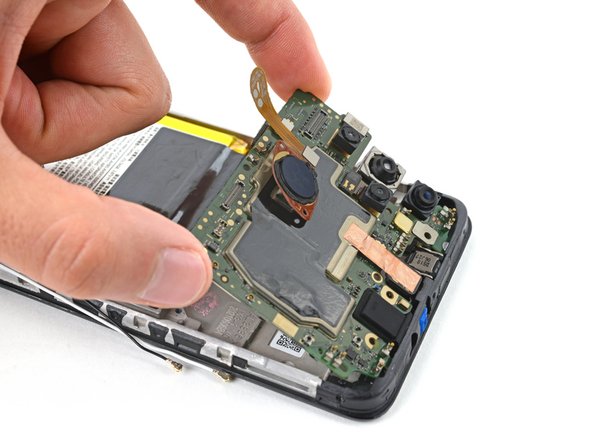
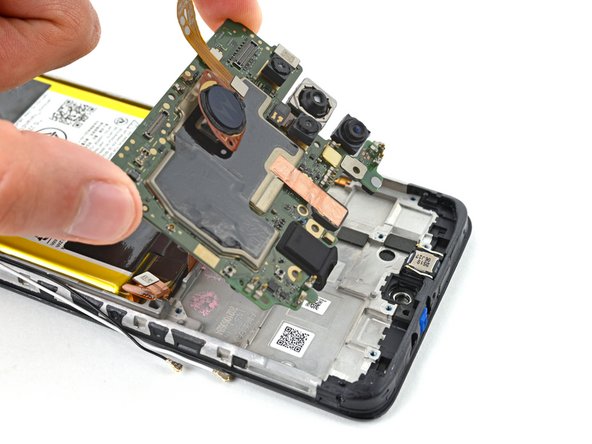
    6. Motherboard Removal, Remove the motherboard: step 27, image 1 of 3 Motherboard Removal, Remove the motherboard: step 27, image 2 of 3 Motherboard Removal, Remove the motherboard: step 27, image 3 of 3
      • Lift the bottom edge of the motherboard up and pull towards the bottom of the phone to remove it.

      • You may feel a bit of resistance. This is normal, since the midframe is slightly bonded to the heat sink with thermal paste.

      • During reassembly:

      • Move all cables that connect to the motherboard (battery, display, interconnect, and antennas) out of the way so they don't get stuck under the motherboard when it's reinserted.

      • Reinsert the motherboard at a downward angle to position the headphone jack and proximity sensor back into their recesses.

      Ask FixBot

      Add Comment

    7. Motherboard Removal, Reassembly information: step 28, image 1 of 2 Motherboard Removal, Reassembly information: step 28, image 2 of 2
      Tool used on this step:
      Microfiber Cleaning Cloths
      $3.99
      Buy
      Ask FixBot

      Add Comment

Conclusion

To reassemble your device, follow these instructions in reverse order.

Cancel: I did not complete this guide.

Spencer Day

Member since: 09/14/22

206,591 Reputation

1,266 Guides authored

Team

iFixit Member of iFixit

Staff

121 Members

72,885 Guides authored

0 Guide Comments

Add Comment

View Statistics:

Past 24 Hours: 1

Past 7 Days: 6

Past 30 Days: 19

All Time: 193