
Meta Quest 2 Front Cover Replacement

What you need

  1. Meta Quest 2 Front Cover Replacement, Power off your Meta Quest 2: step 1, image 1 of 1
    • Hold the power button for three seconds to fully turn off your headset.

    • You'll hear a power down chime, and the LED next to the power button will turn off.

  2. Meta Quest 2 Front Cover Replacement, Remove the facial interface: step 2, image 1 of 2 Meta Quest 2 Front Cover Replacement, Remove the facial interface: step 2, image 2 of 2
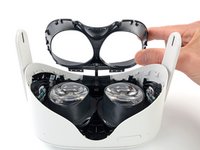
    • Grasp and pull on the nose section of the facial interface to unclip it from the headset.

  3. Meta Quest 2 Front Cover Replacement: step 3, image 1 of 2 Meta Quest 2 Front Cover Replacement: step 3, image 2 of 2
    • Grasp and pull on the top section of the facial interface to unclip it from the headset.

  4. Meta Quest 2 Front Cover Replacement: step 4, image 1 of 1
    • Remove the facial interface.

    • During reassembly, align the facial interface to the headset and use your fingers to press along the perimeter to clip it back in.

  5. Meta Quest 2 Front Cover Replacement, Unclip the side straps: step 5, image 1 of 3 Meta Quest 2 Front Cover Replacement, Unclip the side straps: step 5, image 2 of 3 Meta Quest 2 Front Cover Replacement, Unclip the side straps: step 5, image 3 of 3
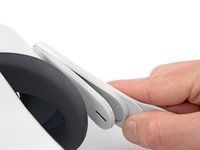
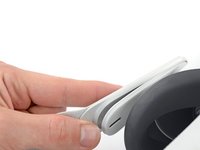
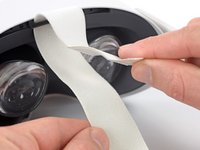
    • Use your fingers to grasp the right strap near the headset.

    • Peel the right strap away from the headset arm to unclip it.

  6. Meta Quest 2 Front Cover Replacement: step 6, image 1 of 2 Meta Quest 2 Front Cover Replacement: step 6, image 2 of 2
    • Repeat the procedure to peel the left strap away from the arm to unclip it.

  7. Meta Quest 2 Front Cover Replacement, Remove the top strap: step 7, image 1 of 2 Meta Quest 2 Front Cover Replacement, Remove the top strap: step 7, image 2 of 2
    • Separate the hook and loop strip on the top strap.

  8. Meta Quest 2 Front Cover Replacement, Remove the head strap: step 8, image 1 of 2 Meta Quest 2 Front Cover Replacement, Remove the head strap: step 8, image 2 of 2
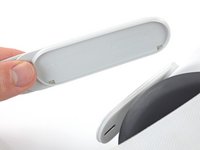
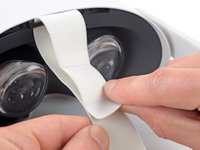
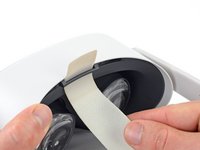
    • Unthread the top strap from its bracket.

    • Remove the head strap.

  9. Meta Quest 2 Front Cover Replacement, Remove the eyepiece trim screws: step 9, image 1 of 2 Meta Quest 2 Front Cover Replacement, Remove the eyepiece trim screws: step 9, image 2 of 2
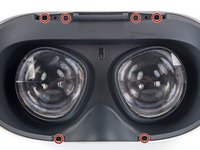
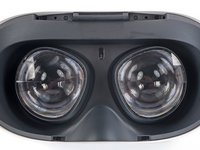
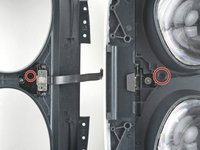
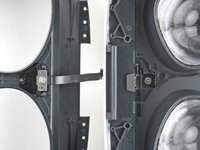
    • Use a Torx T2 driver to remove the six 3.5 mm‑long screws securing the eyepiece trim.

  10. Meta Quest 2 Front Cover Replacement, Release the eyepiece trim clips: step 10, image 1 of 2 Meta Quest 2 Front Cover Replacement, Release the eyepiece trim clips: step 10, image 2 of 2
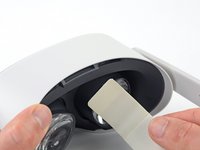
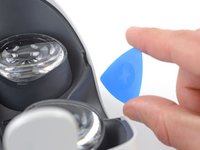
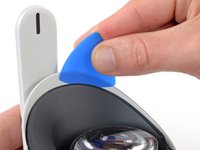
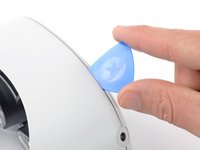
    • Insert an opening pick into the seam between the eyepiece trim and white outer shell, near the nose cutout.

  11. Meta Quest 2 Front Cover Replacement: step 11, image 1 of 3 Meta Quest 2 Front Cover Replacement: step 11, image 2 of 3 Meta Quest 2 Front Cover Replacement: step 11, image 3 of 3
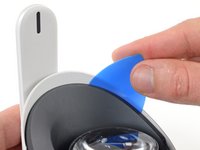
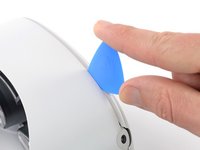
    • Slide the opening pick to the right along the seam to release the clips securing the eyepiece trim.

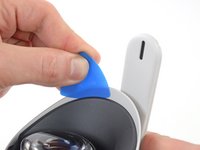
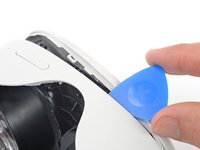
    • Pry with the opening pick to release the clips securing the right side of the eyepiece trim.

    • Leave the opening pick in the seam to prevent the clips from reengaging.

  12. Meta Quest 2 Front Cover Replacement: step 12, image 1 of 3 Meta Quest 2 Front Cover Replacement: step 12, image 2 of 3 Meta Quest 2 Front Cover Replacement: step 12, image 3 of 3
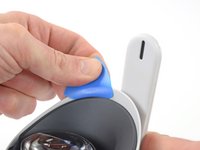
    • Repeat the prying procedure along the left edge to release the clips securing the eyepiece trim.

    • During reassembly, press your fingers along the perimeter of the eyepiece trim to clip it back in place.

  13. Meta Quest 2 Front Cover Replacement, Reposition the eyepiece trim: step 13, image 1 of 3 Meta Quest 2 Front Cover Replacement, Reposition the eyepiece trim: step 13, image 2 of 3 Meta Quest 2 Front Cover Replacement, Reposition the eyepiece trim: step 13, image 3 of 3
    • Don’t try to fully remove the eyepiece trim in this step. It’s still connected to the headset by a short cable.

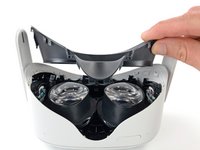
    • Lift the eyepiece trim slightly and tilt it towards the top edge of the headset.

    • Set the trim down on your work surface, making sure not to strain the cable.

  14. Meta Quest 2 Front Cover Replacement, Disconnect the face sensor: step 14, image 1 of 3 Meta Quest 2 Front Cover Replacement, Disconnect the face sensor: step 14, image 2 of 3 Meta Quest 2 Front Cover Replacement, Disconnect the face sensor: step 14, image 3 of 3
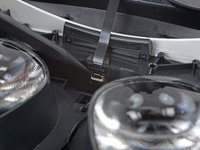
    • Use the point of a spudger to flip open the black lock tab on the ZIF connector securing the face sensor cable.

  15. Meta Quest 2 Front Cover Replacement: step 15, image 1 of 2 Meta Quest 2 Front Cover Replacement: step 15, image 2 of 2
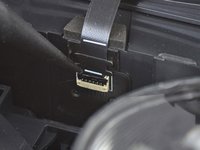
    • Use tweezers to pull the face sensor cable out of the ZIF connector.

  16. Meta Quest 2 Front Cover Replacement, Remove the eyepiece trim: step 16, image 1 of 1
    • Remove the eyepiece trim.

  17. Meta Quest 2 Front Cover Replacement, Reassembly note: step 17, image 1 of 2 Meta Quest 2 Front Cover Replacement, Reassembly note: step 17, image 2 of 2
    • During reassembly:

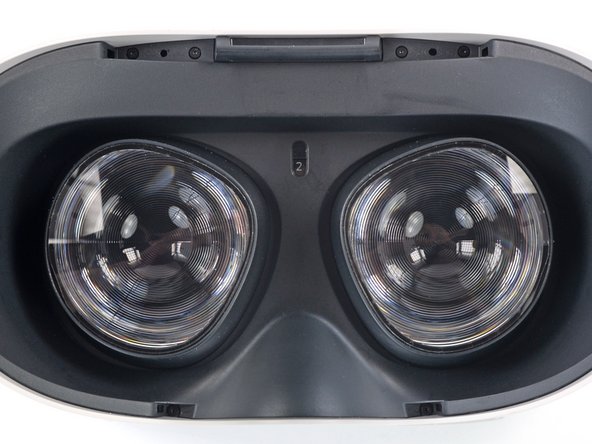
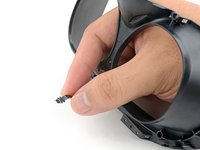
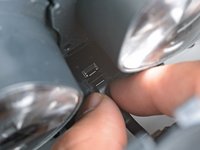
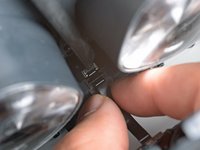
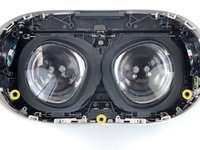
    • Make sure the lens spacing matches the spacing indicator. This allows the indicator peg to sit correctly in its notch.

    • If the lens spacing doesn't match the indicator, manually adjust the lens with your fingers.

  18. Meta Quest 2 Front Cover Replacement, Reassembly note: step 18, image 1 of 3 Meta Quest 2 Front Cover Replacement, Reassembly note: step 18, image 2 of 3 Meta Quest 2 Front Cover Replacement, Reassembly note: step 18, image 3 of 3
    • During reassembly, the face sensor cable can be tricky to connect. Follow these tips to connect the cable:

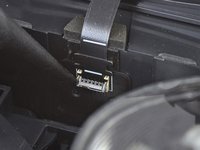
    • Thread your fingers through the eyepiece trim’s eyeholes and grasp the edges of the sensor cable.

    • Slide the sensor cable into the socket until the first set of tabs rests in the socket. This should flip the lock tab down partially.

    • Use a spudger to press the lock tab down towards the cable to lock it in place.

  19. Meta Quest 2 Front Cover Replacement, Remove the front cover screws: step 19, image 1 of 3 Meta Quest 2 Front Cover Replacement, Remove the front cover screws: step 19, image 2 of 3 Meta Quest 2 Front Cover Replacement, Remove the front cover screws: step 19, image 3 of 3
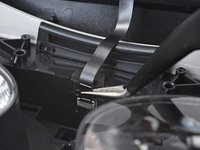
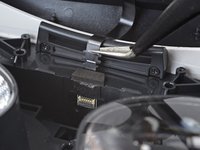
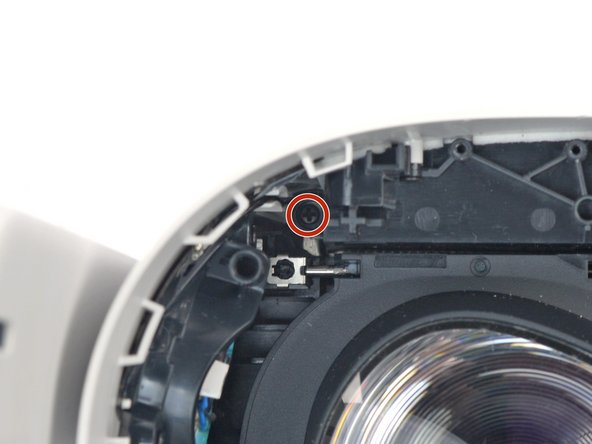
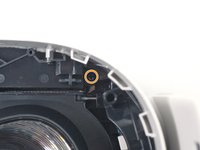
    • Use a Phillips screwdriver to remove the five 7.7 mm‑long screws securing the front cover to the headset:

    • One recessed in the top-left corner

    • One recessed in the top-right corner

    • Three along the lower edge

  20. Meta Quest 2 Front Cover Replacement, Release the front cover clips: step 20, image 1 of 2 Meta Quest 2 Front Cover Replacement, Release the front cover clips: step 20, image 2 of 2
    • The front cover is still held in place by clips along the bottom and side edges.

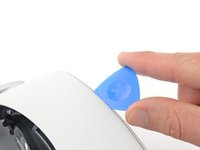
    • Insert an opening pick into the seam between the bottom edge of the front cover and the headset.

    • Pry with the opening pick to release the front cover clips.

  21. Meta Quest 2 Front Cover Replacement: step 21, image 1 of 3 Meta Quest 2 Front Cover Replacement: step 21, image 2 of 3 Meta Quest 2 Front Cover Replacement: step 21, image 3 of 3
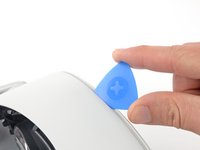
    • Slide the opening clip along the seam and pry to release all the clips securing the front cover.

  22. Meta Quest 2 Front Cover Replacement, Remove the front cover: step 22, image 1 of 1
    • Remove the front cover.

Conclusion

To reassemble your device, follow these instructions in reverse order.

Take your e-waste to an R2 or e-Stewards certified recycler.

Repair didn’t go as planned? Try some basic troubleshooting, or ask our Answers community for help.

Arthur Shi

Member since: 01/03/18

253,515 Reputation

526 Guides authored

Team

iFixit Member of iFixit

Staff

135 Members

17,204 Guides authored

0 Comments

Add Comment

View Statistics:

Past 24 Hours: 1

Past 7 Days: 12

Past 30 Days: 74

All Time: 331