
MacBook Pro 16" 2023 Screen Replacement

What you need

  1. MacBook Pro 16" 2023 Screen Replacement, Prepare your MacBook for disassembly: step 1, image 1 of 3 MacBook Pro 16" 2023 Screen Replacement, Prepare your MacBook for disassembly: step 1, image 2 of 3 MacBook Pro 16" 2023 Screen Replacement, Prepare your MacBook for disassembly: step 1, image 3 of 3
    • Allow your MacBook's battery to drain below 10% before starting this repair. A charged battery may catch fire if damaged during the repair.

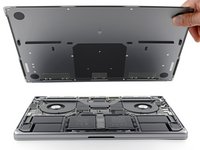
    • Fully shut down your MacBook, close the lid, and flip it over. Keep the lid closed until you've physically disconnected the battery.

    • Unplug the MagSafe cable and any accessories connected to your MacBook.

  2. MacBook Pro 16" 2023 Screen Replacement, Unfasten the lower case: step 2, image 1 of 1
    Tool used on this step:
    FixMat
    $36.95
    Buy
    • Use a P5 pentalobe driver to remove the eight screws securing the lower case:

    • Four 9.1 mm‑long screws

    • Four 6 mm‑long screws

    • Throughout this repair, keep track of each screw and make sure it goes back exactly where it came from.

  3. MacBook Pro 16" 2023 Screen Replacement, Insert an opening pick: step 3, image 1 of 3 MacBook Pro 16" 2023 Screen Replacement, Insert an opening pick: step 3, image 2 of 3 MacBook Pro 16" 2023 Screen Replacement, Insert an opening pick: step 3, image 3 of 3
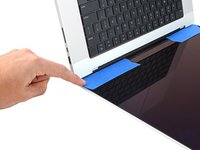
    • Apply a suction handle to the center of the lower case's front edge.

    • Pull up on the suction handle to create a gap between the lower case and the frame.

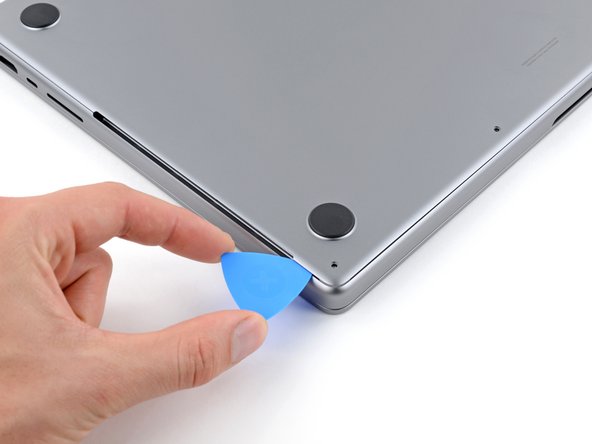
    • Insert an opening pick into the gap.

  4. MacBook Pro 16" 2023 Screen Replacement, Release the right clips: step 4, image 1 of 3 MacBook Pro 16" 2023 Screen Replacement, Release the right clips: step 4, image 2 of 3 MacBook Pro 16" 2023 Screen Replacement, Release the right clips: step 4, image 3 of 3
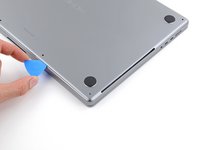
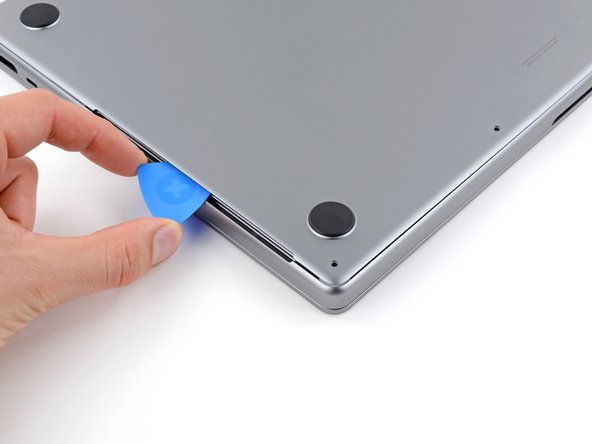
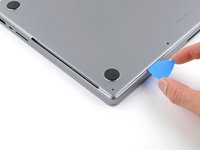
    • Slide your opening pick around the bottom right corner and up the right edge of the lower case.

    • If your pick gets stuck at the cutout, use your fingers to lift the lower case up slightly to allow your pick to slide underneath.

    • Slide your pick until it reaches the middle of the cutout, or until the rightmost clip stops it from sliding.

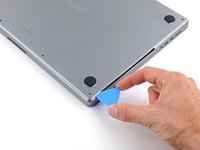
    • Twist your pick to release the two right clips.

    • You'll hear and feel a pop when each of the two clips releases.

  5. MacBook Pro 16" 2023 Screen Replacement, Release the left clips: step 5, image 1 of 3 MacBook Pro 16" 2023 Screen Replacement, Release the left clips: step 5, image 2 of 3 MacBook Pro 16" 2023 Screen Replacement, Release the left clips: step 5, image 3 of 3
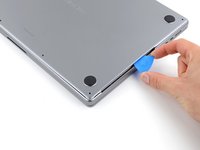
    • Slide your opening pick around the bottom left corner and up the left edge of the lower case.

    • If your pick gets stuck at the cutout, pry the lower case up slightly to allow your pick to slide underneath.

    • Slide your pick until it reaches the middle of the cutout, or until the leftmost clip stops it from sliding.

    • Twist your pick to release the left two clips.

    • You'll hear and feel a pop when each of the two clips releases.

  6. MacBook Pro 16" 2023 Screen Replacement, Release the sliding clips: step 6, image 1 of 3 MacBook Pro 16" 2023 Screen Replacement, Release the sliding clips: step 6, image 2 of 3 MacBook Pro 16" 2023 Screen Replacement, Release the sliding clips: step 6, image 3 of 3
    • Sliding clips along the back edge of the MacBook further secure the lower case. Separating these clips may require a lot of force—consider using gloves to protect your hands from the sharp edges of the lower case.

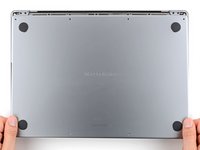
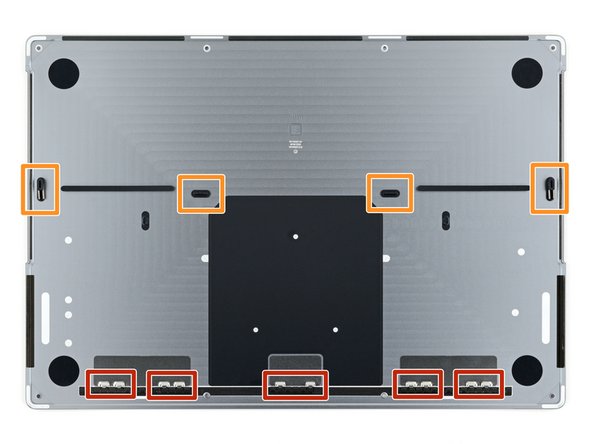
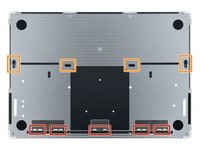
    • Firmly pull the lower case away from the back edge, one corner at a time, to disengage the sliding clips.

    • Keep the lower case flat to the MacBook. Don't pull upward until it's completely separated.

  7. MacBook Pro 16" 2023 Screen Replacement, Remove the lower case: step 7, image 1 of 2 MacBook Pro 16" 2023 Screen Replacement, Remove the lower case: step 7, image 2 of 2
    • Remove the lower case.

    • To reinstall the lower case:

    • Lay it down and align the sliding clips with the back edge of the MacBook. Press down on the lower case and slide it toward the back edge to engage the clips.

    • When one side is engaged, it may push the other out of alignment. Check both sides as you push.

    • Once the back corners of the lower case are secured and flush with the frame, press down along the middle of the lower case to engage the four remaining clips.
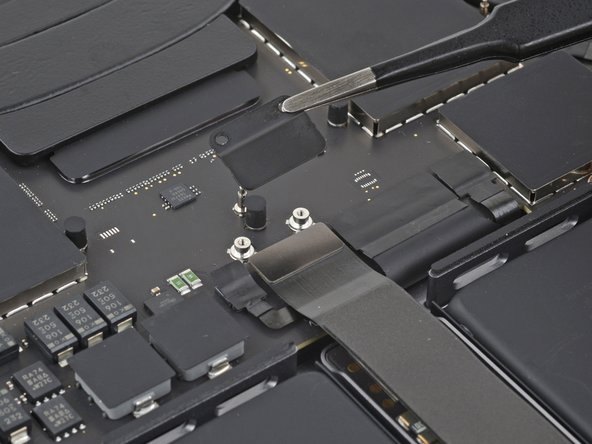
    • You'll hear and feel each clip snap into place.

  8. MacBook Pro 16" 2023 Screen Replacement, Remove the trackpad cable bracket: step 8, image 1 of 3 MacBook Pro 16" 2023 Screen Replacement, Remove the trackpad cable bracket: step 8, image 2 of 3 MacBook Pro 16" 2023 Screen Replacement, Remove the trackpad cable bracket: step 8, image 3 of 3
    • Use a T3 Torx driver to remove the two 2.1 mm screws securing the trackpad cable bracket.

    • Remove the bracket.

  9. MacBook Pro 16" 2023 Screen Replacement, Disconnect the trackpad: step 9, image 1 of 2 MacBook Pro 16" 2023 Screen Replacement, Disconnect the trackpad: step 9, image 2 of 2
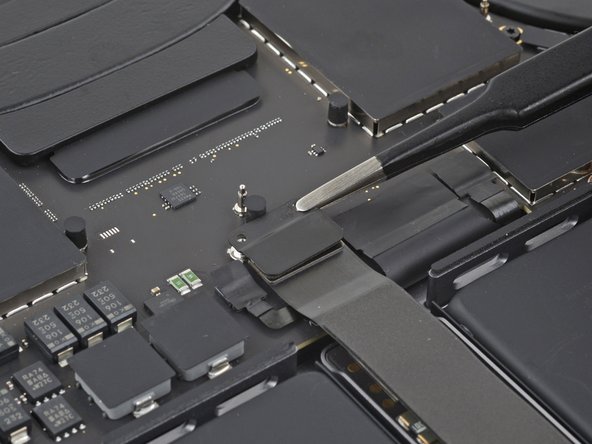
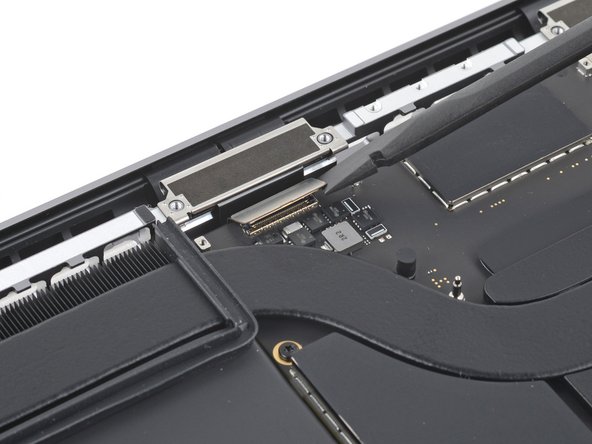
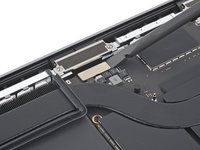
    • Use the flat end of your spudger to pry up and disconnect the trackpad cable press connector from the logic board.

    • To re-attach press connectors like this one, carefully align and press down on one side until it clicks into place, then repeat on the other side. Don't press down in the middle. If the connector is misaligned, the pins can bend and cause permanent damage.

  10. MacBook Pro 16" 2023 Screen Replacement, Move the trackpad cable: step 10, image 1 of 3 MacBook Pro 16" 2023 Screen Replacement, Move the trackpad cable: step 10, image 2 of 3 MacBook Pro 16" 2023 Screen Replacement, Move the trackpad cable: step 10, image 3 of 3
    • The trackpad cable is lightly adhered to the battery board.

    • Peel the trackpad cable from the battery board.

    • Move the cable over the front edge of the MacBook.

    • Be careful not to crease the cable.

  11. MacBook Pro 16" 2023 Screen Replacement, Uncover the battery data cable connector: step 11, image 1 of 2 MacBook Pro 16" 2023 Screen Replacement, Uncover the battery data cable connector: step 11, image 2 of 2
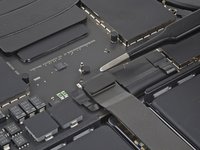
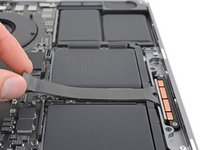
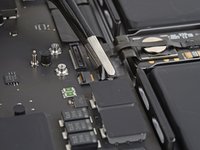
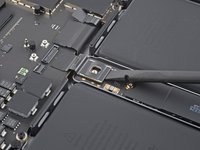
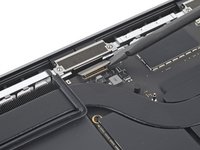
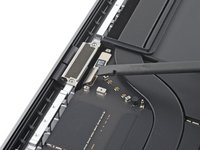
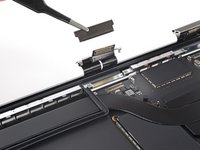
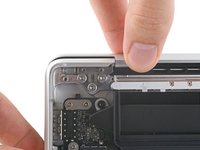
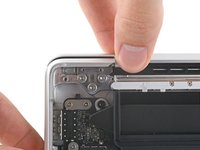
    • Peel back the tape covering the battery data cable connector on the logic board.

  12. MacBook Pro 16" 2023 Screen Replacement, Unlatch the connector: step 12, image 1 of 2 MacBook Pro 16" 2023 Screen Replacement, Unlatch the connector: step 12, image 2 of 2
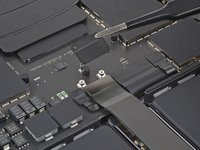
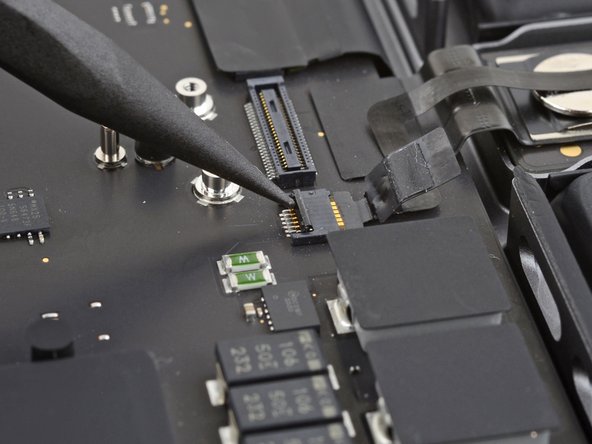
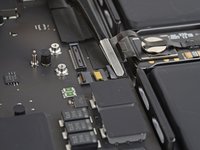
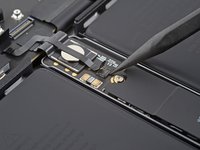
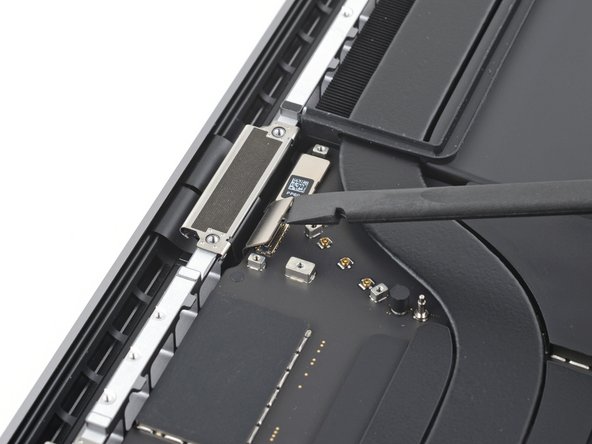
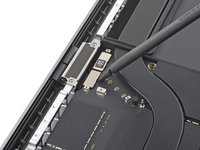
    • Use the point of a spudger or a clean fingernail to flip up the small locking flap on the battery data cable ZIF connector.

  13. MacBook Pro 16" 2023 Screen Replacement, Disconnect the battery data cable: step 13, image 1 of 3 MacBook Pro 16" 2023 Screen Replacement, Disconnect the battery data cable: step 13, image 2 of 3 MacBook Pro 16" 2023 Screen Replacement, Disconnect the battery data cable: step 13, image 3 of 3
    Tool used on this step:
    Tweezers
    $4.99
    Buy
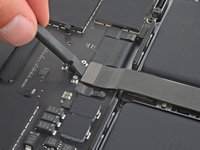
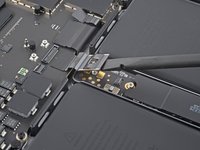
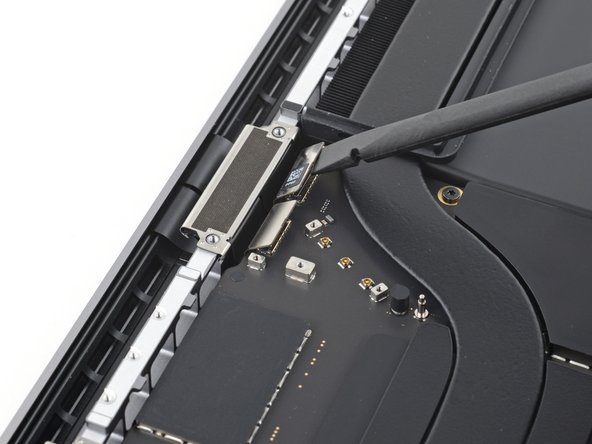
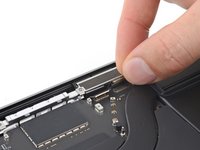
    • Slide one arm of your blunt nose tweezers under the battery data cable.

    • Grip the cable just below the head of the connector.

    • Slide the connector straight out of its socket.

  14. MacBook Pro 16" 2023 Screen Replacement, Uncover the connector: step 14, image 1 of 2 MacBook Pro 16" 2023 Screen Replacement, Uncover the connector: step 14, image 2 of 2
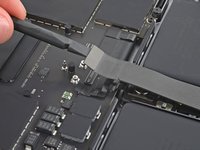
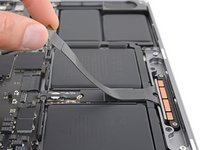
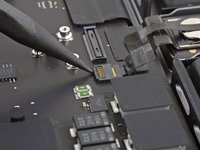
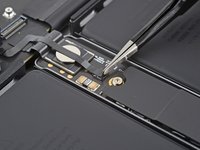
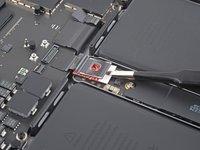
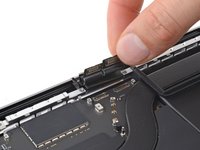
    • Peel back the tape covering the battery data cable connector on the battery board.

  15. MacBook Pro 16" 2023 Screen Replacement, Disconnect the battery data cable: step 15, image 1 of 3 MacBook Pro 16" 2023 Screen Replacement, Disconnect the battery data cable: step 15, image 2 of 3 MacBook Pro 16" 2023 Screen Replacement, Disconnect the battery data cable: step 15, image 3 of 3
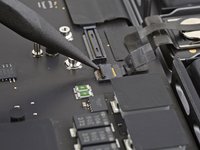
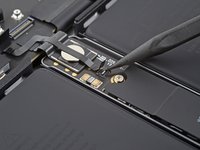
    • Use the point of your spudger or a clean fingernail to flip up the small locking flap on the battery data cable ZIF connector.

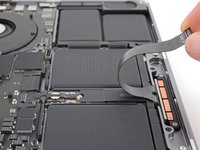
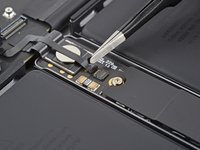
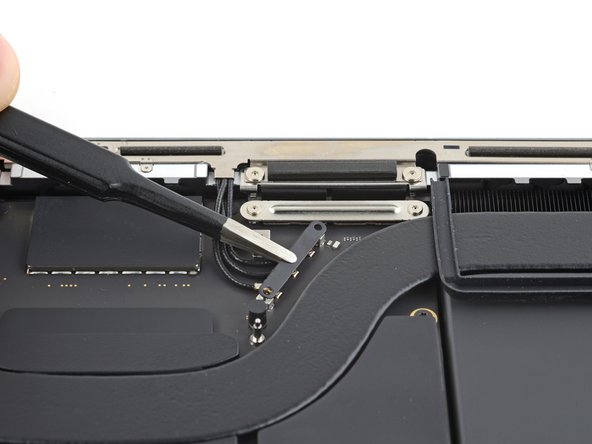
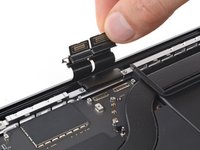
    • Use blunt nose tweezers to grab the battery data cable just under the head of the connector and slide it straight out of its socket.

  16. MacBook Pro 16" 2023 Screen Replacement, Remove the battery data cable: step 16, image 1 of 3 MacBook Pro 16" 2023 Screen Replacement, Remove the battery data cable: step 16, image 2 of 3 MacBook Pro 16" 2023 Screen Replacement, Remove the battery data cable: step 16, image 3 of 3
    • The battery data cable is adhered to the battery board and logic board.

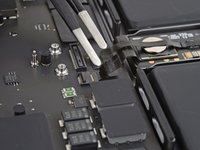
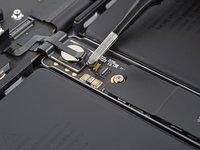
    • Peel the cable from the battery board and the logic board.

    • Remove the cable.

  17. MacBook Pro 16" 2023 Screen Replacement, Unfasten the battery connector: step 17, image 1 of 1
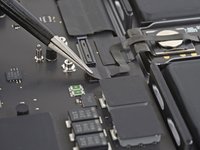
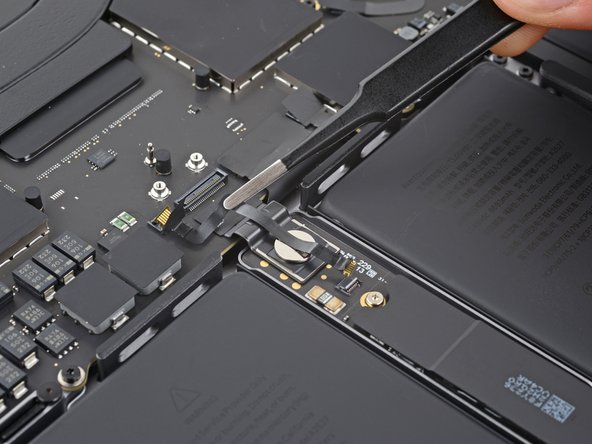
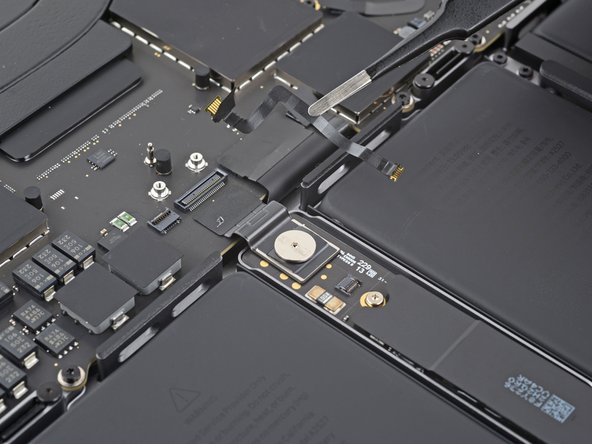
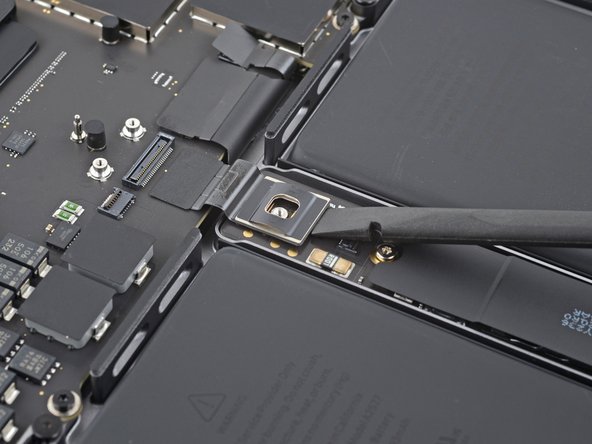
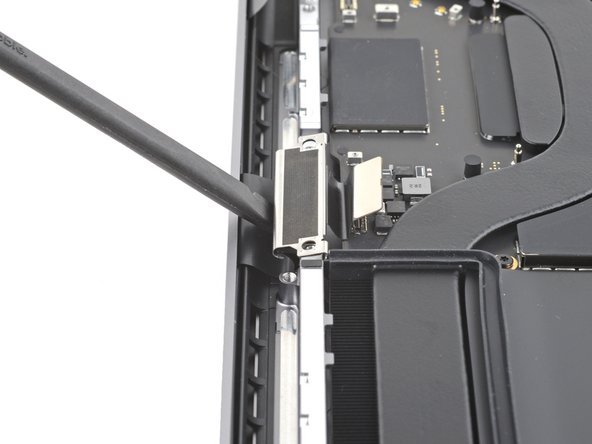
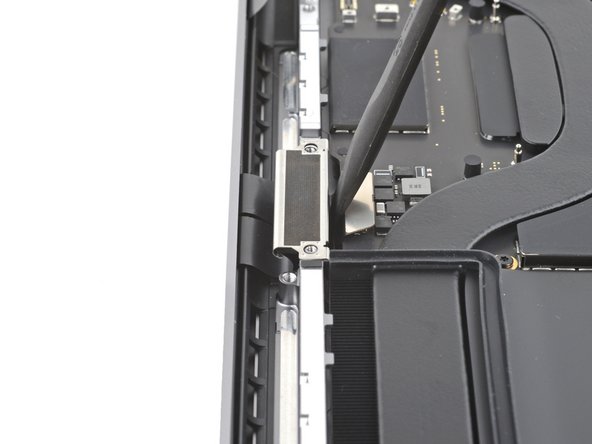
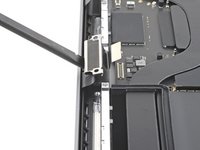
    • Use a T5 Torx driver to remove the 3.9 mm pancake screw securing the battery connector.

  18. MacBook Pro 16" 2023 Screen Replacement, Disconnect the battery: step 18, image 1 of 3 MacBook Pro 16" 2023 Screen Replacement, Disconnect the battery: step 18, image 2 of 3 MacBook Pro 16" 2023 Screen Replacement, Disconnect the battery: step 18, image 3 of 3
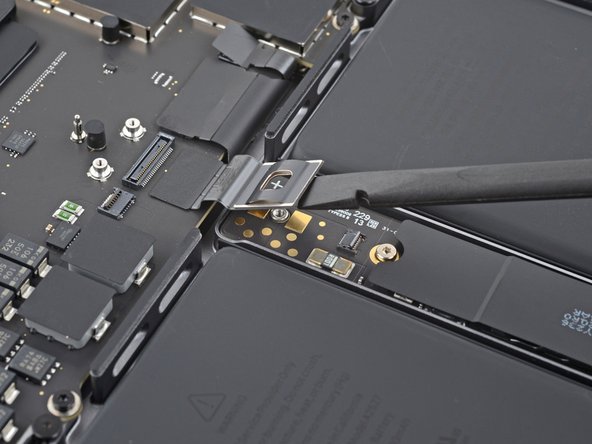
    • Use the flat end of your spudger to lift the battery connector away from the battery board, disconnecting the battery.
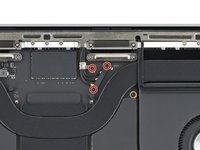
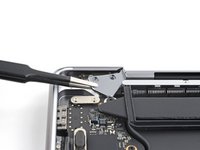
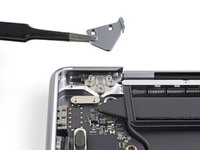
    • Lift the connector high enough that it doesn't accidentally make contact during the repair, but no more than 45 degrees to prevent damaging its hinge.

    • For added safety, place a barrier, such as a piece of a playing card, between the connector and board.

  19. MacBook Pro 16" 2023 Screen Replacement, Unfasten the antenna cables: step 19, image 1 of 3 MacBook Pro 16" 2023 Screen Replacement, Unfasten the antenna cables: step 19, image 2 of 3 MacBook Pro 16" 2023 Screen Replacement, Unfasten the antenna cables: step 19, image 3 of 3
    • Use your T3 Torx driver to remove the three 2.1 mm screws securing the antenna cable cover and bracket.

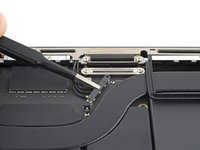
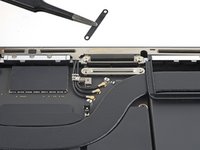
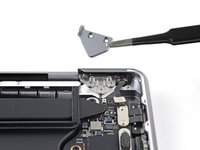
    • Remove the antenna cable cover.

  20. MacBook Pro 16" 2023 Screen Replacement, Disconnect the antenna bar: step 20, image 1 of 3 MacBook Pro 16" 2023 Screen Replacement, Disconnect the antenna bar: step 20, image 2 of 3 MacBook Pro 16" 2023 Screen Replacement, Disconnect the antenna bar: step 20, image 3 of 3
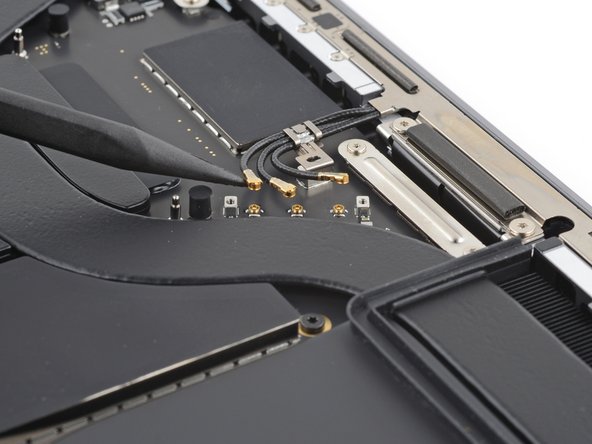
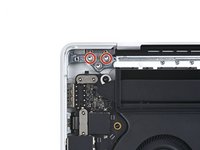
    • Use the point of your spudger to pry up and disconnect the three antenna cables from the logic board.

    • Pry only on the metal heads of the connectors. Avoid prying on the cables themselves.

    • To reconnect antenna cables like these, hold each one in place over its socket and press down with the flat end of your spudger. The connector will snap into place.

  21. MacBook Pro 16" 2023 Screen Replacement, Unfasten the antenna bar: step 21, image 1 of 2 MacBook Pro 16" 2023 Screen Replacement, Unfasten the antenna bar: step 21, image 2 of 2
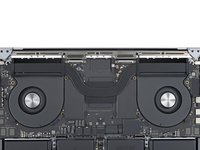
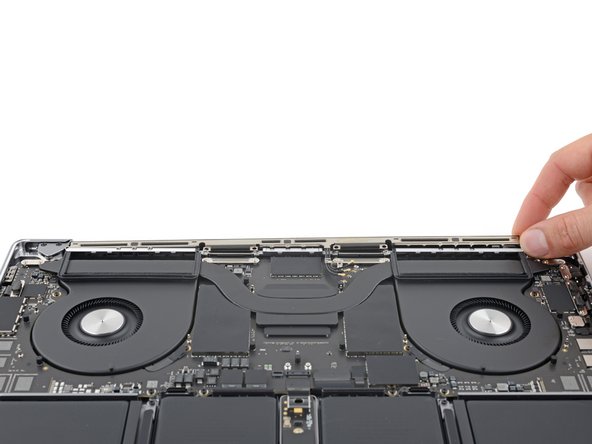
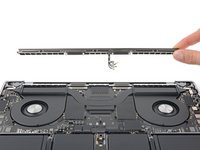
    • Use a P2 pentalobe driver to remove the nine 1.5 mm screws securing the antenna bar.

    • Due to their small size, these screws strip very easily. Make sure your driver is in good condition. Keep it vertical and apply constant downward pressure as you loosen the screws.

    • During reassembly, don't overtighten these screws—ensure that they're threading in properly, then tighten only until they're snug.

    • Use your T5 Torx driver to remove the six remaining screws securing the antenna bar:

    • Four 3 mm screws

    • Two 7.5 mm screws

  22. MacBook Pro 16" 2023 Screen Replacement, Remove the antenna bar: step 22, image 1 of 2 MacBook Pro 16" 2023 Screen Replacement, Remove the antenna bar: step 22, image 2 of 2
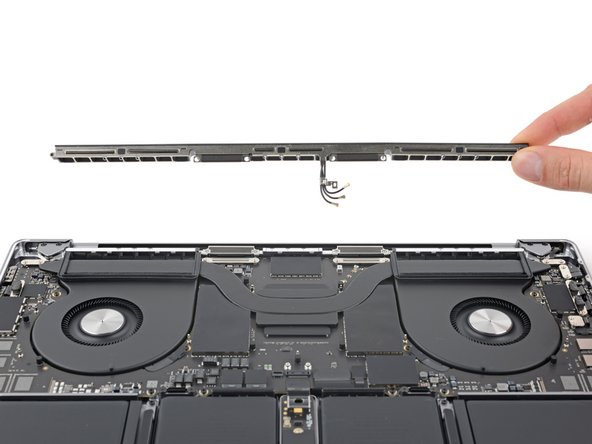
    • Pull the antenna bar straight up and out of the frame to remove it.
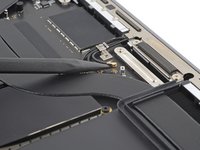
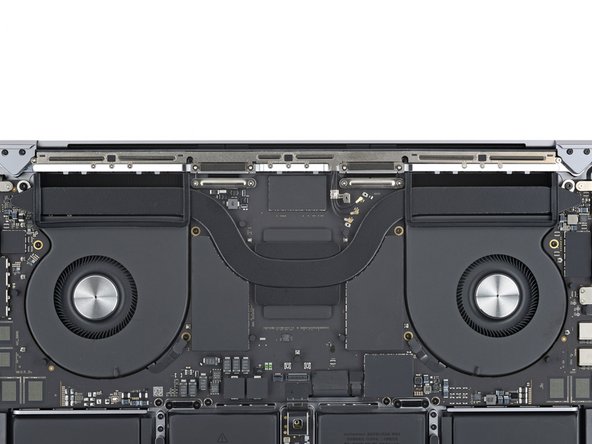
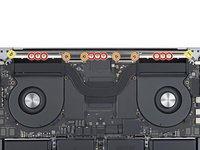
    • If it feels stuck, use the point of a spudger to pry it up from the frame.

  23. MacBook Pro 16" 2023 Screen Replacement, Unfasten the display cable covers: step 23, image 1 of 1
    • Use your T3 Torx driver to remove the four 2.1 mm screws securing the display cable covers.

  24. MacBook Pro 16" 2023 Screen Replacement, Remove the display cable covers: step 24, image 1 of 3 MacBook Pro 16" 2023 Screen Replacement, Remove the display cable covers: step 24, image 2 of 3 MacBook Pro 16" 2023 Screen Replacement, Remove the display cable covers: step 24, image 3 of 3
    • Remove both display cable covers.

  25. MacBook Pro 16" 2023 Screen Replacement, Disconnect the display: step 25, image 1 of 2 MacBook Pro 16" 2023 Screen Replacement, Disconnect the display: step 25, image 2 of 2
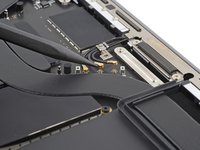
    • Use the flat end of your spudger to pry up and disconnect the left display press connector from the logic board.

  26. MacBook Pro 16" 2023 Screen Replacement: step 26, image 1 of 3 MacBook Pro 16" 2023 Screen Replacement: step 26, image 2 of 3 MacBook Pro 16" 2023 Screen Replacement: step 26, image 3 of 3
    • Disconnect the right two display press connectors from the logic board.

  27. MacBook Pro 16" 2023 Screen Replacement, Free the display cables: step 27, image 1 of 3 MacBook Pro 16" 2023 Screen Replacement, Free the display cables: step 27, image 2 of 3 MacBook Pro 16" 2023 Screen Replacement, Free the display cables: step 27, image 3 of 3
    • The display cables are tucked into recesses in the frame.

    • Grab the display cables and lift them out of their recesses.

  28. MacBook Pro 16" 2023 Screen Replacement, Remove the cable buffers: step 28, image 1 of 3 MacBook Pro 16" 2023 Screen Replacement, Remove the cable buffers: step 28, image 2 of 3 MacBook Pro 16" 2023 Screen Replacement, Remove the cable buffers: step 28, image 3 of 3
    Tool used on this step:
    Tweezers
    $4.99
    Buy
    • Use tweezers or your fingers to remove the right display cable buffer from the frame.

    • If this buffer came out with the display cable bracket, remove it from the bracket.

  29. MacBook Pro 16" 2023 Screen Replacement: step 29, image 1 of 3 MacBook Pro 16" 2023 Screen Replacement: step 29, image 2 of 3 MacBook Pro 16" 2023 Screen Replacement: step 29, image 3 of 3
    • Grab and lift the left display cables out of their recesses.

    • Remove the left display cable buffer.

  30. MacBook Pro 16" 2023 Screen Replacement, Reassembly information: step 30, image 1 of 3 MacBook Pro 16" 2023 Screen Replacement, Reassembly information: step 30, image 2 of 3 MacBook Pro 16" 2023 Screen Replacement, Reassembly information: step 30, image 3 of 3
    • During reassembly, follow these instructions to secure the display cables:

    • Insert the black plastic cable buffers into the frame with their longer ends facing away from the MacBook.

    • Use the flat end of your spudger to tuck the cables under their buffer on the side closest to the screen.

    • Tuck the cables into the slot in the frame near the head of the connectors.

    • Press down on the cable brackets to secure them to the frame.
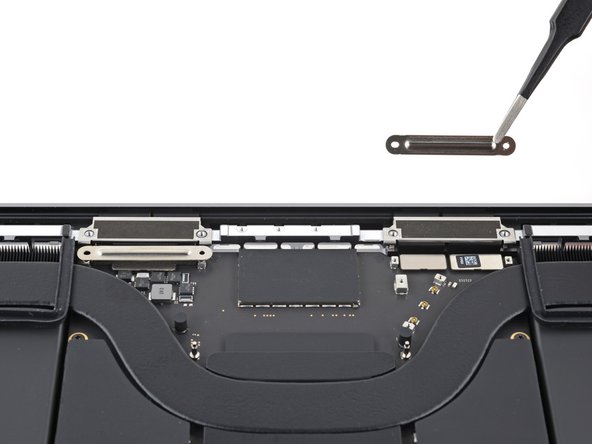
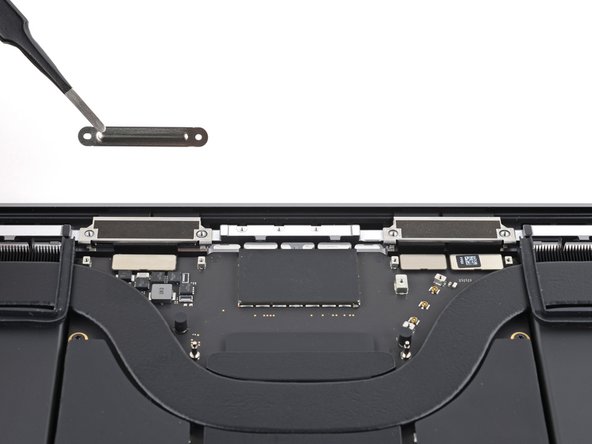
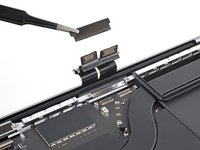
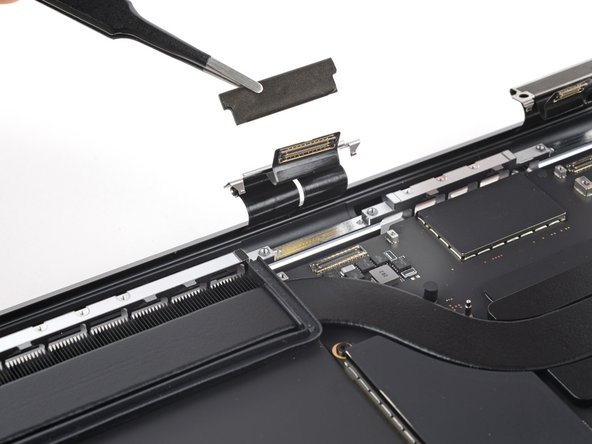
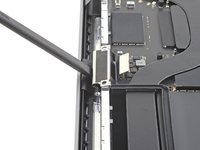
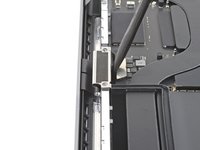
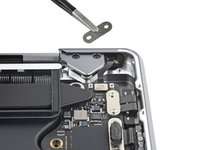
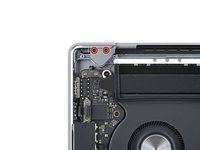
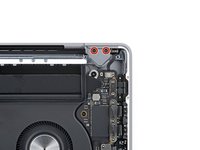
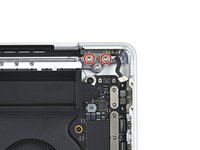
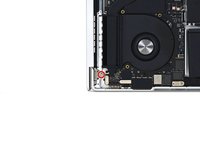
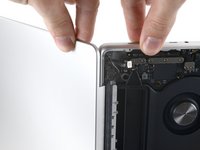
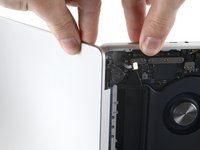
  31. MacBook Pro 16" 2023 Screen Replacement, Remove the lid angle sensor cover: step 31, image 1 of 2 MacBook Pro 16" 2023 Screen Replacement, Remove the lid angle sensor cover: step 31, image 2 of 2
    • Use your T3 Torx driver to remove the two 2.1 mm screws securing the lid angle sensor cover near the right screen hinge.
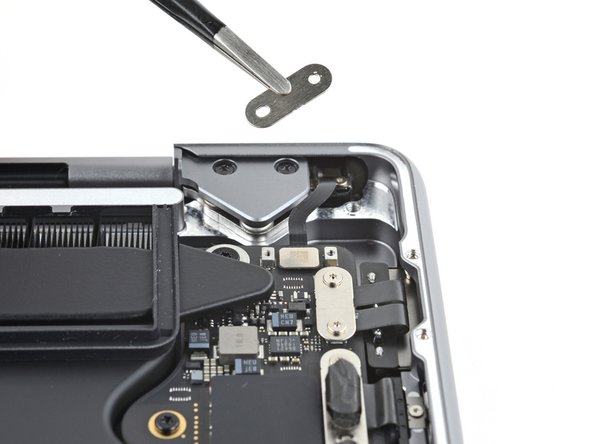
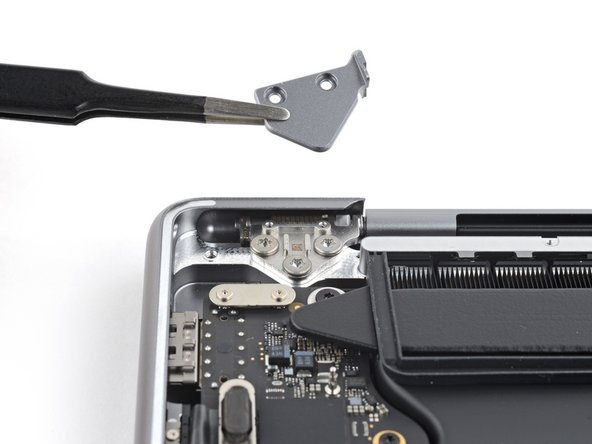
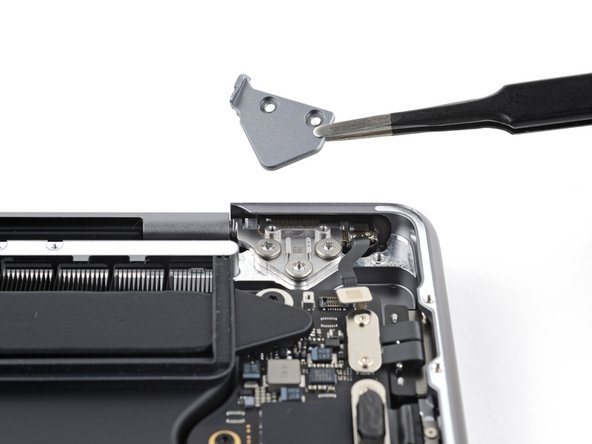
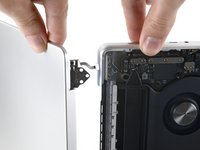
    • Remove the cover.

  32. MacBook Pro 16" 2023 Screen Replacement, Disconnect the lid angle sensor: step 32, image 1 of 2 MacBook Pro 16" 2023 Screen Replacement, Disconnect the lid angle sensor: step 32, image 2 of 2
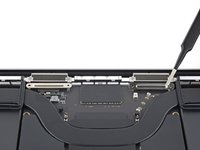
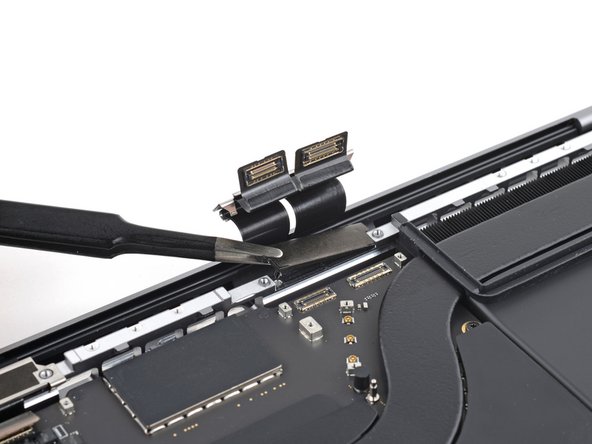
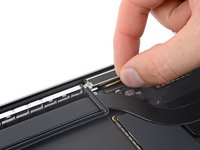
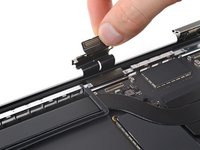
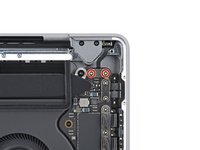
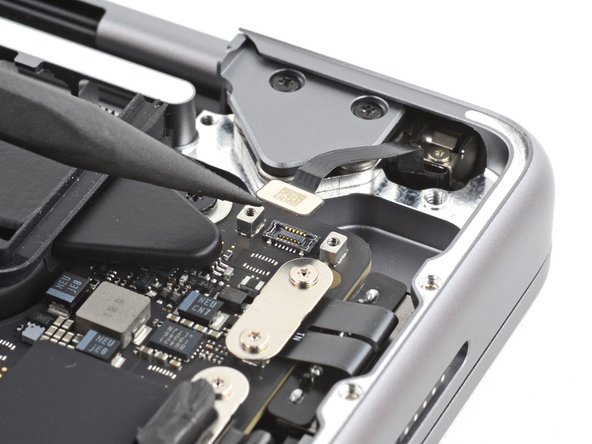
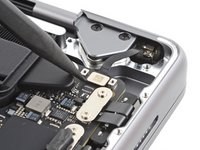
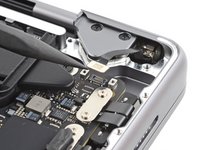
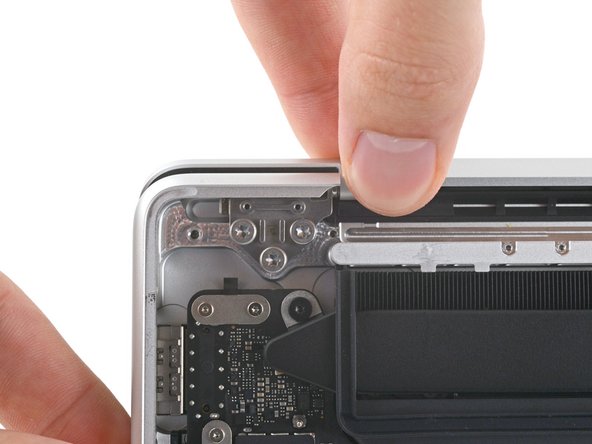
    • Use the point of your spudger or a clean fingernail to pry up and disconnect the lid angle sensor press connector.

  33. MacBook Pro 16" 2023 Screen Replacement, Unfasten the hinge covers: step 33, image 1 of 2 MacBook Pro 16" 2023 Screen Replacement, Unfasten the hinge covers: step 33, image 2 of 2
    • Use your T5 Torx driver to remove the two 2.5 mm screws securing each hinge cover (four screws total).

  34. MacBook Pro 16" 2023 Screen Replacement, Remove the hinge covers: step 34, image 1 of 3 MacBook Pro 16" 2023 Screen Replacement, Remove the hinge covers: step 34, image 2 of 3 MacBook Pro 16" 2023 Screen Replacement, Remove the hinge covers: step 34, image 3 of 3
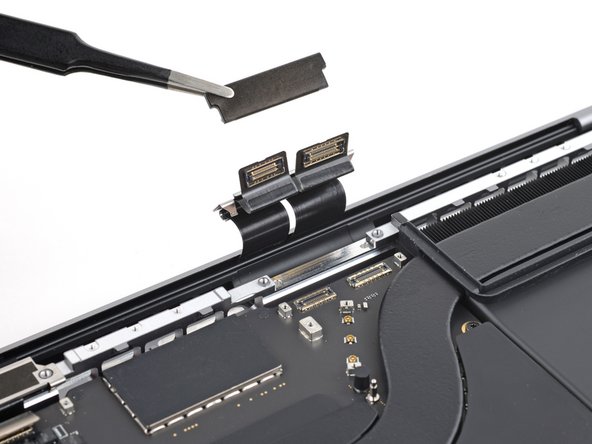
    • Grab and rotate the outer edge of the hinge covers toward the logic board to free them from the lip of the frame.

    • Remove both hinge covers.
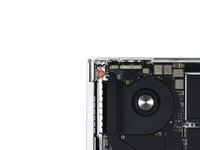
  35. MacBook Pro 16" 2023 Screen Replacement, Loosen the hinges: step 35, image 1 of 2 MacBook Pro 16" 2023 Screen Replacement, Loosen the hinges: step 35, image 2 of 2
    • Use a T8 Torx driver to remove the two upper 6.4 mm screws from each hinge (four screws total).

    • Each hinge has a third screw. Leave it in place for now.

  36. MacBook Pro 16" 2023 Screen Replacement, Prepare your MacBook: step 36, image 1 of 2 MacBook Pro 16" 2023 Screen Replacement, Prepare your MacBook: step 36, image 2 of 2
    • If you plan on reusing your screen, apply tape to the bottom corners of the screen to protect it from getting scratched in the next step.

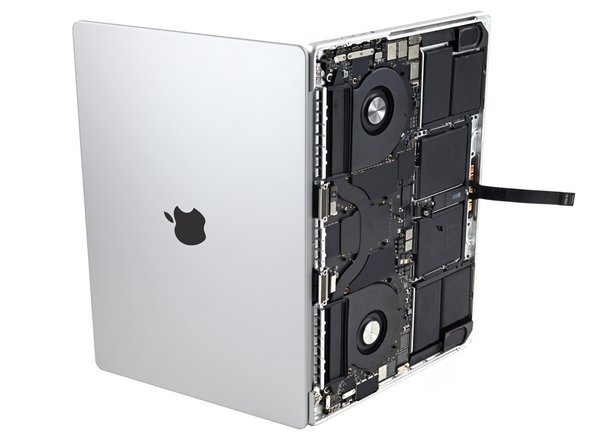
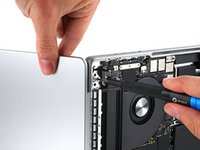
    • Fully open the screen and stand the MacBook on its side.

  37. MacBook Pro 16" 2023 Screen Replacement, Remove the remaining hinge screws: step 37, image 1 of 3 MacBook Pro 16" 2023 Screen Replacement, Remove the remaining hinge screws: step 37, image 2 of 3 MacBook Pro 16" 2023 Screen Replacement, Remove the remaining hinge screws: step 37, image 3 of 3
    • Steady your MacBook with one hand to prevent the screen and body from separating and falling over.
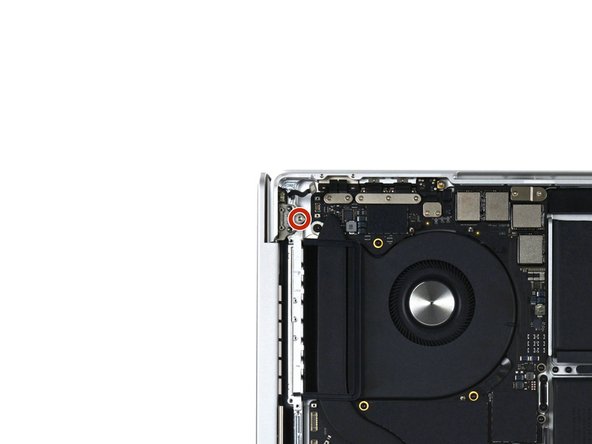
    • Use your T8 Torx driver to remove the two remaining screws securing the hinges, starting with the bottom hinge.

  38. MacBook Pro 16" 2023 Screen Replacement, Free the screen hinges: step 38, image 1 of 3 MacBook Pro 16" 2023 Screen Replacement, Free the screen hinges: step 38, image 2 of 3 MacBook Pro 16" 2023 Screen Replacement, Free the screen hinges: step 38, image 3 of 3
    • Hold both the screen and the body of the MacBook securely, as either half can fall unexpectedly.

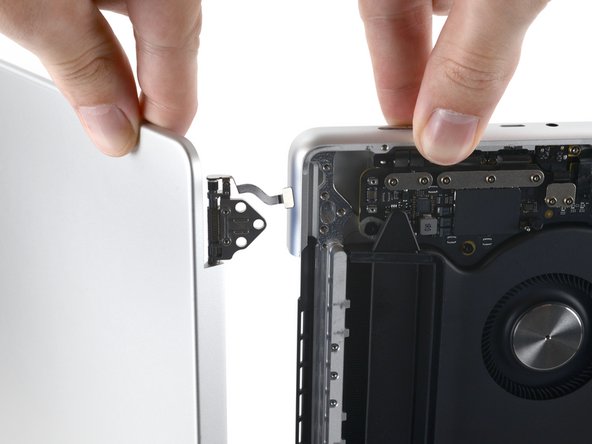
    • Slide the screen toward the body of the MacBook to free both hinges from their recesses in the frame.

    • Pull the screen toward you to remove both hinges from the frame.

  39. MacBook Pro 16" 2023 Screen Replacement, Remove the screen: step 39, image 1 of 1
    • Remove the screen.

  40. MacBook Pro 16" 2023 Screen Replacement, Reassembly information: step 40, image 1 of 2 MacBook Pro 16" 2023 Screen Replacement, Reassembly information: step 40, image 2 of 2
    • During reassembly, follow these instructions to align your screen hinges:

    • Install the hinge screws without fully tightening them. Center the hinges and check for gaps or rubbing on either side of the screen.

    • Fully tighten the hinge screws.

    • Optionally, add blue threadlocker to prevent them from loosening over time.

    • If your screen clicks or snaps when it's opened or closed, loosen the screws and realign the screen.

Conclusion

To reassemble your device, follow these instructions in reverse order.

Take your e-waste to an R2 or e-Stewards certified recycler.

Repair didn’t go as planned? Try some basic troubleshooting, or ask our Answers community for help.

One other person completed this guide.

Clay Eickemeyer

Member since: 09/19/22

67,259 Reputation

453 Guides authored

Team

iFixit Member of iFixit

Staff

136 Members

17,420 Guides authored

One Comment

Hola ¿El display del pro 16" M1 Pro 2021 es el mismo del Pro 16" M2 pro?

PLA2SFC - Reply

Add Comment

View Statistics:

Past 24 Hours: 9

Past 7 Days: 61

Past 30 Days: 258

All Time: 2,169