This translation was generated by a machine and has not been reviewed by a person yet. Speak this language? Review it.
Introduction
If the camera lens is malfunctioning, not opening or extending, or if the camera displays a system error, you may need to remove and inspect the lens, or perhaps replace it entirely. This guide shows how to replace the lens of the Panasonic Lumix TZ71.
What you need
-
-
-
Turn off the camera and, for safety, remove the replacement battery.
-
Remove the four Phillips screws on the bottom.
-
Remove the two Phillips screws on the side with the door.
-
Remove the Phillips screw on the other side.
 Ask FixBot
-
-
-
Lift the rear bezel out. Use your fingernails or an opening pick to do so. The bezel is a bit tight.
-
-
-
-
-
Slide the button board down a small distance.
-
Tilt the PCB up at an angle and hold it in place.
-
Flip up the black locking flap on the ZIF socket of the ribbon cable using the tip of a spudger.
-
Carefully pull the ribbon cable out with tweezers.
-
-
-
-
Slide the display slightly to the right.
-
Lift the top edge of the display slightly.
-
Open the display like a book.
-
-
-
Use the tip of a spudger to flip up the black locking flap on the display cable socket.
-
Use tweezers to pull the ribbon cable out of the socket.
-
Remove the display.
-
-
-
-
-
Remove the four Phillips screws from the copper shielding plate.
-
The plate is lightly adhered in the yellow-marked area. Use a spudger to begin prying it up carefully there.
-
Work your way around with the spudger and pry the plate out little by little.
-
Remove the plate.
-
-
-
Underneath the button board, there is also a black molded part acting as a bracket.
-
Carefully pry out the bracket with the tip of a spudger and remove it.
-
-
-
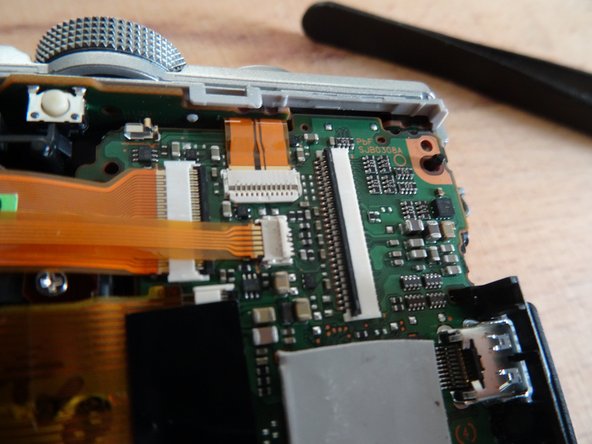
The wide ribbon cable in the middle is secured with a piece of tape. Peel back the tape enough so that the cable can be unplugged.
-
Flip up the marked locking flaps on the ZIF connectors of the ribbon cables with the tip of your spudger.
-
Carefully unplug the ribbon cables one by one using tweezers. To pull out the wide ribbon cable, you can use the adhesive strip.
-
-
-
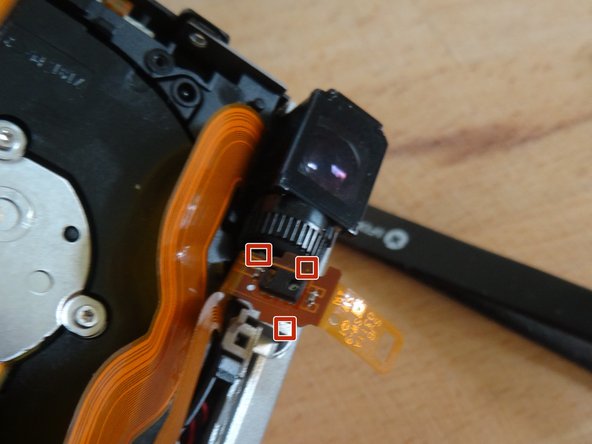
The lens is almost free, but it is obstructed by the small, delicate sensor next to the viewfinder.
-
Gently pull the sensor's ribbon cable out from under the top camera cover.
-
Carefully release the ribbon cable with the sensor from its three small retaining clips.
-
-






Follow the steps in reverse order to reassemble your device.

Team

Repair is War on Entropy Member of Repair is War on Entropy
Community
41 Members
7,012 Guides authored
