Free Shipping on Domestic Orders $75+

LG G Pad 8.3 Back Panel Replacement

Prerequisite Only
This is a prerequisite-only guide! This guide is part of another procedure and isn’t meant to be used alone.

What you need

    1. LG G Pad 8.3 Back Panel Replacement, Back Panel: step 1, image 1 of 2 LG G Pad 8.3 Back Panel Replacement, Back Panel: step 1, image 2 of 2
      • With the tablet face down, pull the SD card slot cover out.

      • Using a Phillips #000 screwdriver, remove the 3mm screw located in the SD card slot.

      Ask FixBot

      Add Comment

    2. LG G Pad 8.3 Back Panel Replacement: step 2, image 1 of 3 LG G Pad 8.3 Back Panel Replacement: step 2, image 2 of 3 LG G Pad 8.3 Back Panel Replacement: step 2, image 3 of 3
      • Insert a plastic opening tool in the small crevasse between the screen and the back panel.

      • Pry the screen away from the back panel.

      • Repeat this on each edge of the device.

      • We found it helpful to leave multiple plastic opening tools wedged in the crevasse to prevent it from closing.

      • This requires heavy force. The back of the device is attached with an adhesive. If the back panel is too hard to remove, use the iOpener.

      Ask FixBot

      Add Comment

    3. LG G Pad 8.3 Back Panel Replacement: step 3, image 1 of 2 LG G Pad 8.3 Back Panel Replacement: step 3, image 2 of 2
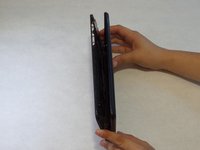
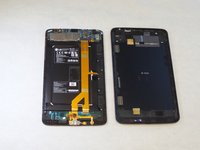
      • After using the plastic opening tools, pry the device open with your hands.

      • Remove the back panel from the screen.

      Ask FixBot

      Add Comment

Conclusion

To reassemble your device, follow these instructions in reverse order.

Cancel: I did not complete this guide.

Raenicia Haworth

Member since: 09/14/15

389 Reputation

1 Guide authored

Team

CSU Fullerton, Team 1-6, Bruce Fall 2015 Member of CSU Fullerton, Team 1-6, Bruce Fall 2015

CSUF-BRUCE-F15S1G6

4 Members

84 Guides authored

0 Guide Comments

Add Comment

View Statistics:

Past 24 Hours: 1

Past 7 Days: 12

Past 30 Days: 25

All Time: 470