Introduction
Follow this guide to open a Logitech G502 Lightspeed.
Opening the mouse requires removing its feet (skates/pads). If you plan to reuse the feet, you’ll need to apply heat to loosen the adhesive and avoid bending the feet. Bent or torn feet may require replacement.
What you need
-
-
Before you begin, flip the power switch into the OFF position.
 Ask FixBot
-
-
-
Heat an iOpener and apply it to the mouse feet for one minute.
-
-
-
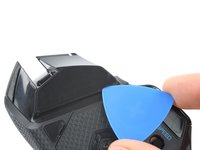
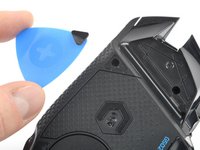
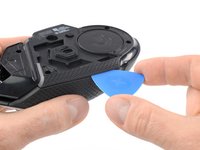
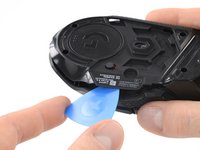
Insert the tip of an opening pick underneath the front foot at the gap in its recess.
-
When possible, grab with your fingers and slowly pull to peel it off completely.
-
-
-
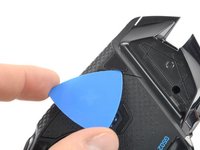
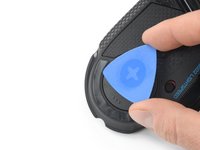
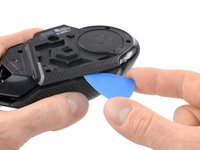
Insert the tip of an opening pick underneath the tiny front right foot at the gap in its recess.
-
-
-
-
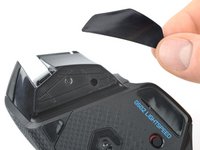
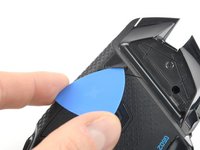
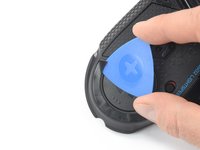
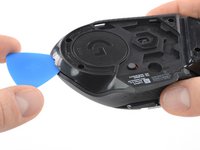
Insert the tip of an opening pick underneath the rear foot starting at the gap in its recess.
-
When possible, grab with your fingers and slowly pull to peel it off completely.
-
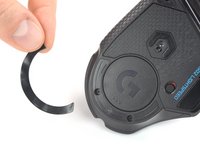
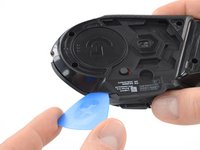
Use a spudger to carefully scrape up and remove any remaining adhesive bits.
-
Use isopropyl alcohol and a microfiber cloth to thoroughly clean all adhesive residue from the foot recesses. Allow the surface to completely dry.
-
Remove the feet from their backing and firmly press them into place.
-
-
-
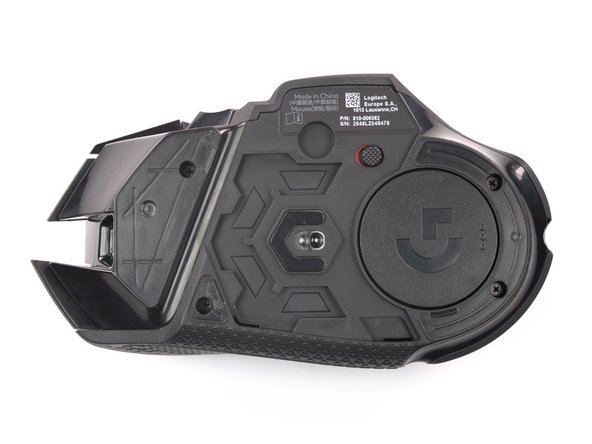
Use your fingers to remove the weight hatch by pulling the bottom part of the thumb rest straight down.
-
-
-
Remove the four 5.4 mm long Phillips screws at the underside of the mouse.
-
-
-
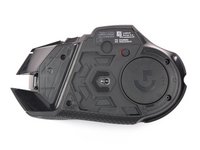
Insert an opening pick between the bottom plate and the upper shell starting at the rear of the mouse.
-
Slide the opening pick along the gap between the two halves towards the outer flank of the mouse.
-
Twist the opening pick to disengage the clips holding both halves together.
-
-
-
Again insert the tip of an opening pick between the bottom plate and the top shell starting at the rear.
-
Slide the pick along the gap between the two halves towards the thumb rest.
-
Twist the opening pick to unhinge the remaining clips.
-
-
-
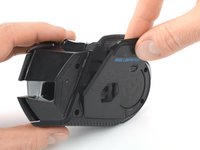
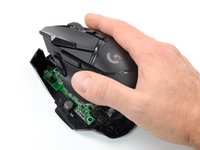
Flip the mouse over on its (removed) feet and hinge the top shell open towards the right side.
-
-
-
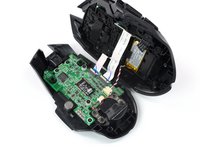
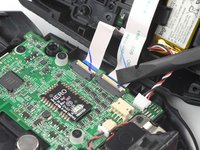
Hold the battery cable close to the connector and carefully "walk it out" by pulling parallel to the motherboard rocking the connector side to side.
-
You can also use a pair of angled tweezers to grip the connector head and pull it straight out of its socket.
-
-
-
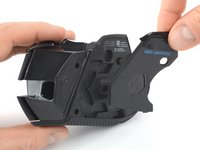
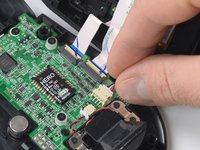
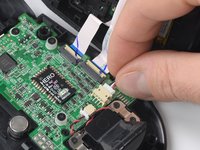
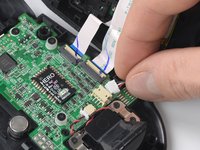
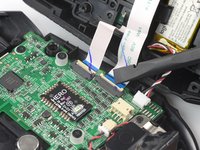
Use a spudger or your fingernail to flip up the small, hinged locking flap of both ZIF connectors to disconnect and free the interconnect cables.
-


To reassemble your device, follow these instructions in reverse order. Apply new adhesive where necessary after cleaning the relevant areas with isopropyl alcohol (>90%).
Take your e-waste to an R2 or e-Stewards certified recycler.
Repair didn’t go as planned? Try some basic troubleshooting, or ask our Answers community for help.
Cancel: I did not complete this guide.
28 other people completed this guide.

Team

Tobias Isakeit - Repairability Engineer Member of Tobias Isakeit - Repairability Engineer
Business
1 Member
1,145 Guides authored
12 Guide Comments
Needs top half disassembly for micro switch swap
Check my link at the bottom
This helped so much! I had the button to turn on infinite scroll for the scroll wheel stuck and this allowed me to get it most of the way taken apart so I could take the rest apart myself.
Well, we've got it half way apart... Now where's the second half of the guide? lol
comes in a paid dlc